How to Make a Basic Paper Airplane
There are many methods to make a paper airplane, some much
more intricate than others. This origami paper airplane
is quick and easy to make, and it's able to make long,
straight flights. The project works best with 6-inch
lightweight origami paper squares. Although many origami
projects can be folded with scrapbook paper, magazine pages,
and other materials, the airplane needs a lightweight paper to
fly well. Thicker paper is also more difficult to fold, which makes
it more likely that your plane will be asymmetrical and end up taking
a quick nosedive upon launch. This project is a great activity to do
with kids, making it a lesson about both origami and aviation. And you
could even turn it into a friendly competition to see whose paper airplane
can fly the farthest.
01:Make the Initial Paper Airplane Folds
Start by folding your square piece of origami paper in half
with the white side facing up. Crease well, and unfold it.
Then, turn and fold the paper in half from the other direction.
Crease well, and unfold it.
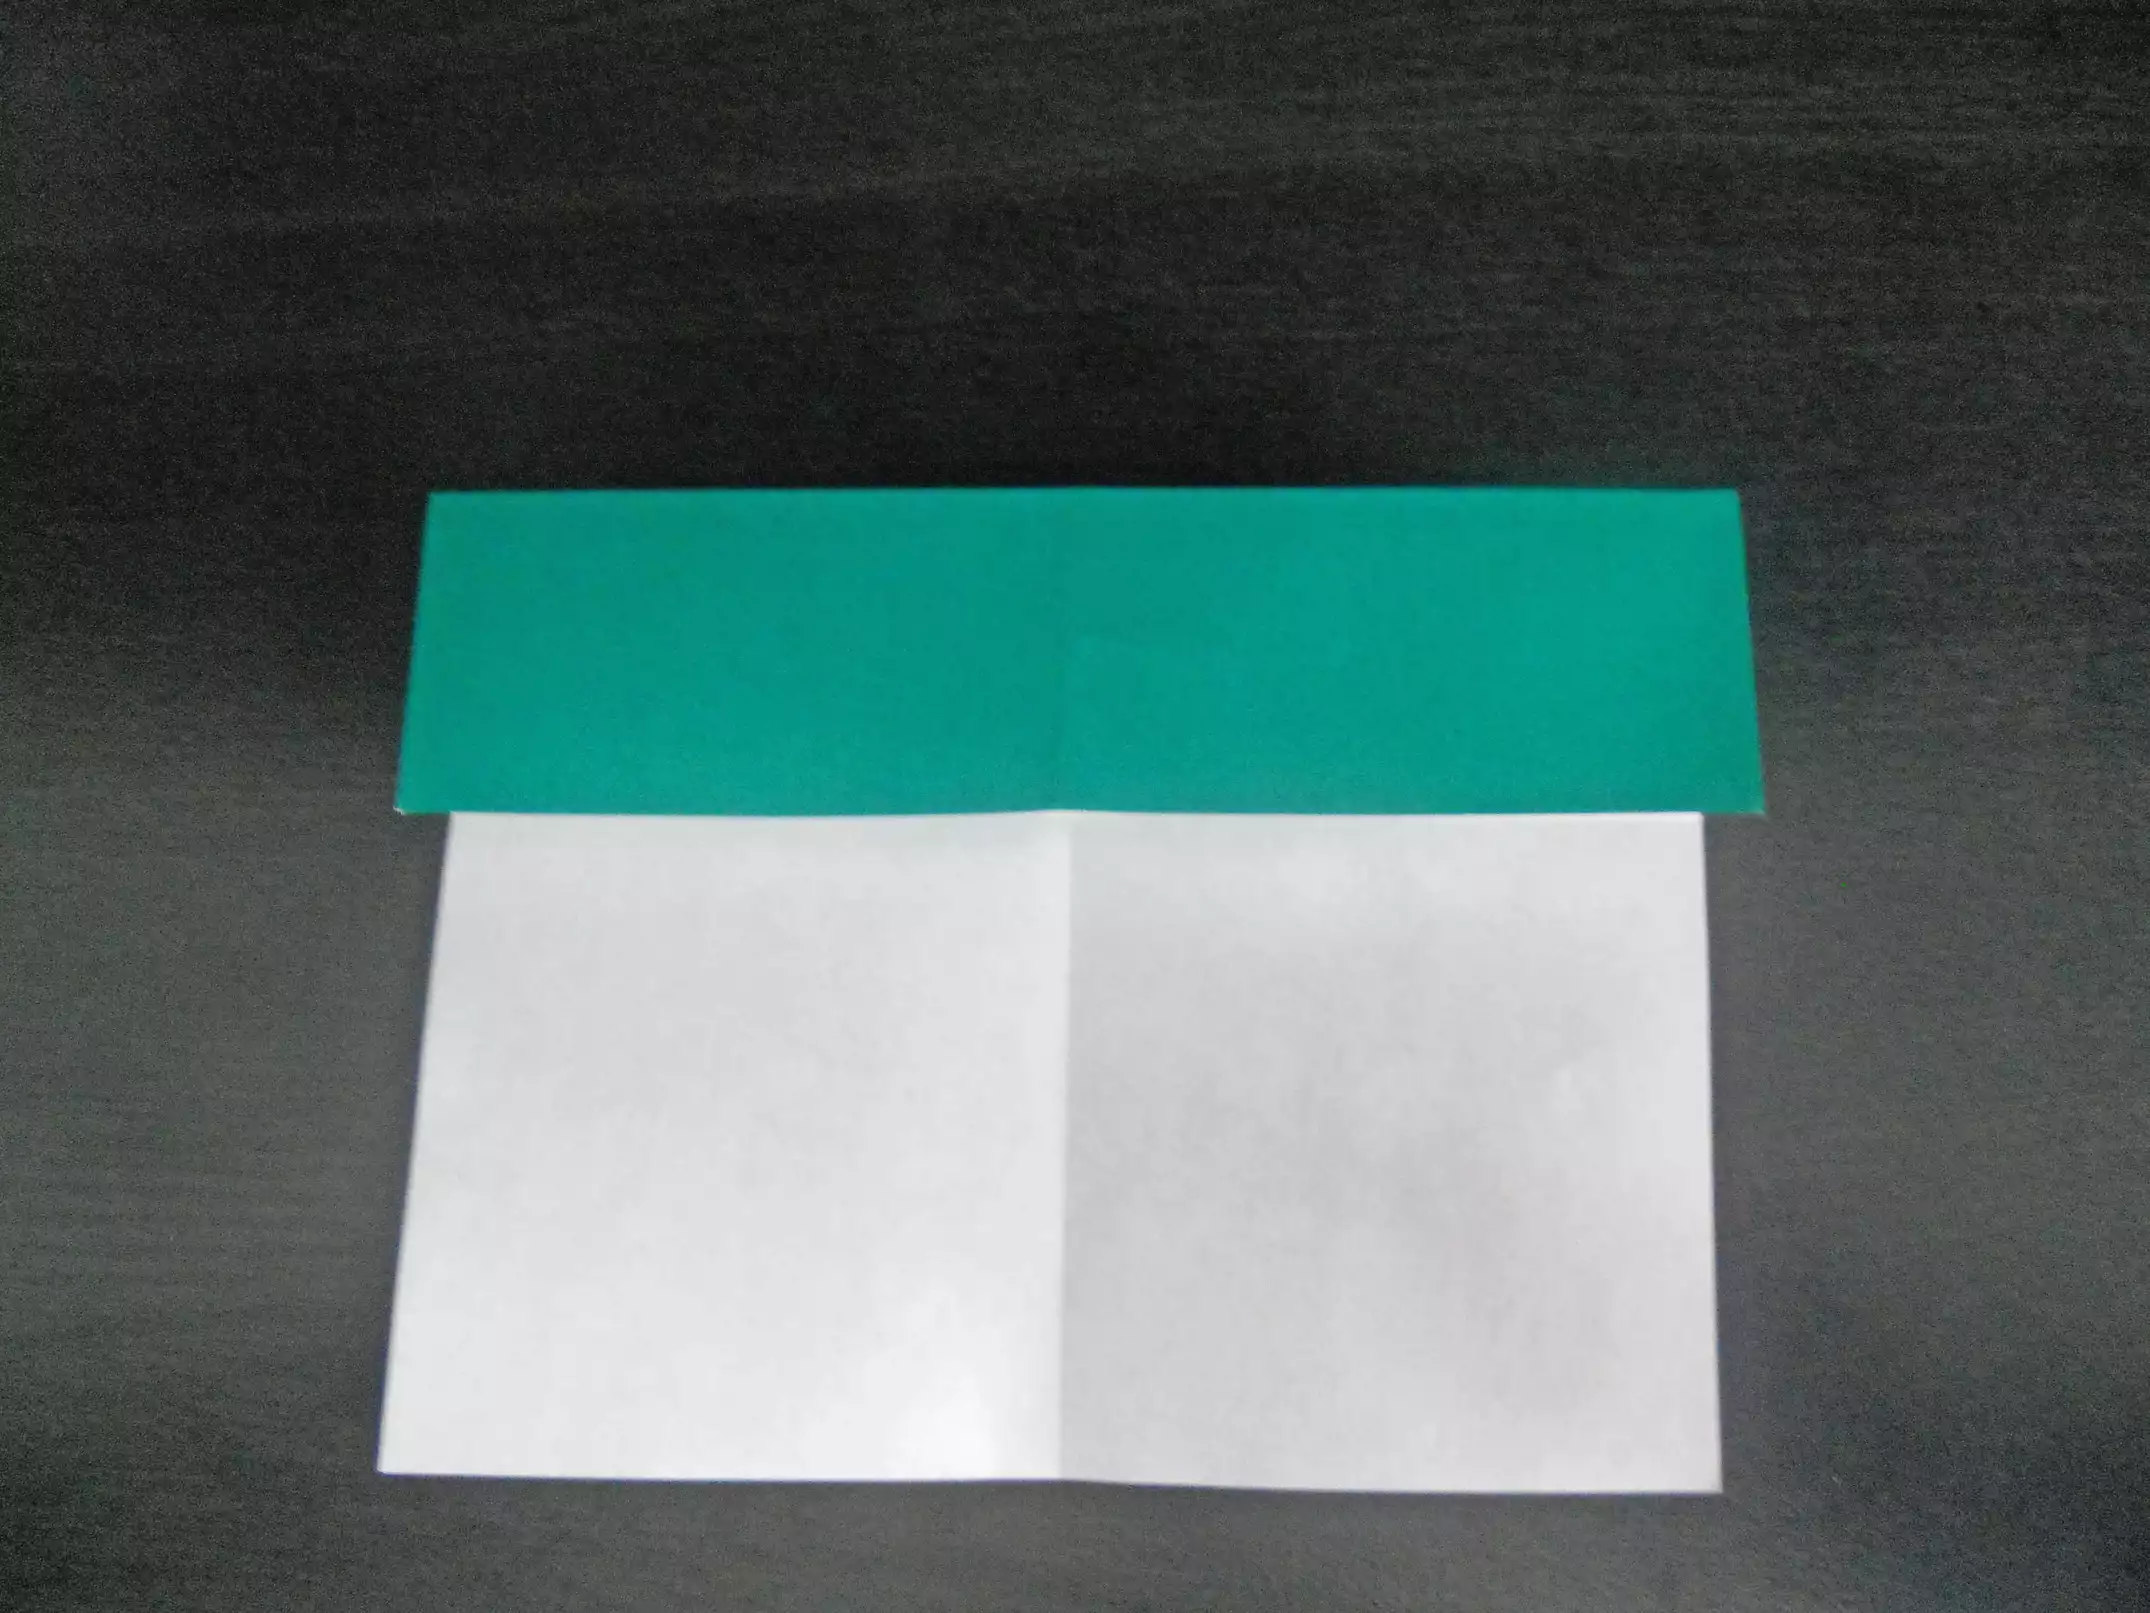
Next, fold the top of the paper to the middle crease. When you're
finished, your paper should look like the photo below.
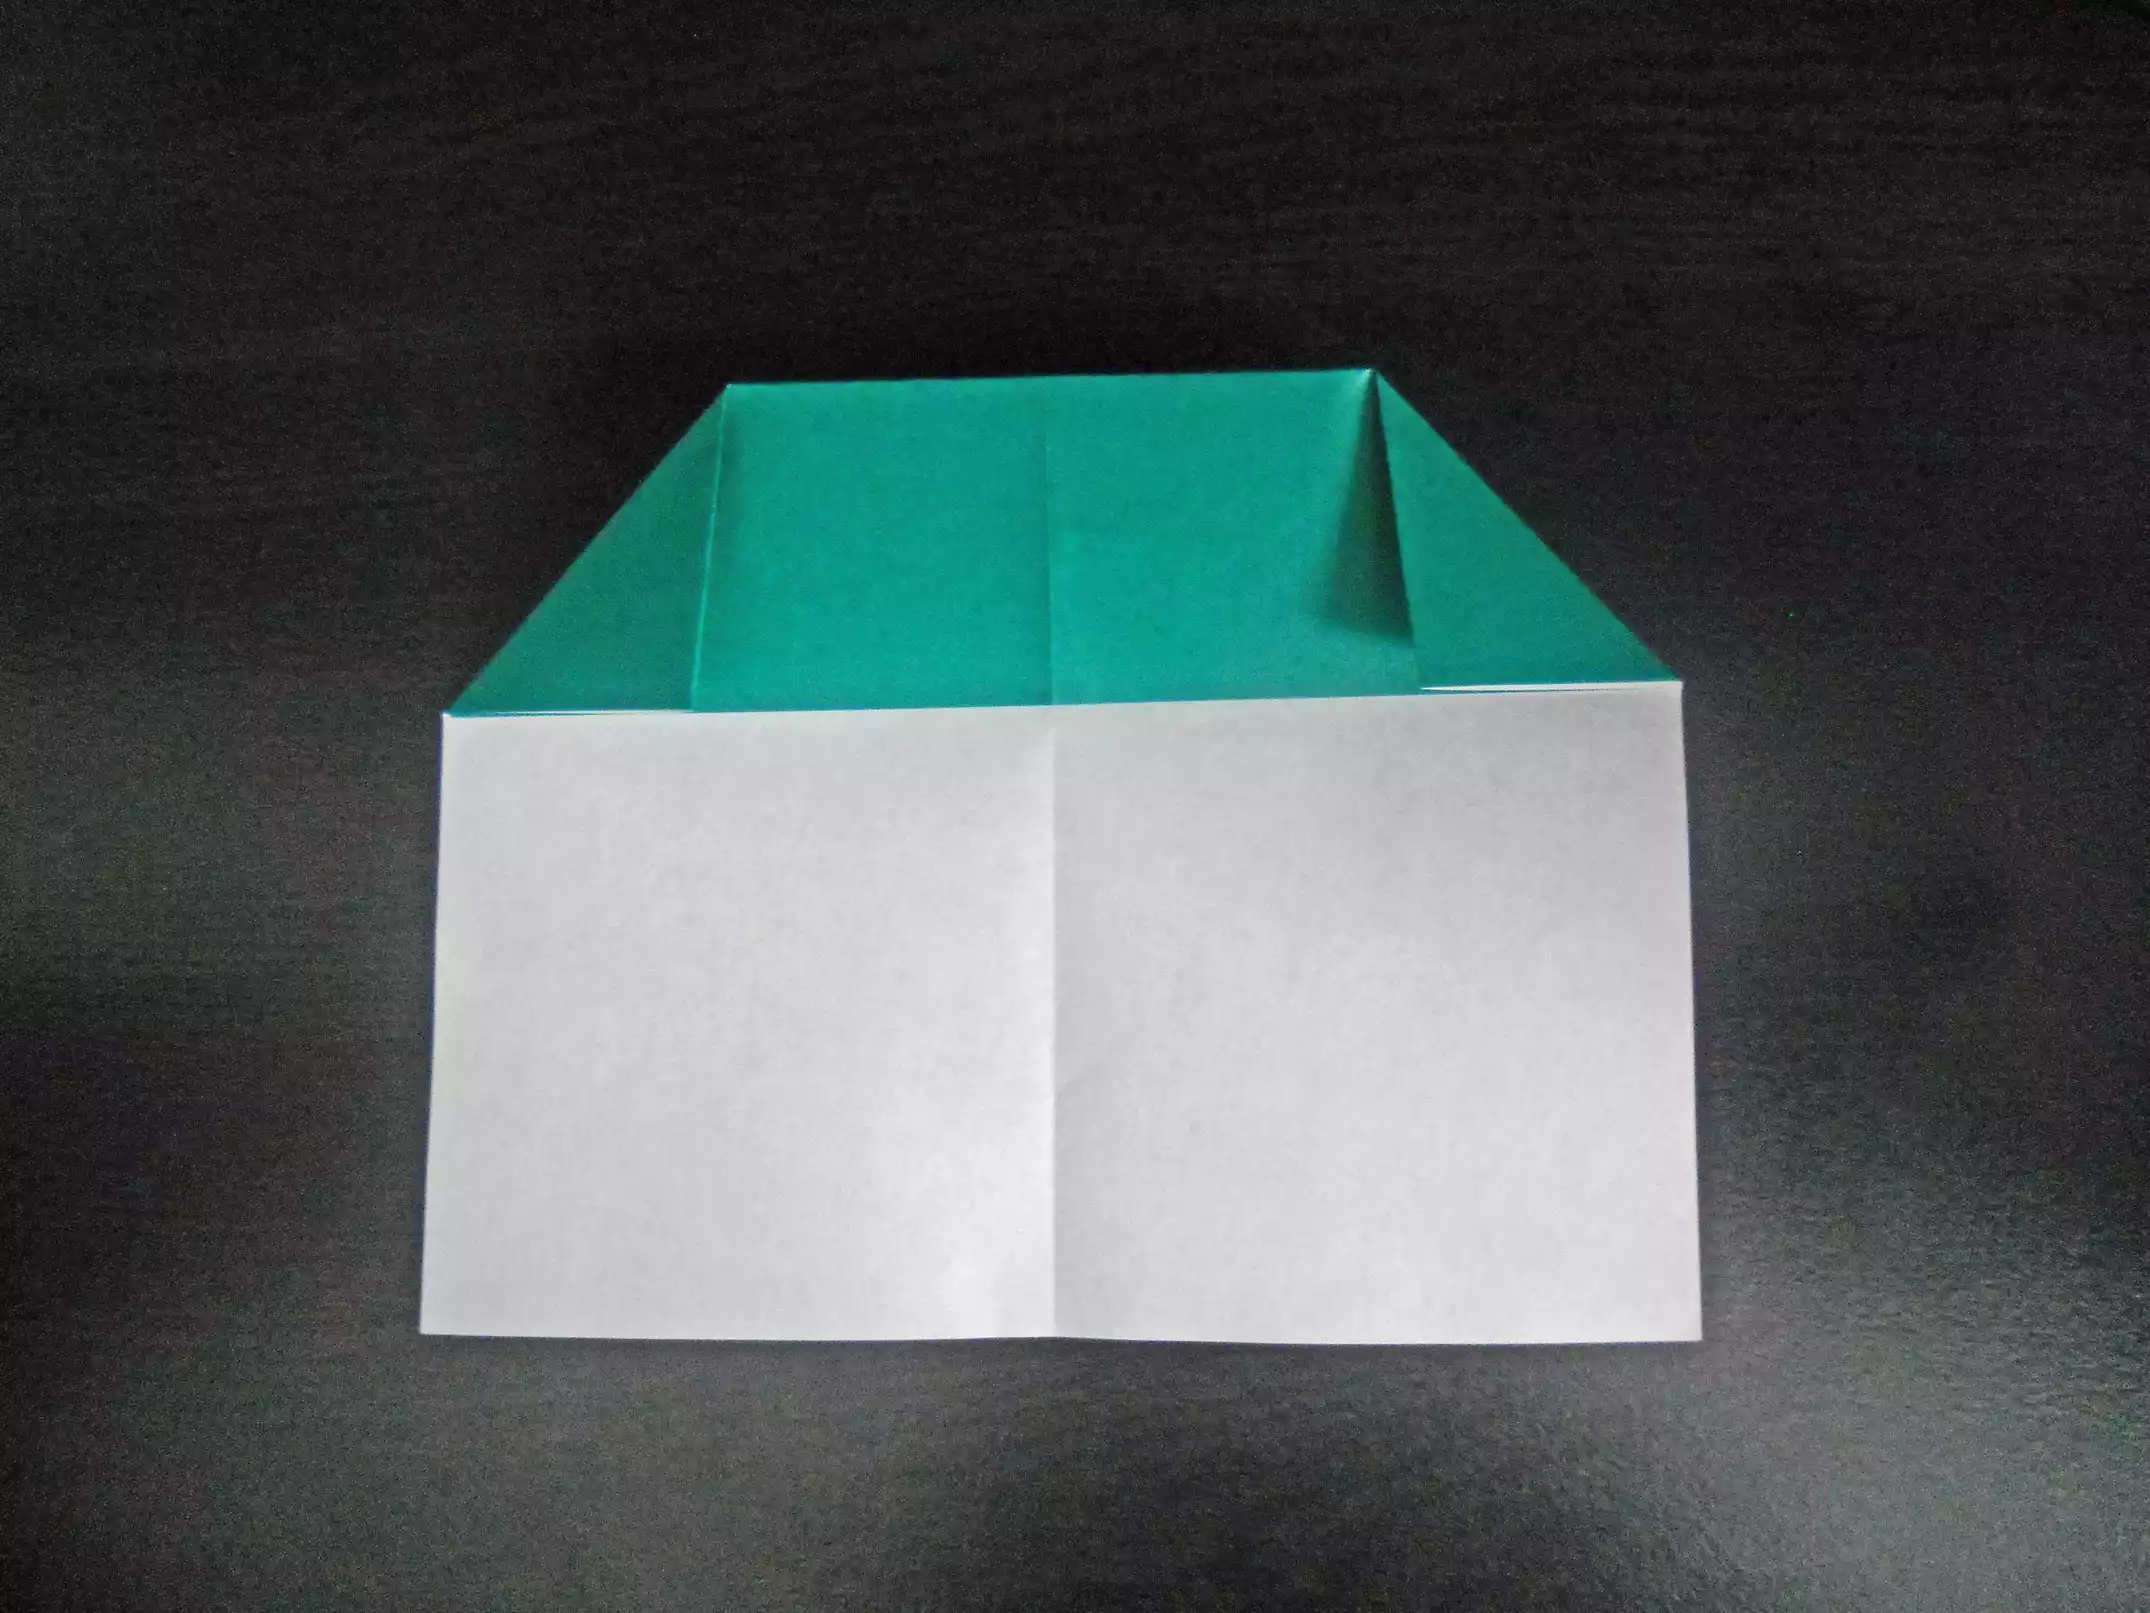
02:Fold Down the Corners
Fold down the top left corner to meet the edge of the
colored side of your paper. Fold down the top right
corner in the same manner.
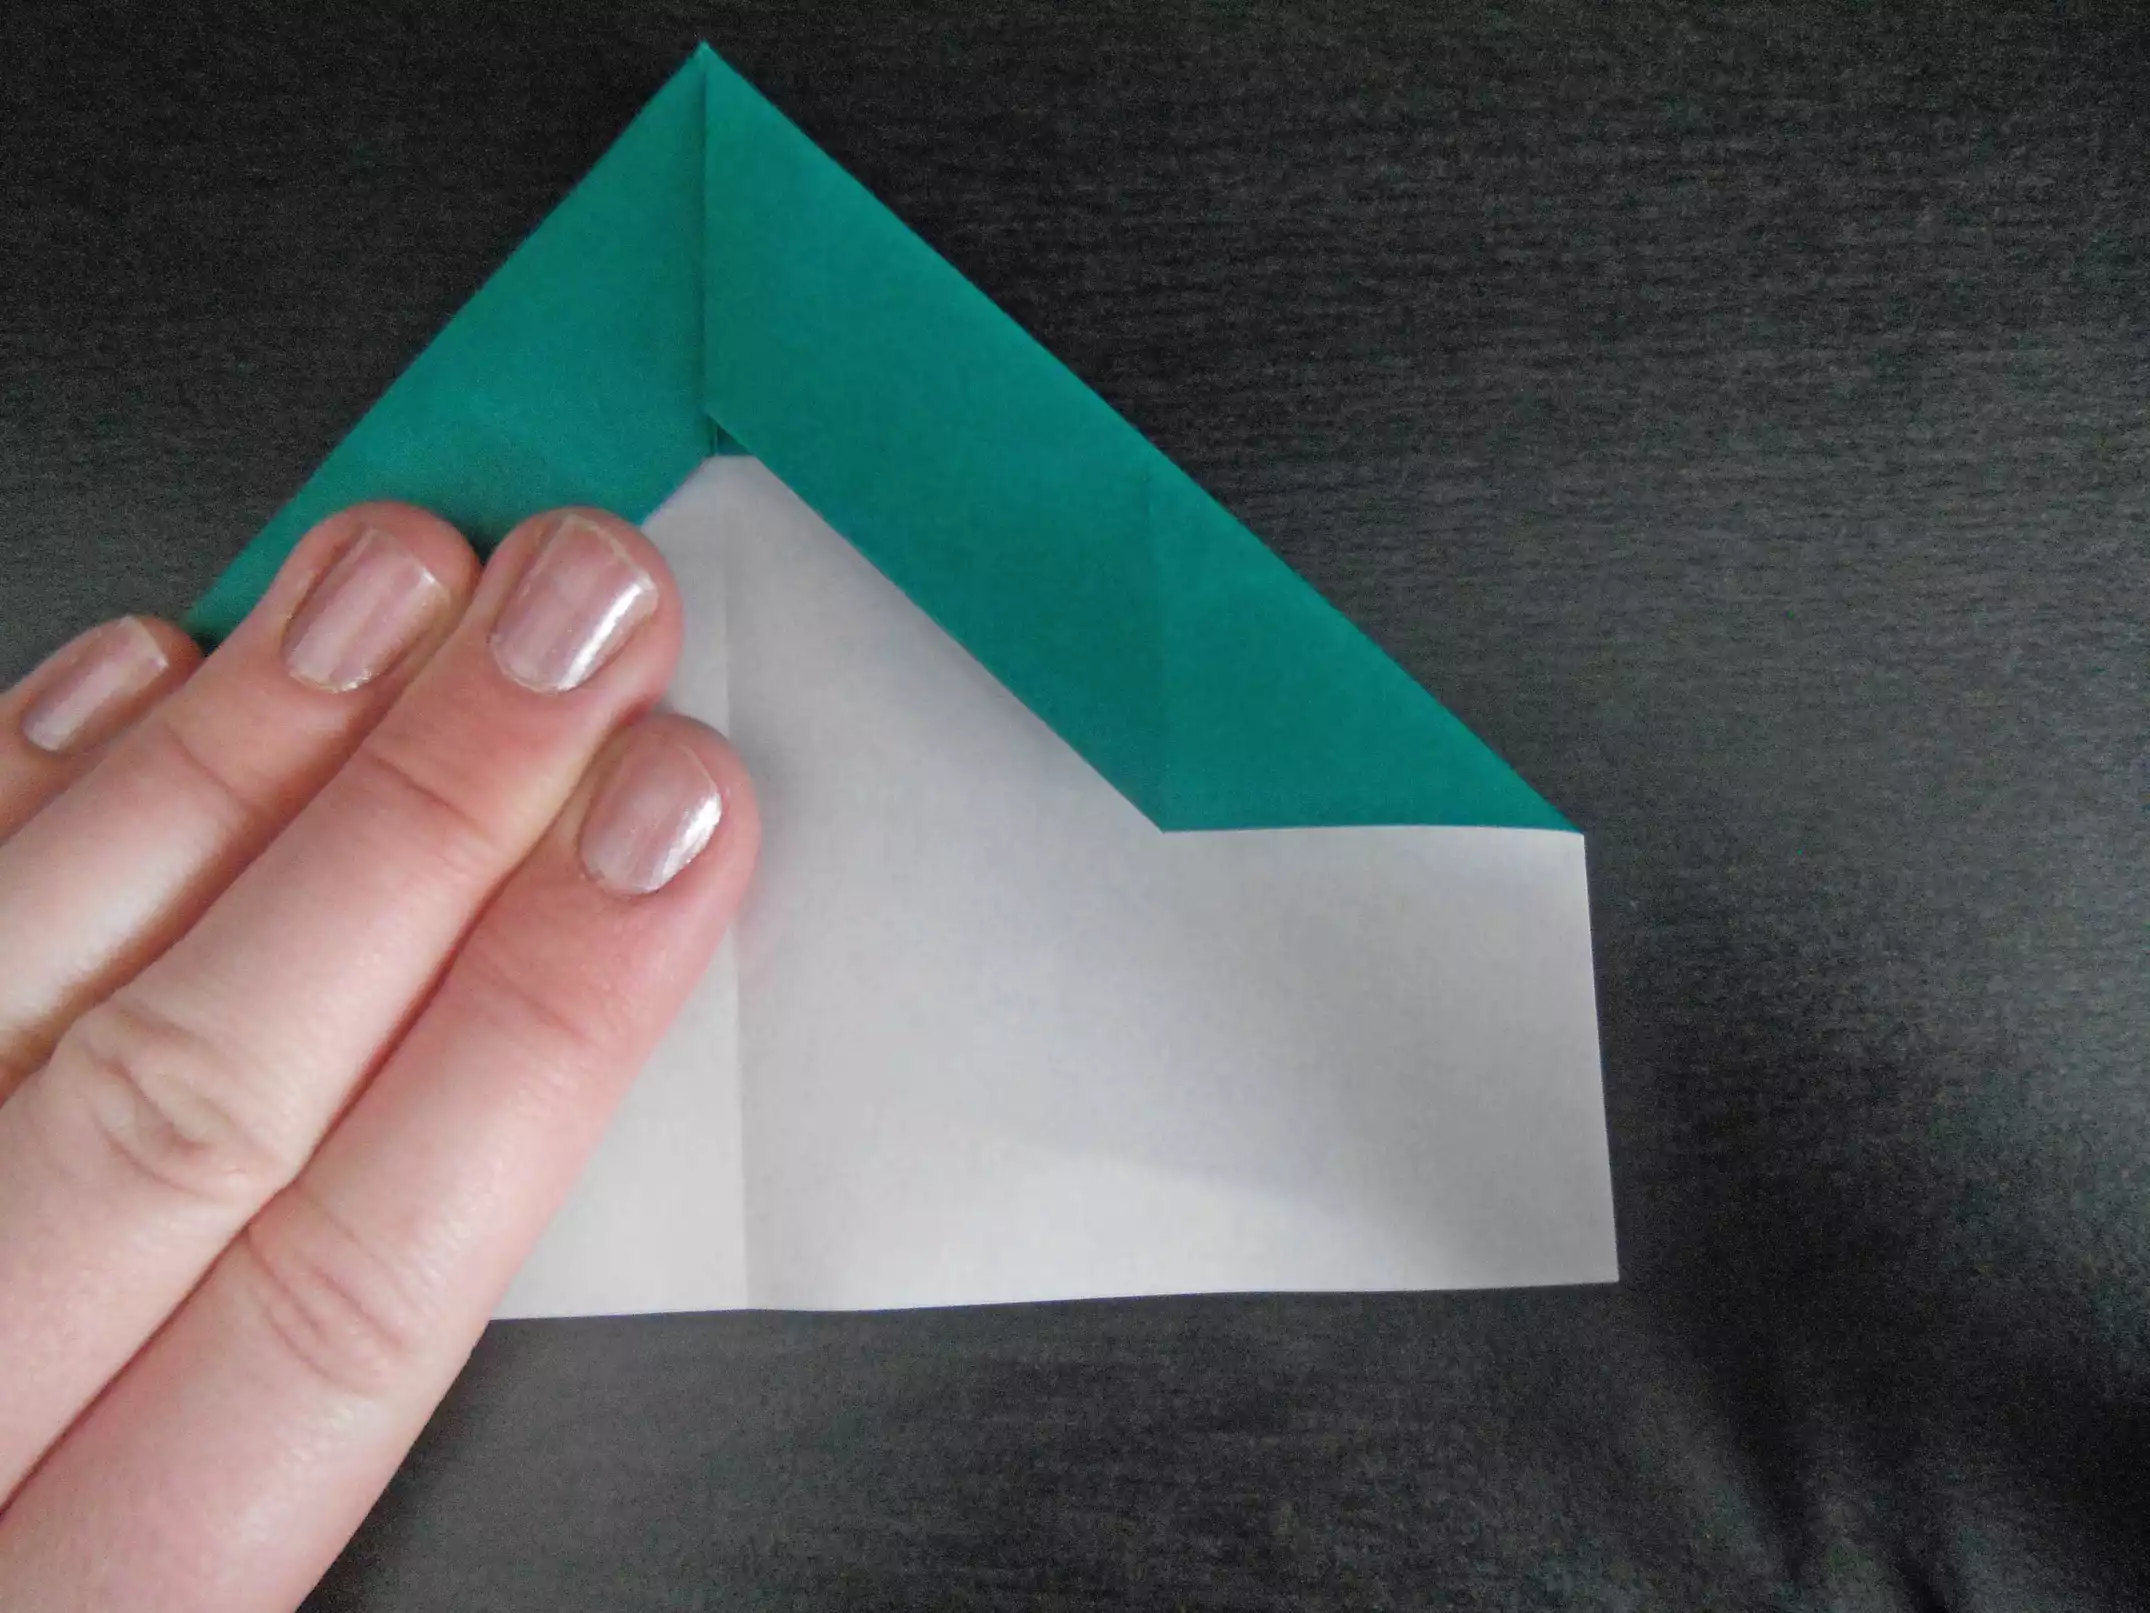
03:Make the Nose of the Paper Airplane
Fold in the left and right corners of the paper to create a
point in the top center (as seen in the photo below).
The pointed tip will become the nose of your origami paper
airplane. The extra folds you made in the previous step will
help to give the nose the additional weight it needs to make
the paper airplane fly properly.
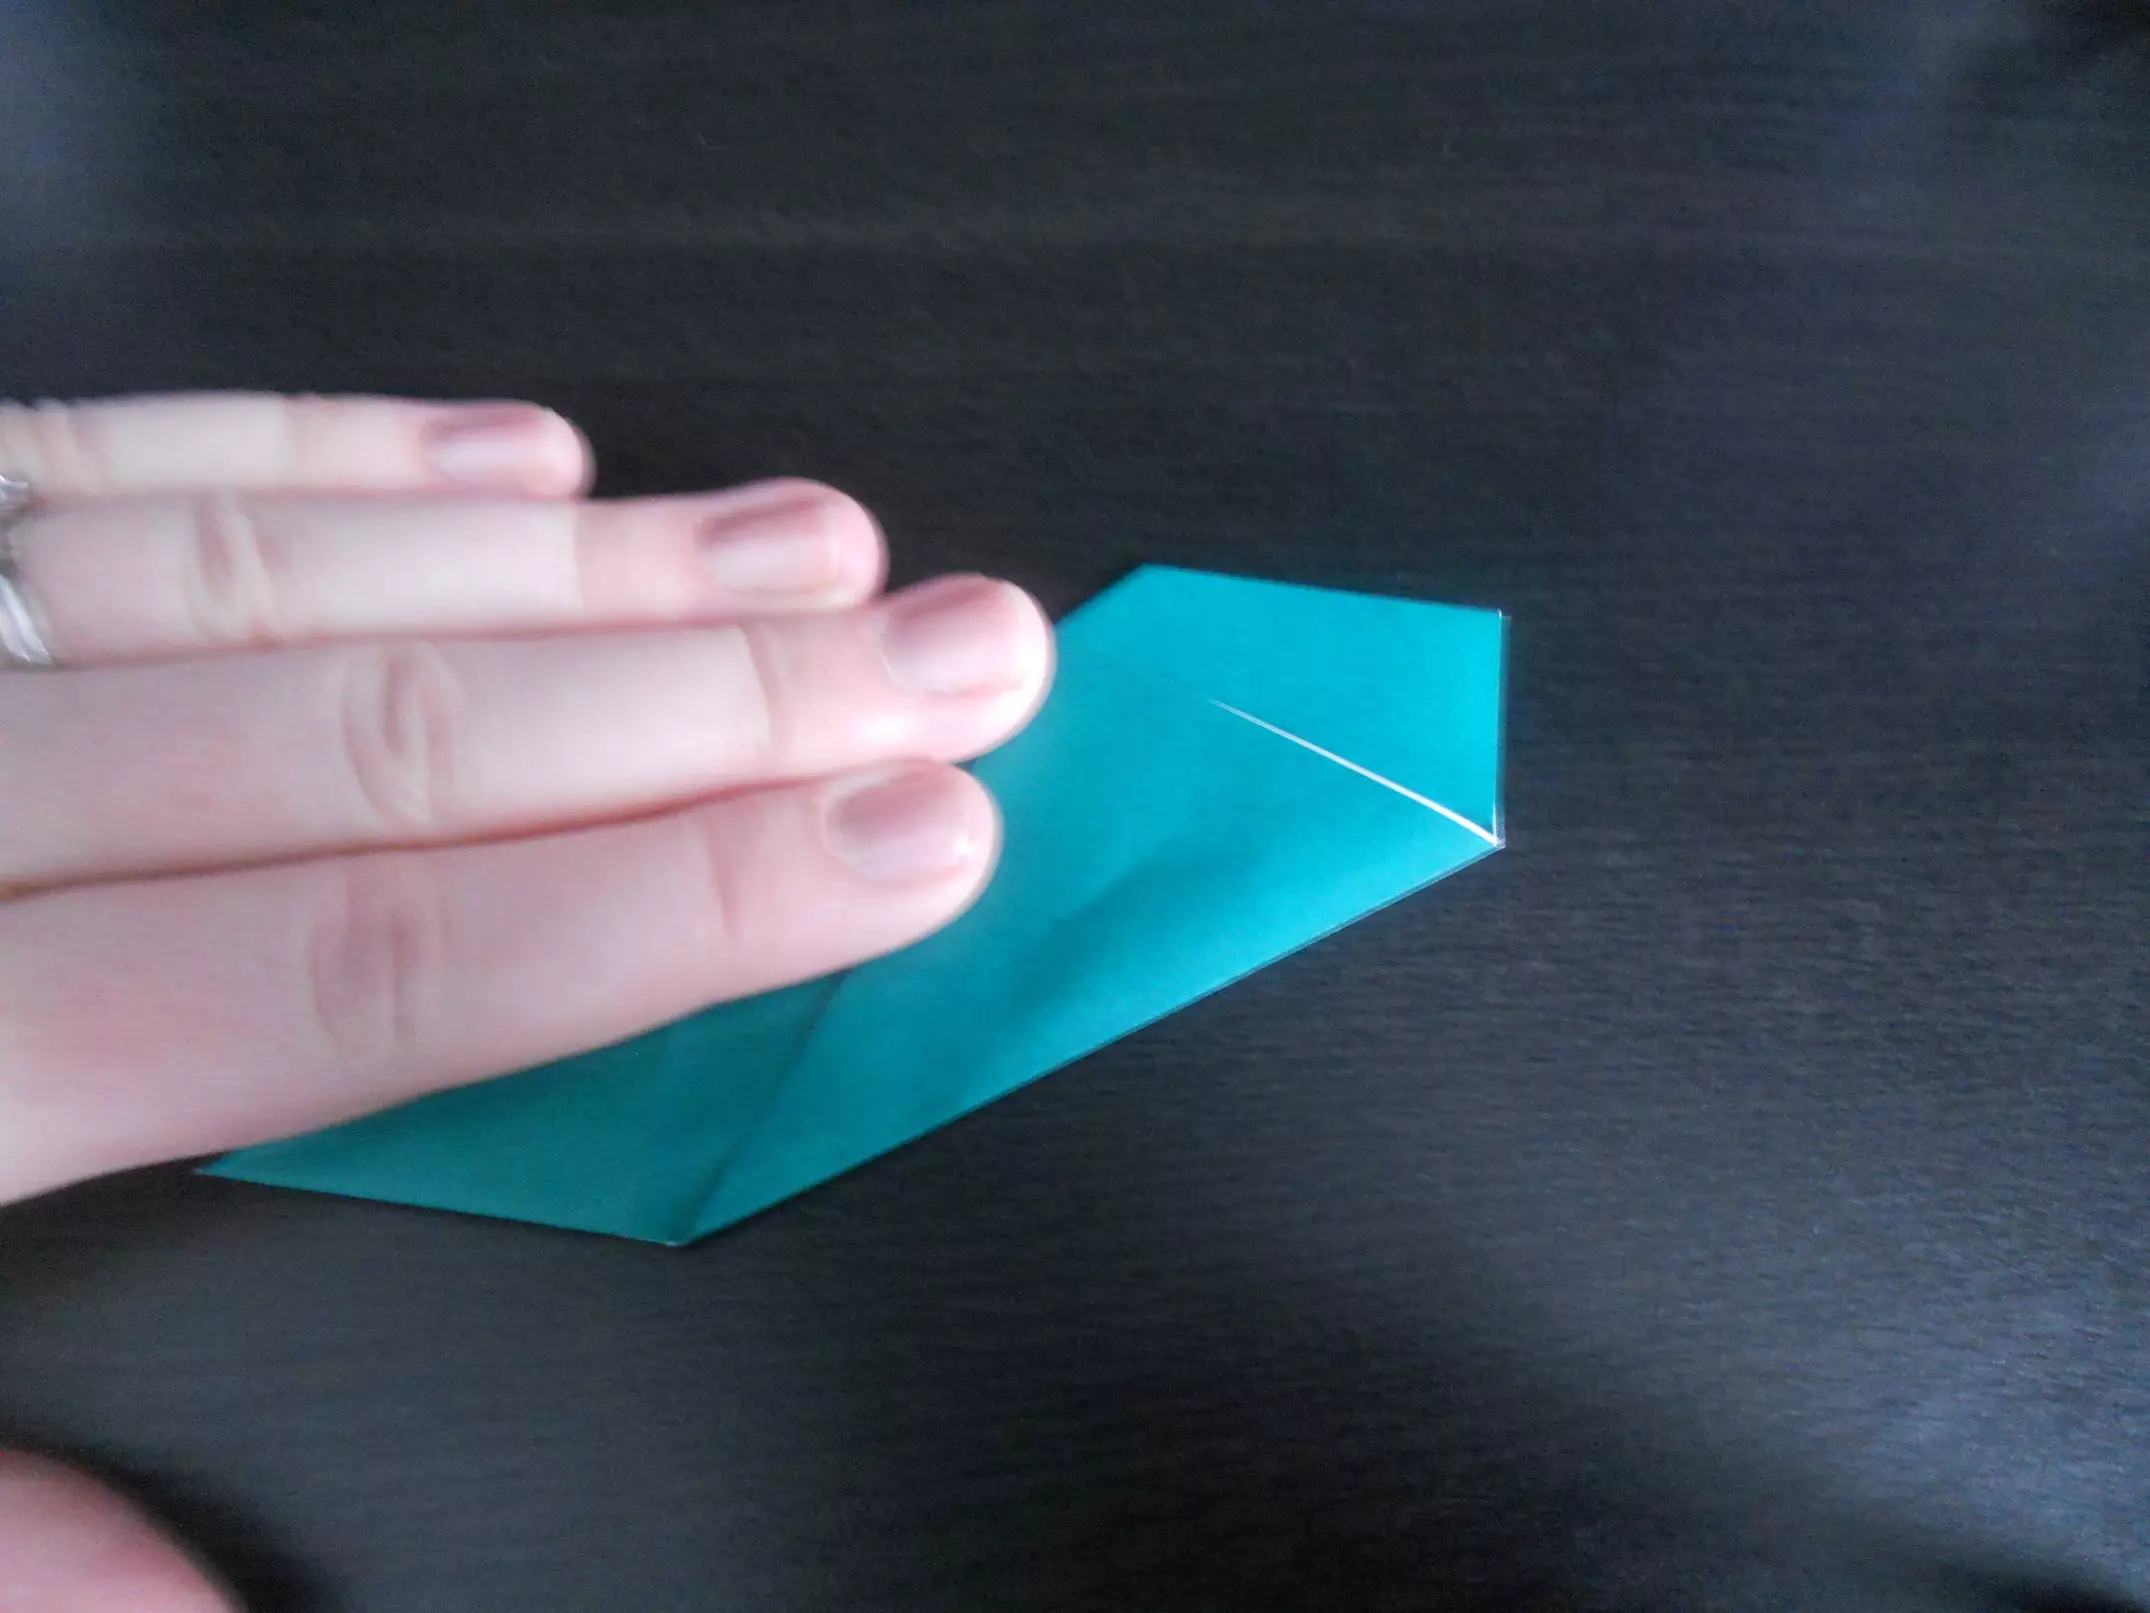
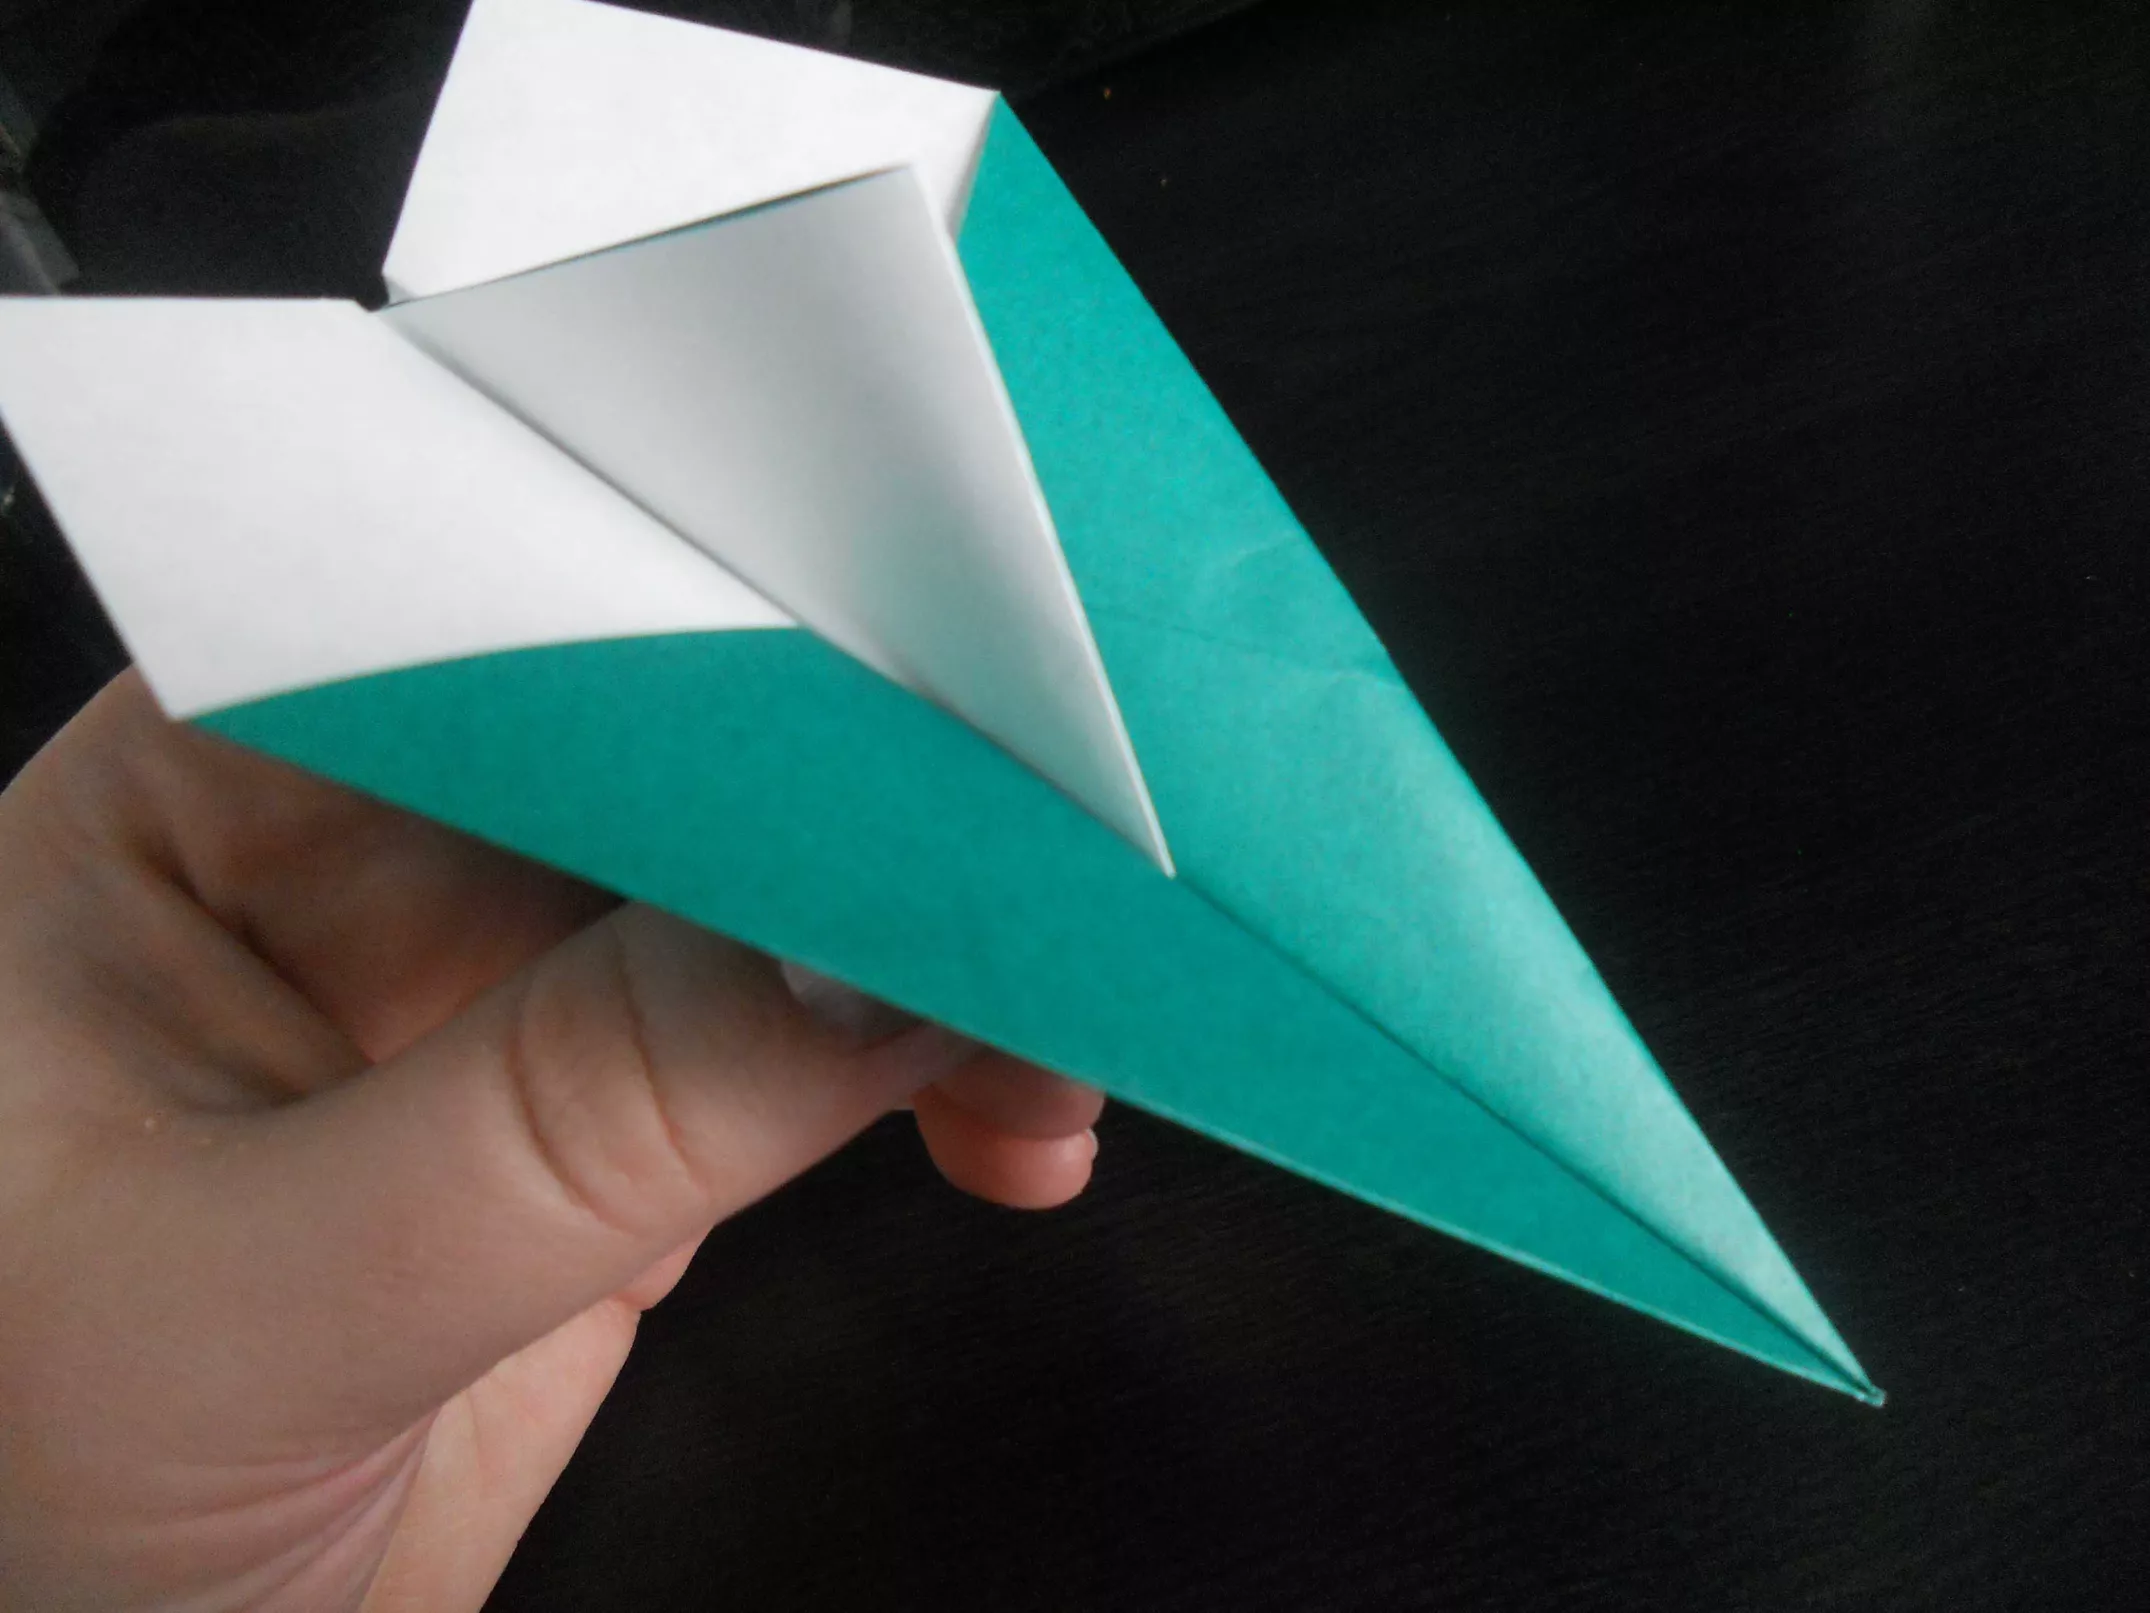
04:Fold Your Paper Along the Middle Crease
Fold your paper in half along the middle crease. Next,
fold the right corner up as shown in the photo below.
The corner should be about 1/2 inch from the edge of the paper.
Then, unfold the paper, flip it over, and fold it from
the other direction along the same crease.
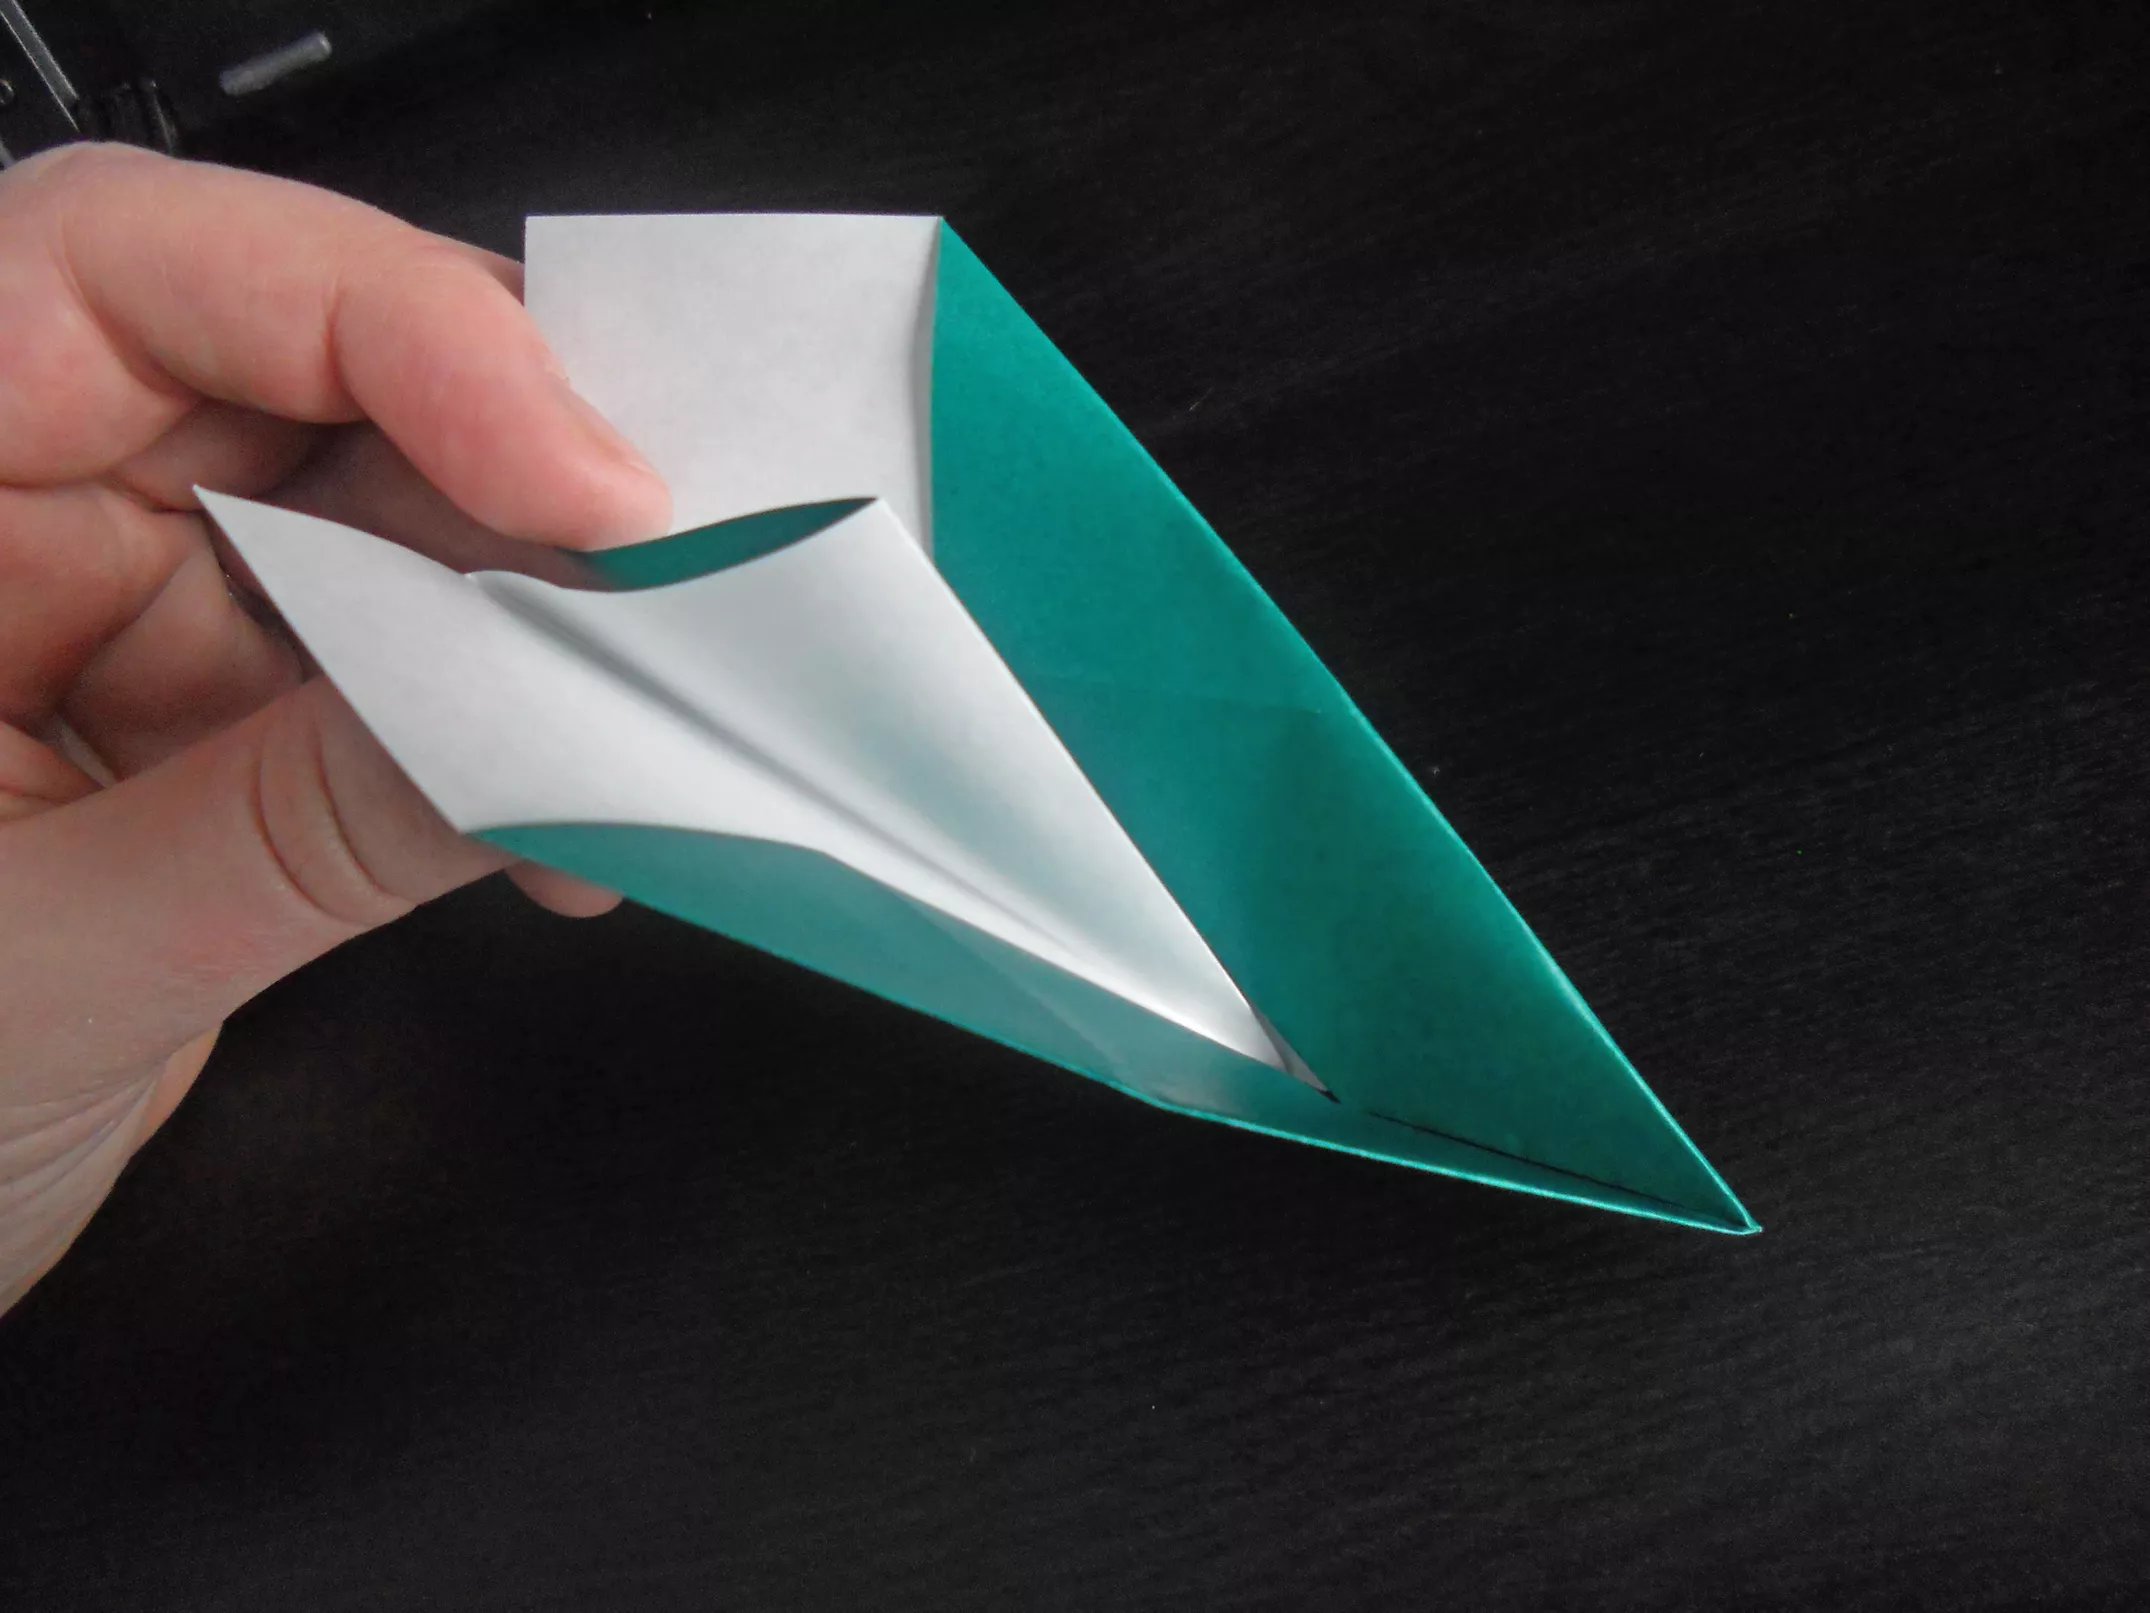
05:Make Your Airplane's Tail
Open your paper, and collapse the fold you made in the
previous step. If you're having trouble getting the
fold to collapse, go over the creases once more to make
sure they're as sharp as possible. This creates the tail
of your paper airplane.
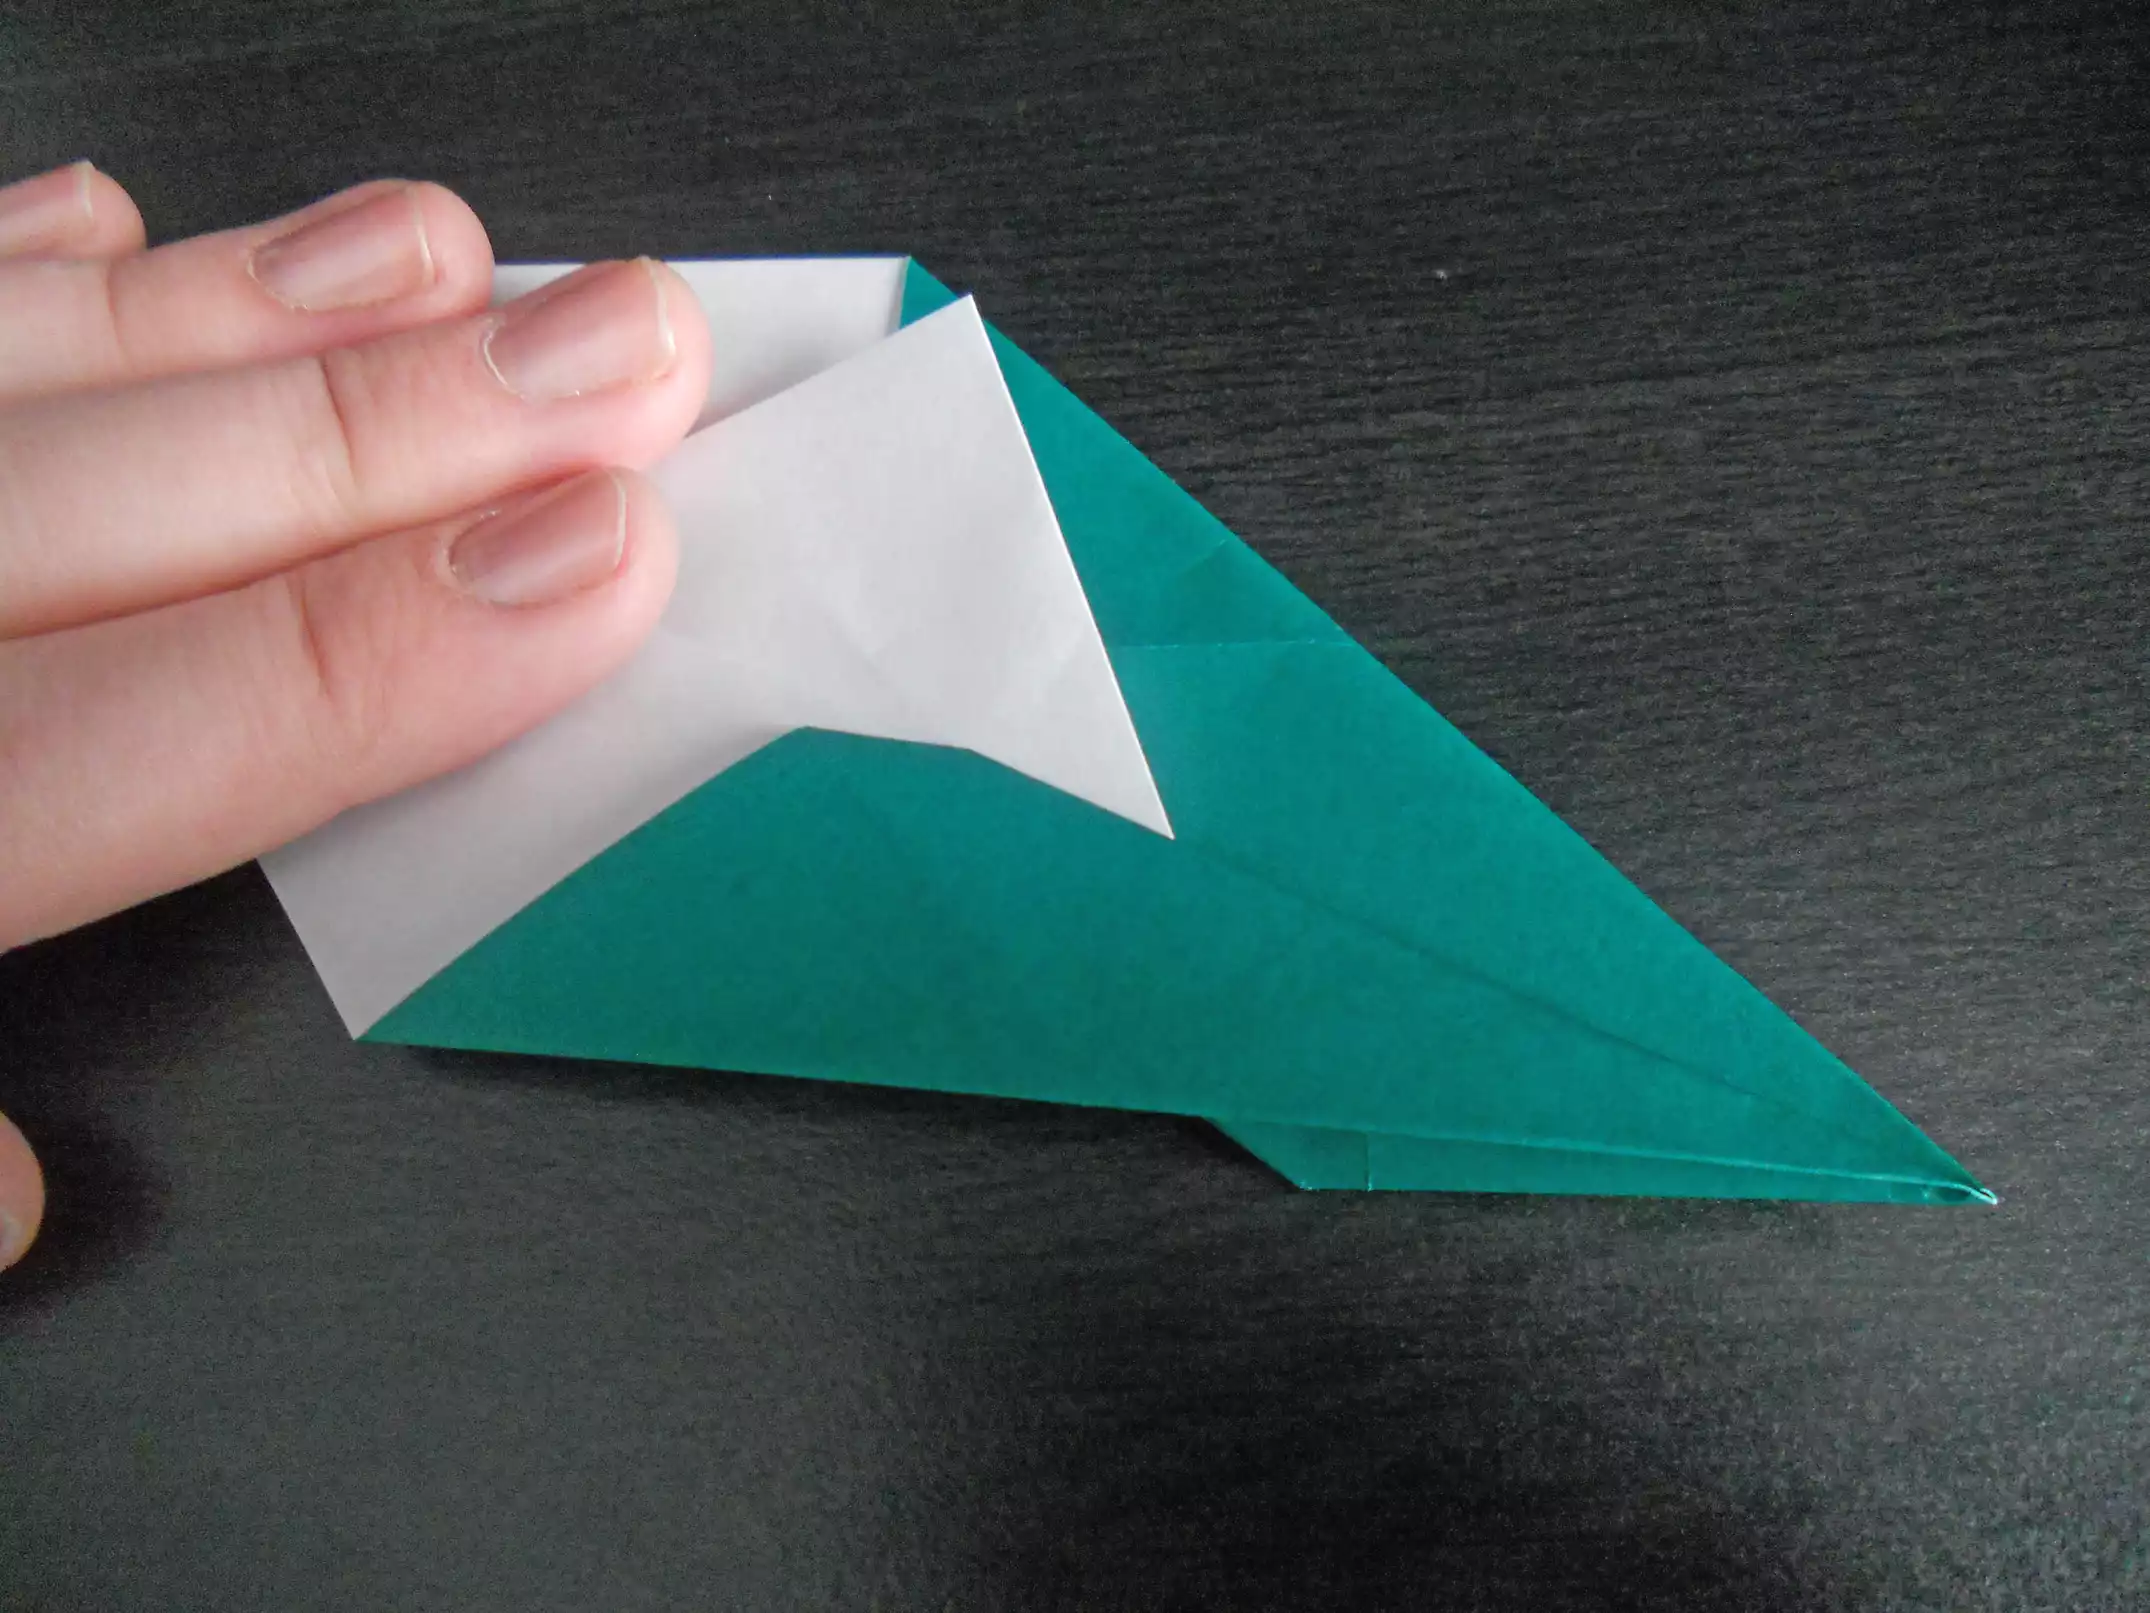
06:Make the Wings of Your Origami Paper Airplane
Fold down the top layer of the paper to make the first wing
of your paper airplane. At the nose, the wing should be
slightly above the middle layer of the paper. At the back,
it should be slightly above the bottom of the tail you made
in the previous step.
Repeat the process on the other side to make the second wing
of your origami paper airplane.
07: Fly Your Simple Paper Airplane
Now it's time to test your paper airplane. Hold your plane
at the widest part of the base, and gently send it flying.
If you're having trouble getting your plane to fly, examine
it carefully to make sure it is symmetrical. If one side is
even slightly larger than the other, your plane won't fly straight.
Don't worry if you need to make a few practice airplanes before
finding a method that works for you. Paper airplanes, just
like other forms of origami, take a bit of patience to learn
how to make them.

Our Purpose Is To Sustainably Make the Pleasure and Benefits of sports Accessible to the Many.
Copyright-2021 Abdul Haq