How to Fold a Traditional Origami Crane
The traditional paper crane is probably the most famous of all origami models.
It’s designed after the Japanese red-
crowned crane. In Japanese mythology this crane is known as the “Honourable Lord Crane”
and it wings carried
souls
up to heaven.
The Japanese name for this model is “Orizuru” which simply means “Folded crane.”
“Ori” is the same “Ori” that you
find in the word origami.
An ancient Japanese legend promises that if anyone folds a thousand paper cranes they
will be granted a wish
by the gods. In same cases you are granted happiness or good luck.
In Japan the crane is said to live for 1,000 years which is why one must fold 1,000 of them.
You have to keep all the cranes to get the wish though. If you fold one and give
it away that one doesn’t count.
The origami crane’s popularity is largely due to a children’s book written by author Eleanor
Coerr called “Sadako and the Thousand Paper Cranes.”
The story follows a Japanese girl name Sadako who was 2 years old when the United States
bombed Japan at the end of World War II. Due to the fall-out
from the bombs Sadako developed leukaemia.
In the hospital she spent her time folding origami cranes hoping to make 1,000 of them.
According to Sadako’s family she managed to fold approximately 1,400 paper cranes. Many
of these cranes have been donated to places such as the 9-11 memorial in New York
City, Pearl Harbour, the Museum of Tolerance and more places as a symbol of peace.
Folding a crane is actually not too difficult. All you need is a single square sheet of paper.
We’ve put together the following instructions to walk you through
exactly how to fold one yourself.
If you’ve never tried origami before then we recommend you check out our beginner’s guide
first. Once you know the basic folds then this will be much easier.
Are you ready to fold? Then lets get started!
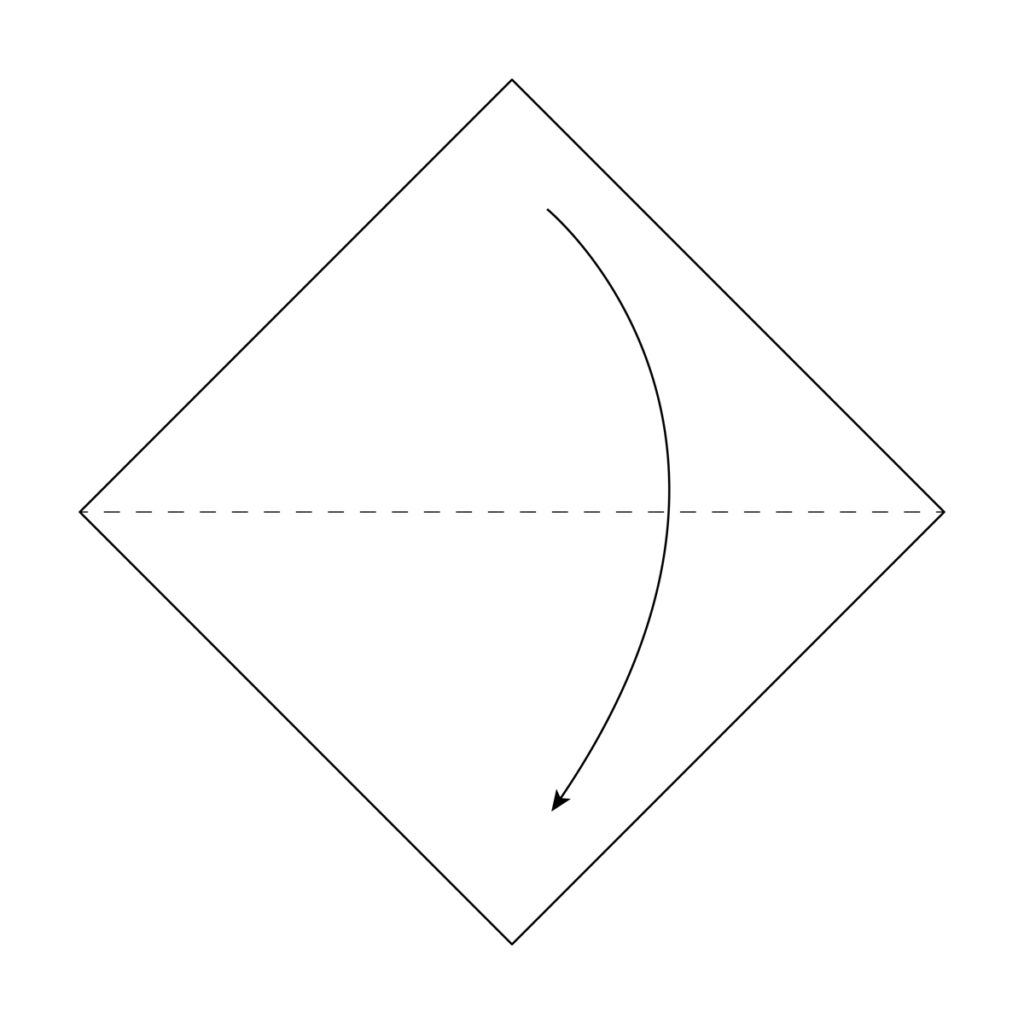
Step-1)
Start with the white side of the
paper facing up and fold in half diagonally.
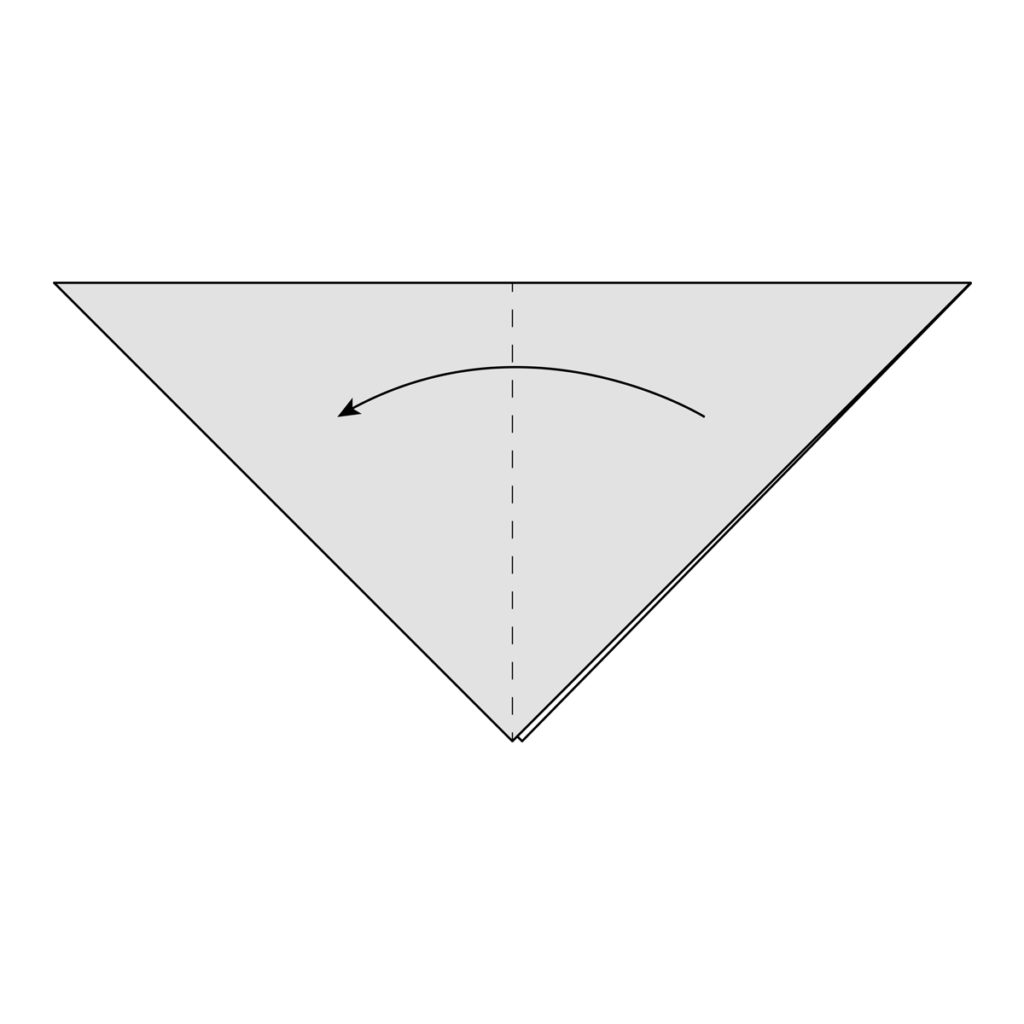
Step-2) Fold in half again along the dotted
line.
Step-3) Fold that flap back and…
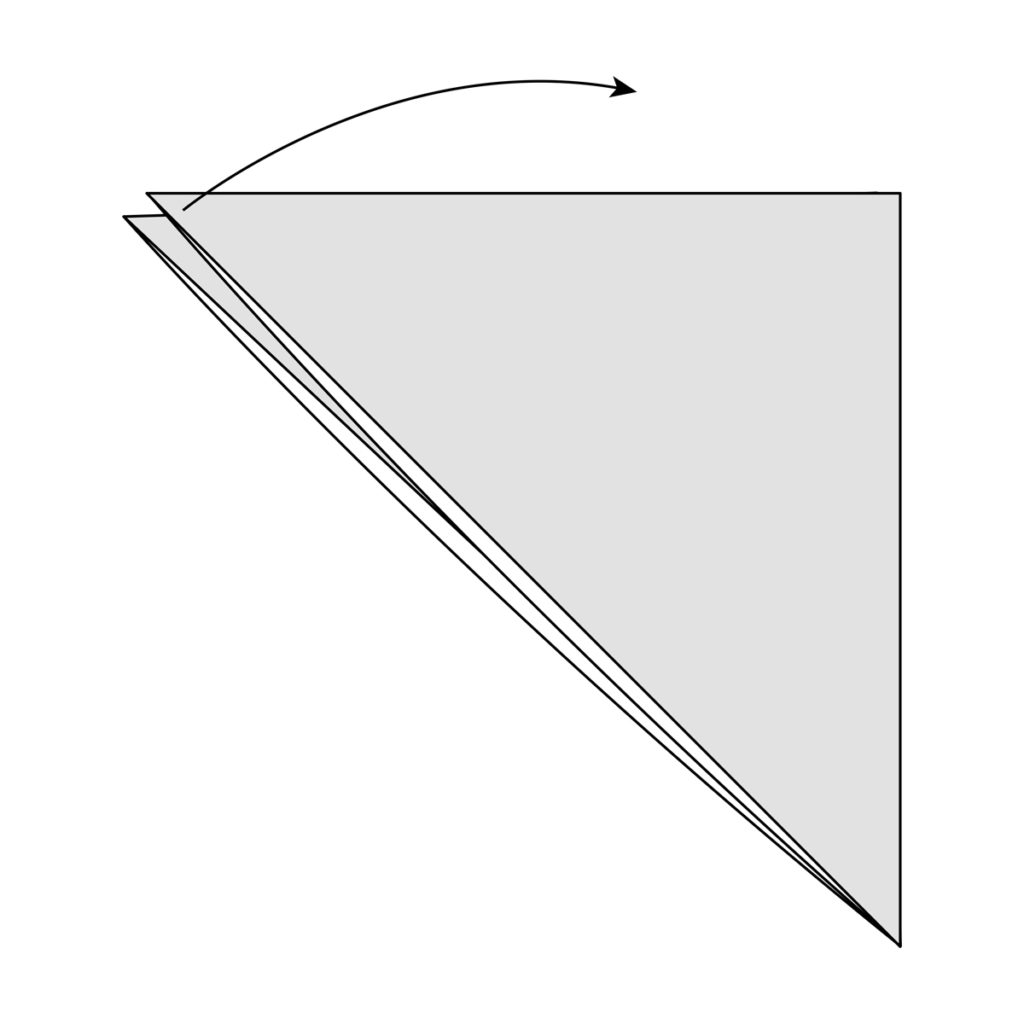
Step-4) Squash fold this flap down.
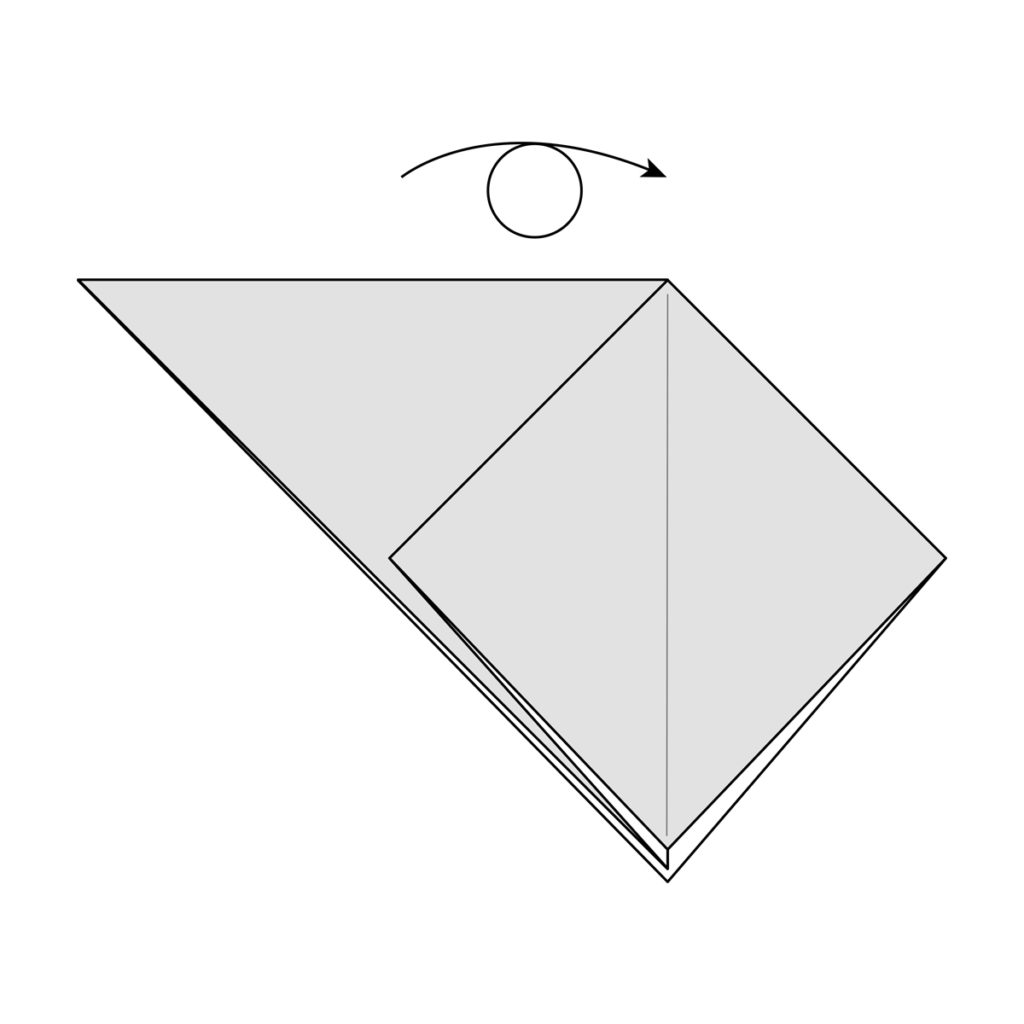
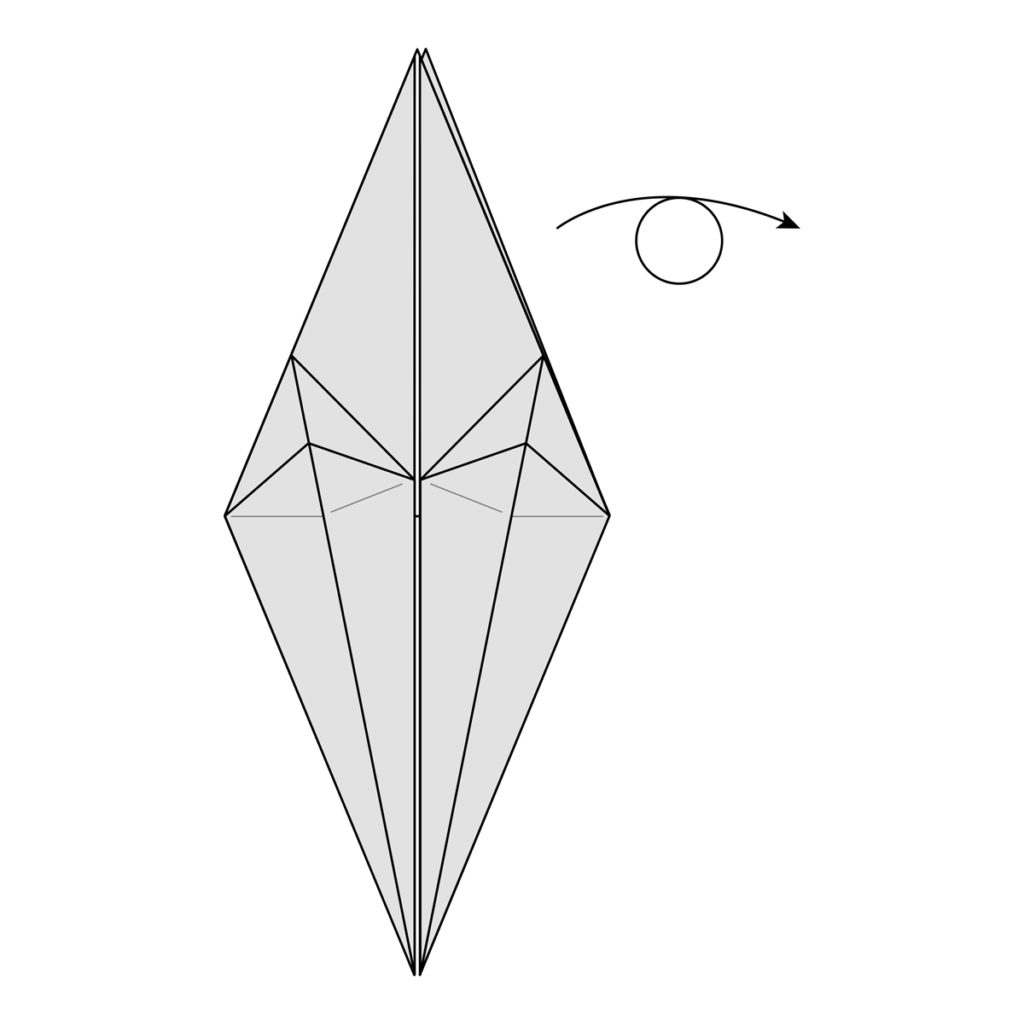
Step-5) Turn the model over, we’re going to
repeat the last few steps on the other side.

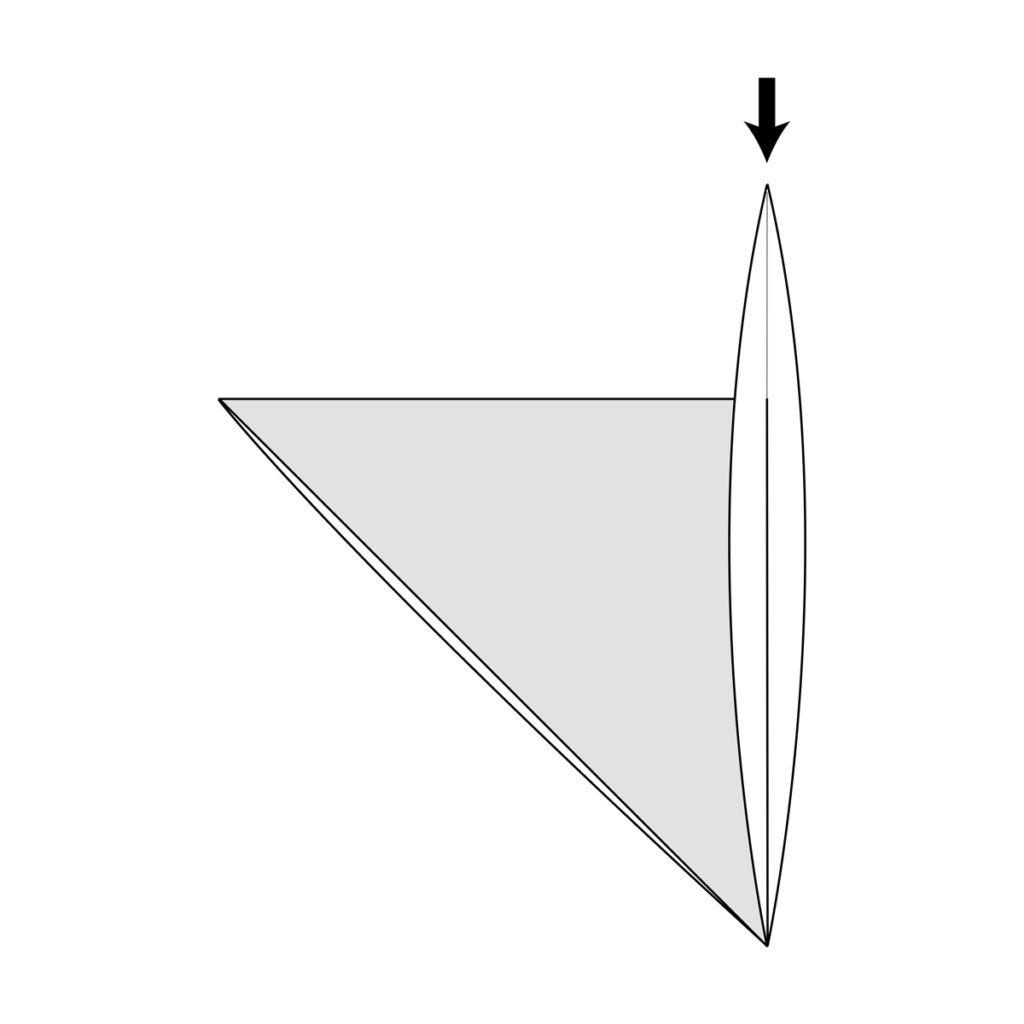
Step-6) Fold the flap over to the left along
the dotted line.
Step-7) Squash fold this flap down.

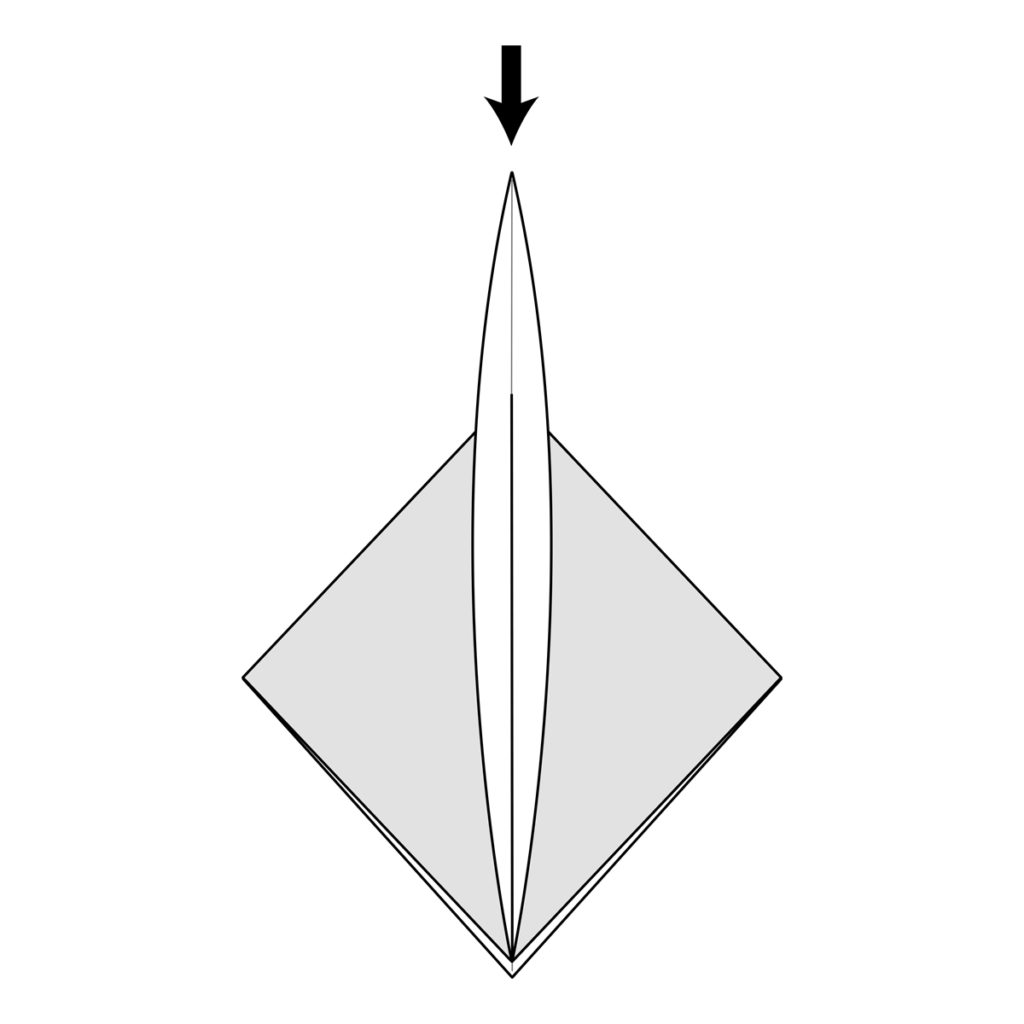
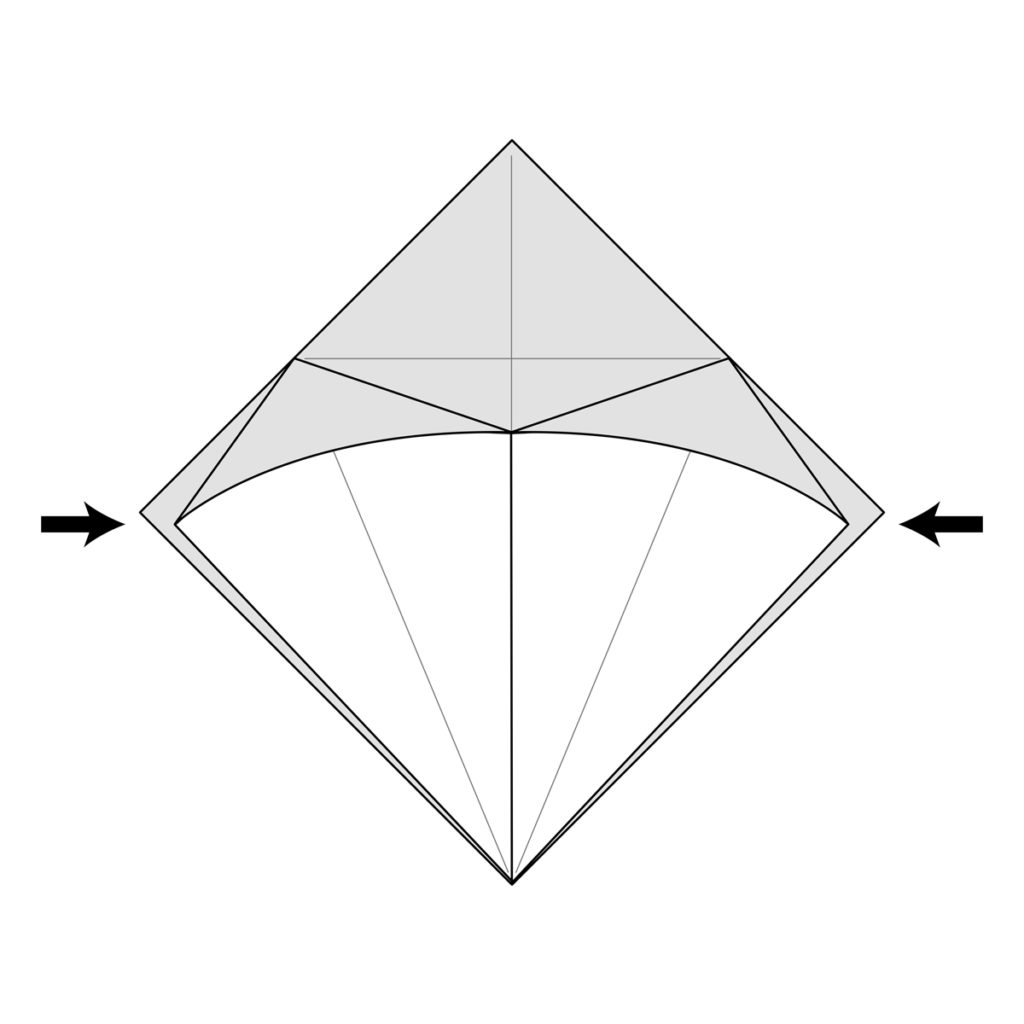
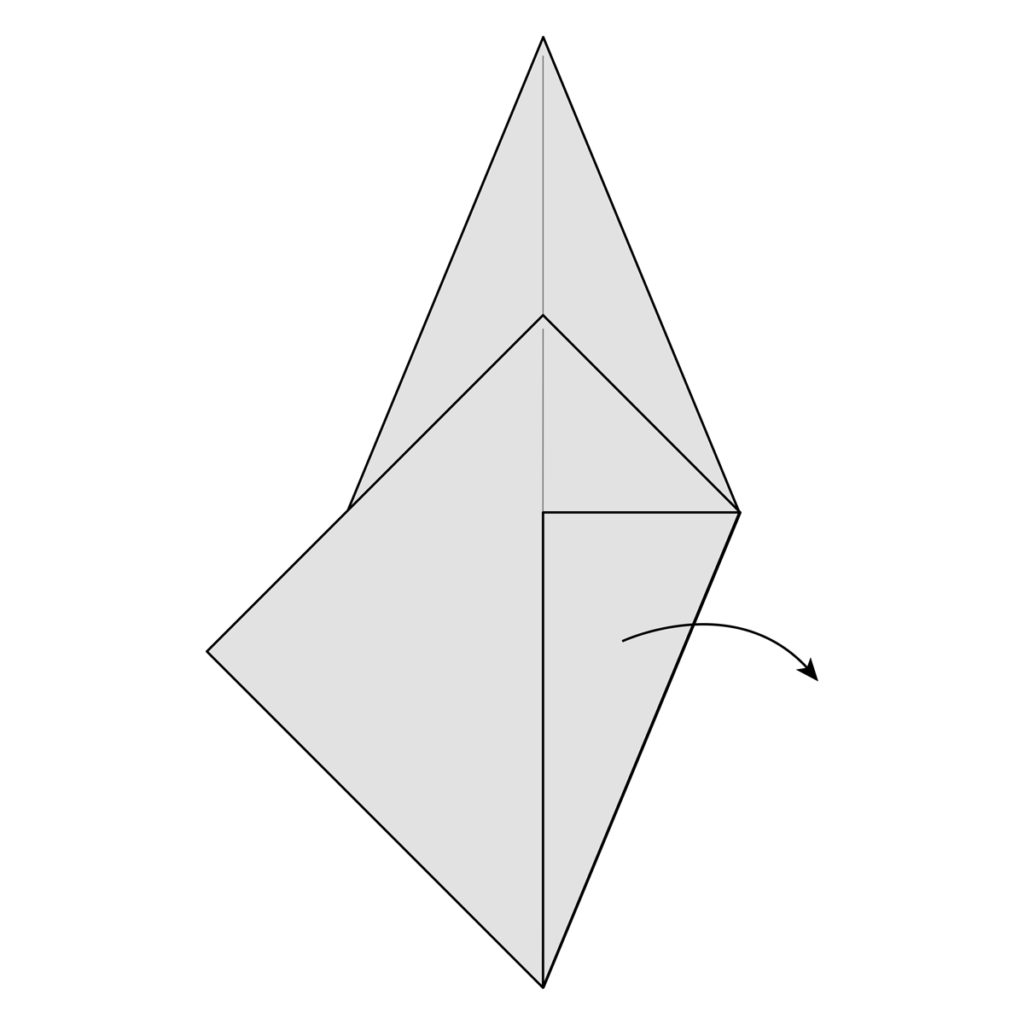
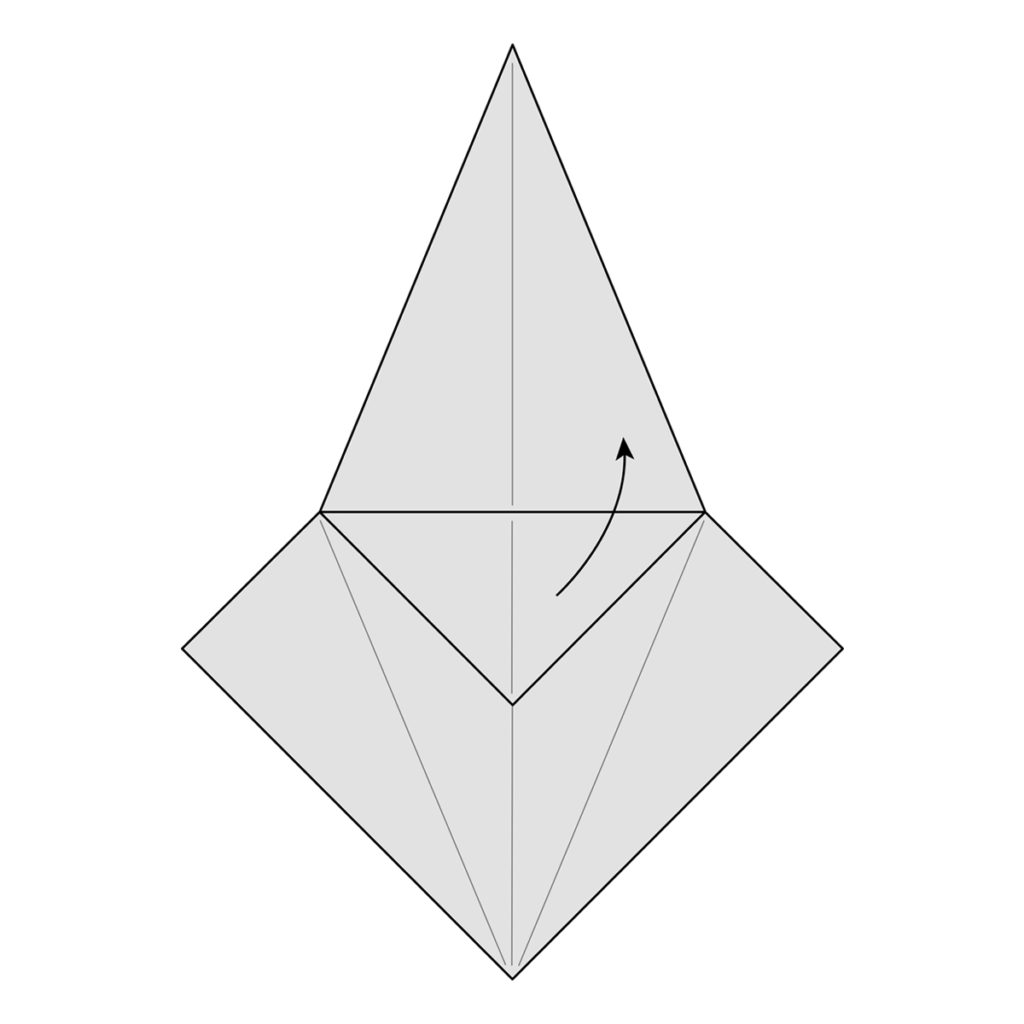
Step-8) You now have a completed square
or preliminary base. With a few more folds
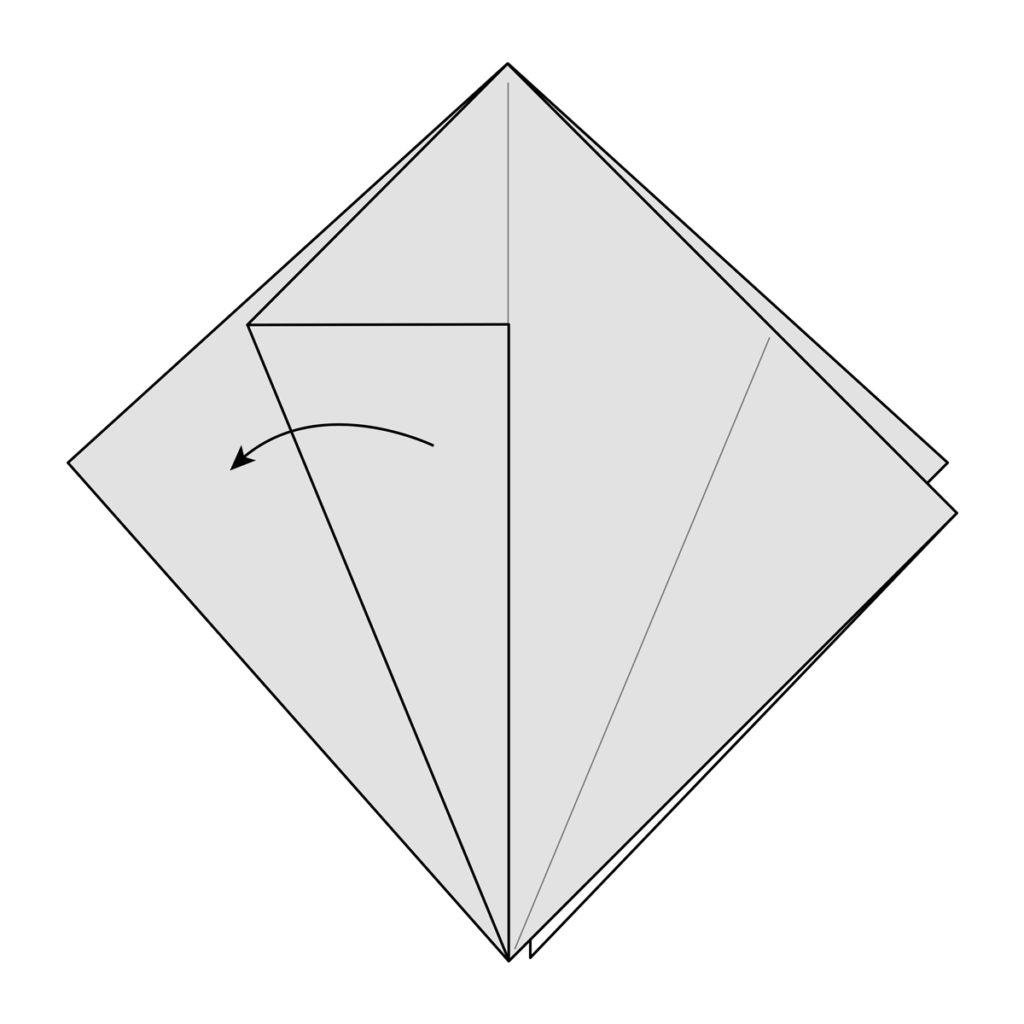
we’ll turn it into a bird base. Fold the side
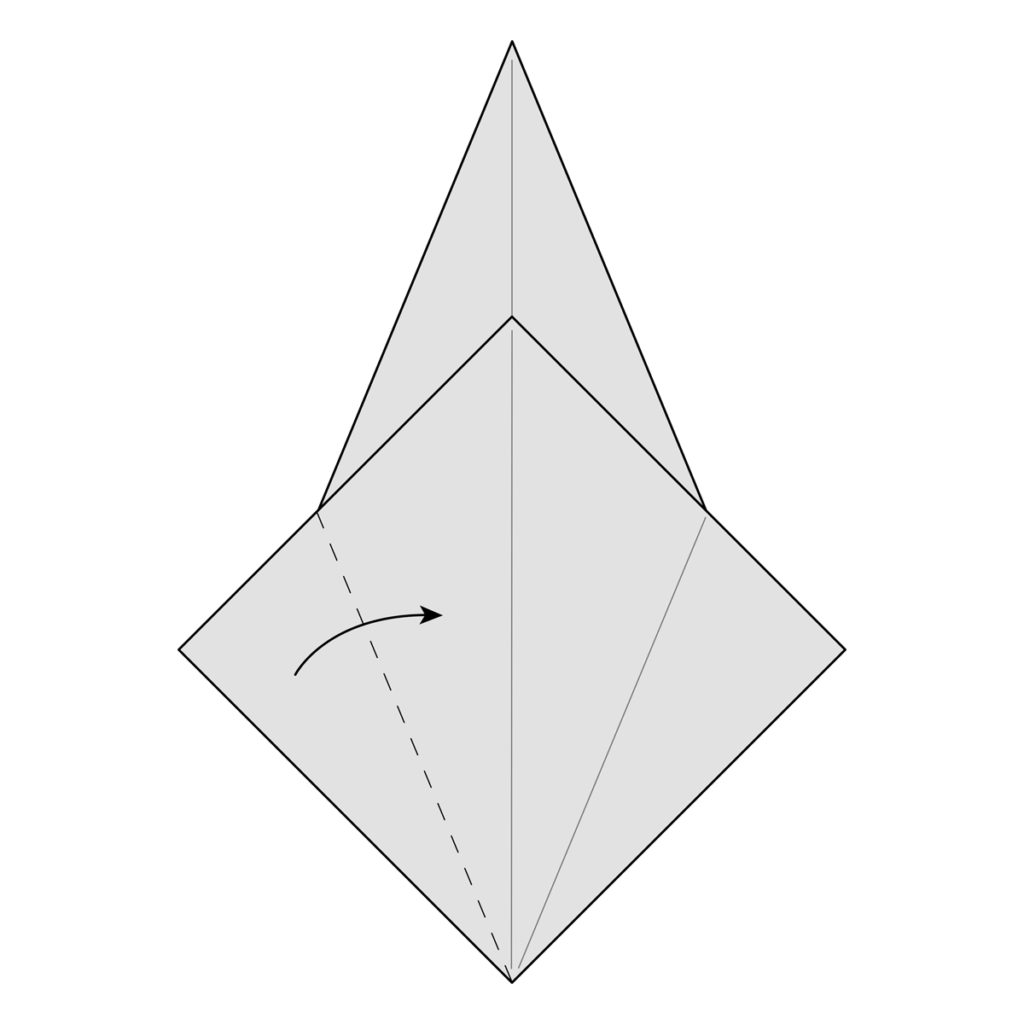
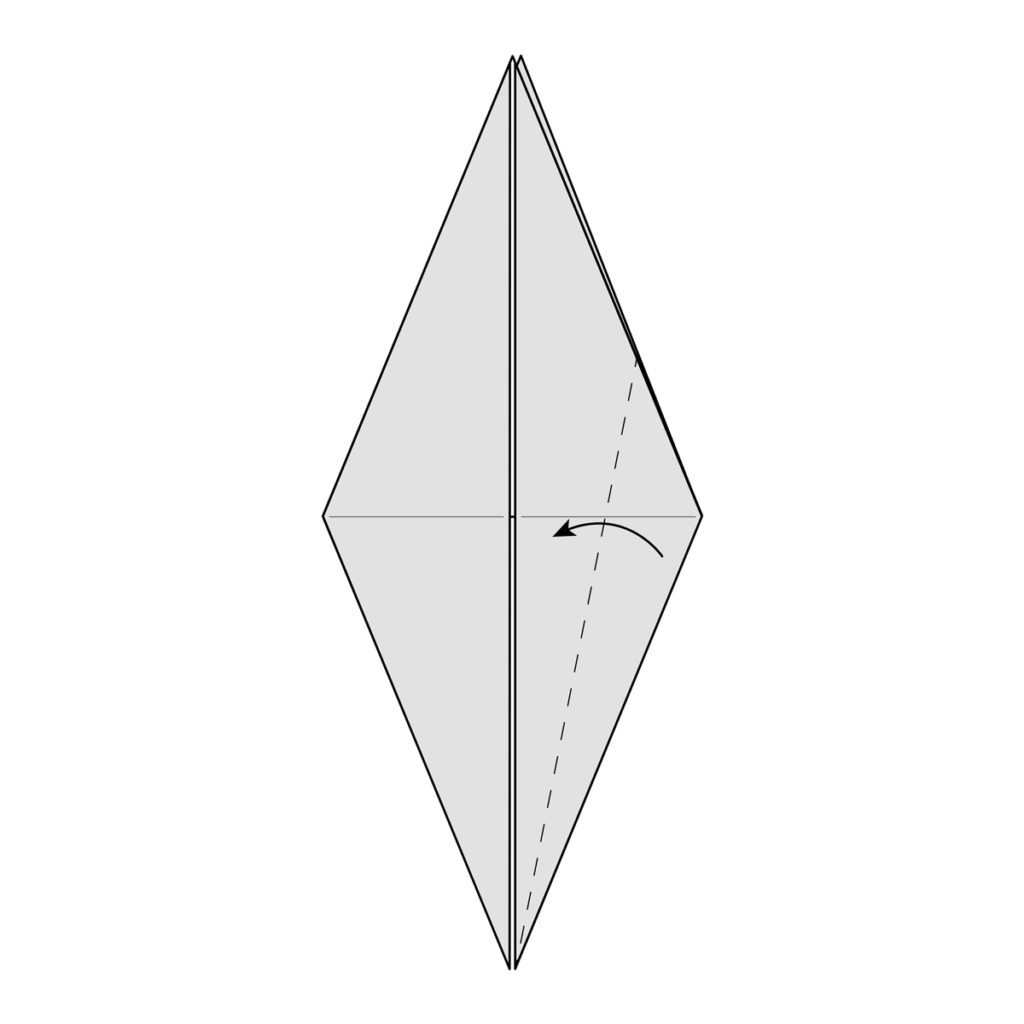
flap to the centre along the dotted line.
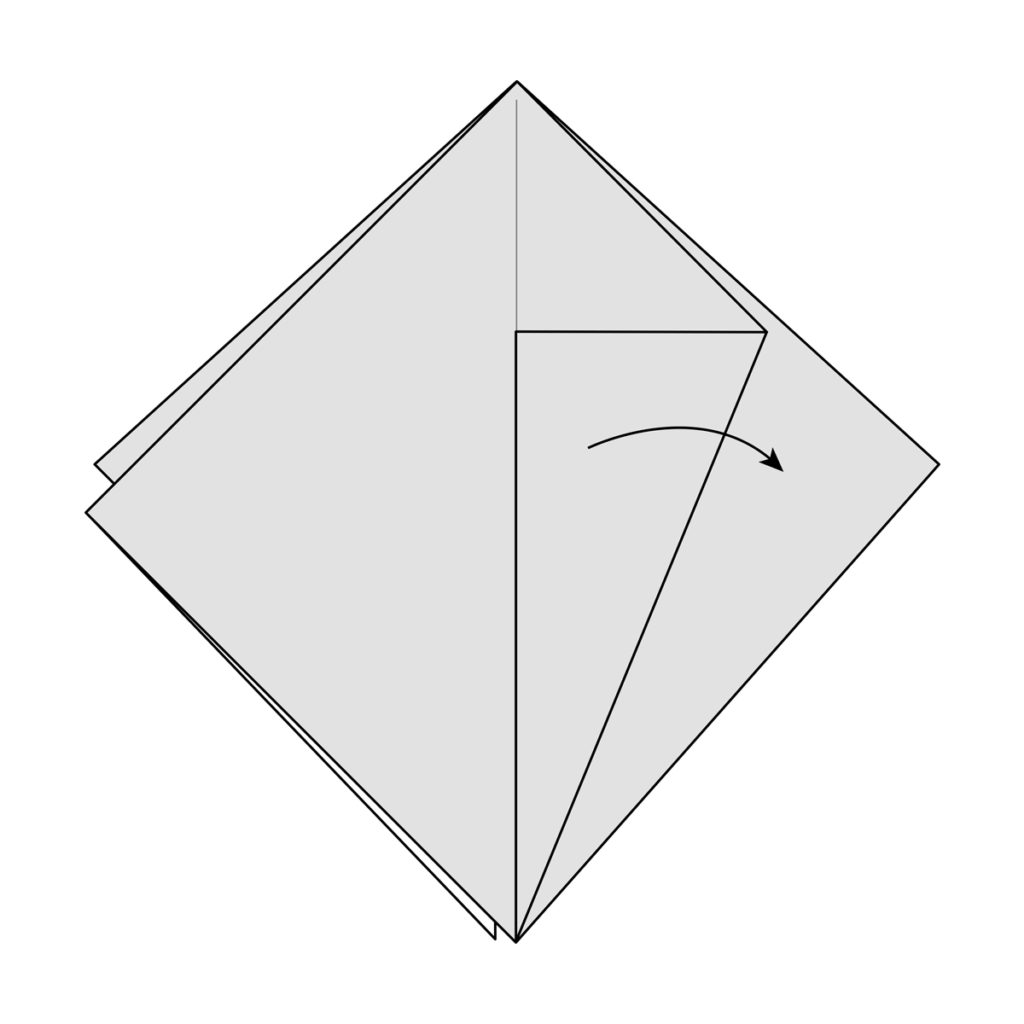
Step-9) Crease this fold well and then
unfold it.
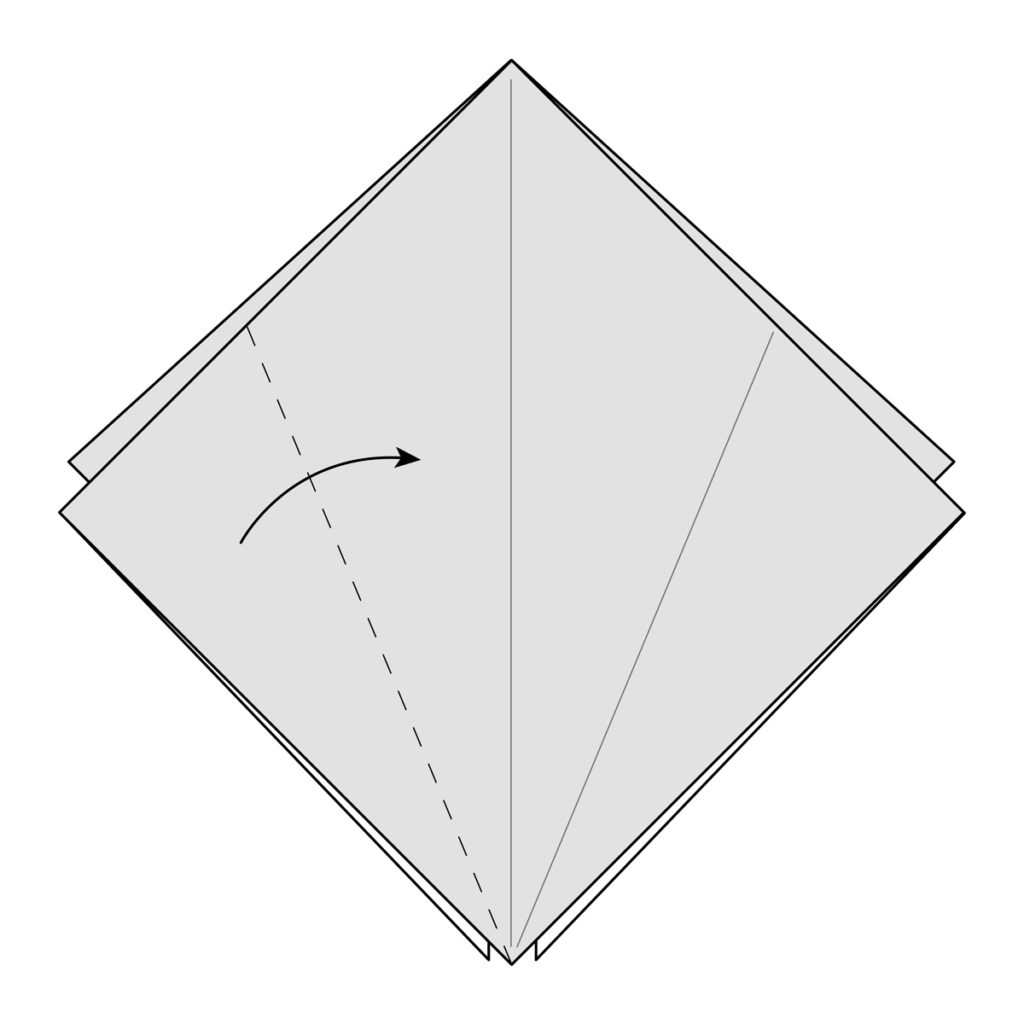
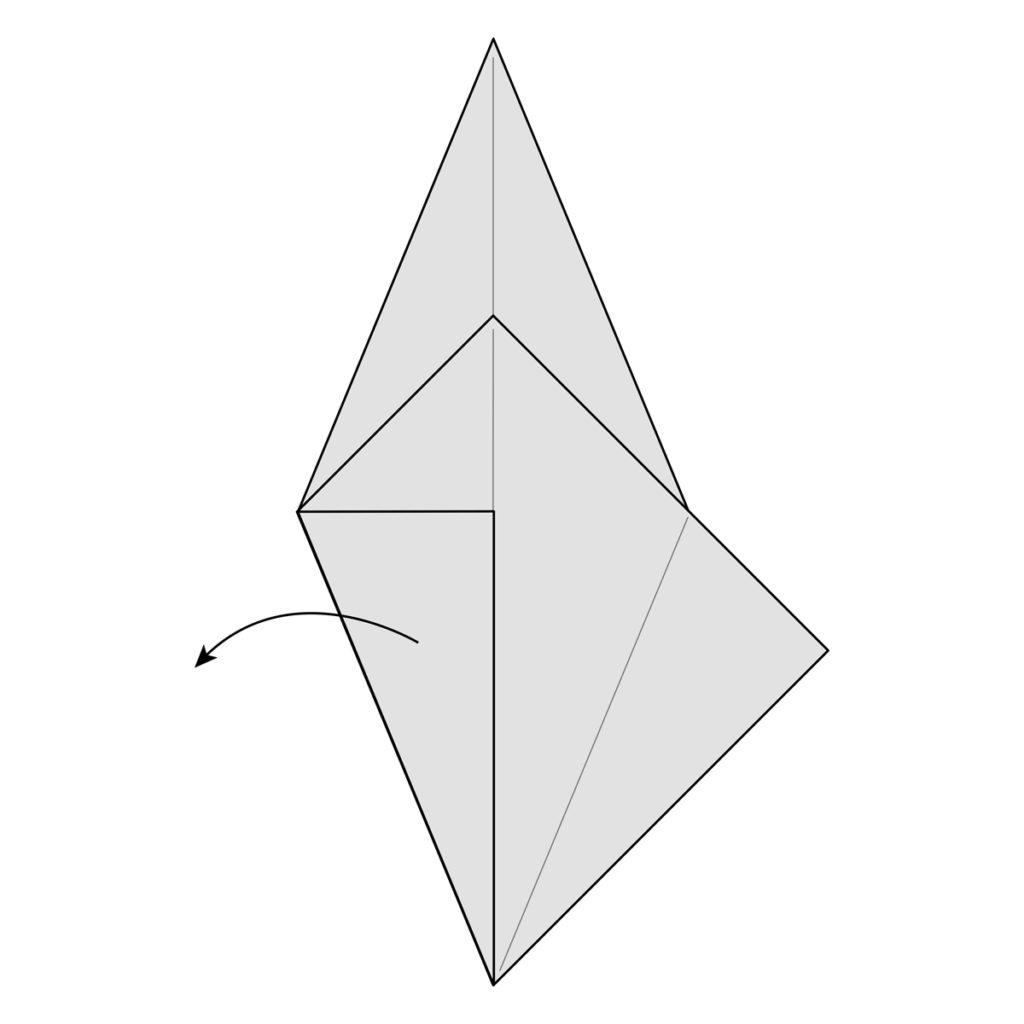
Step-10) Fold the flap on the other side to
Step-11) Crease this well and unfold.
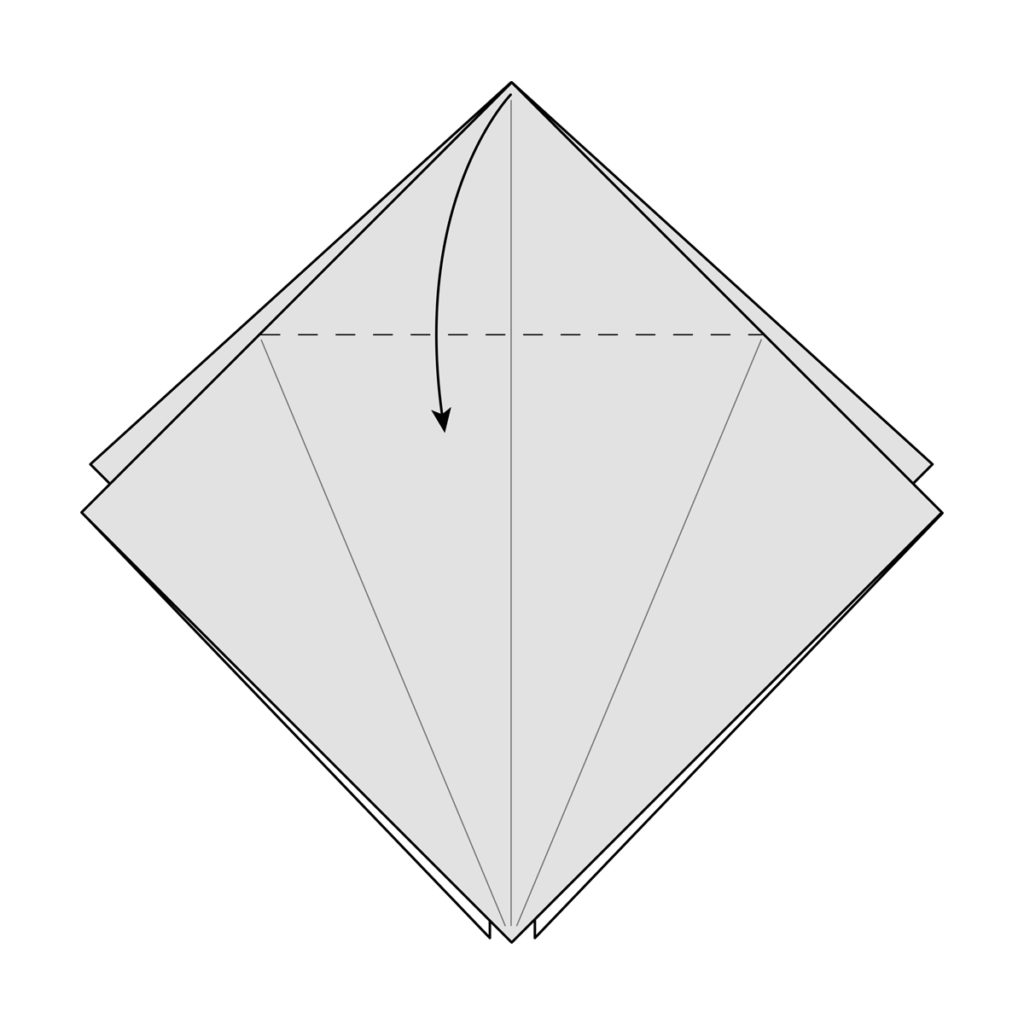
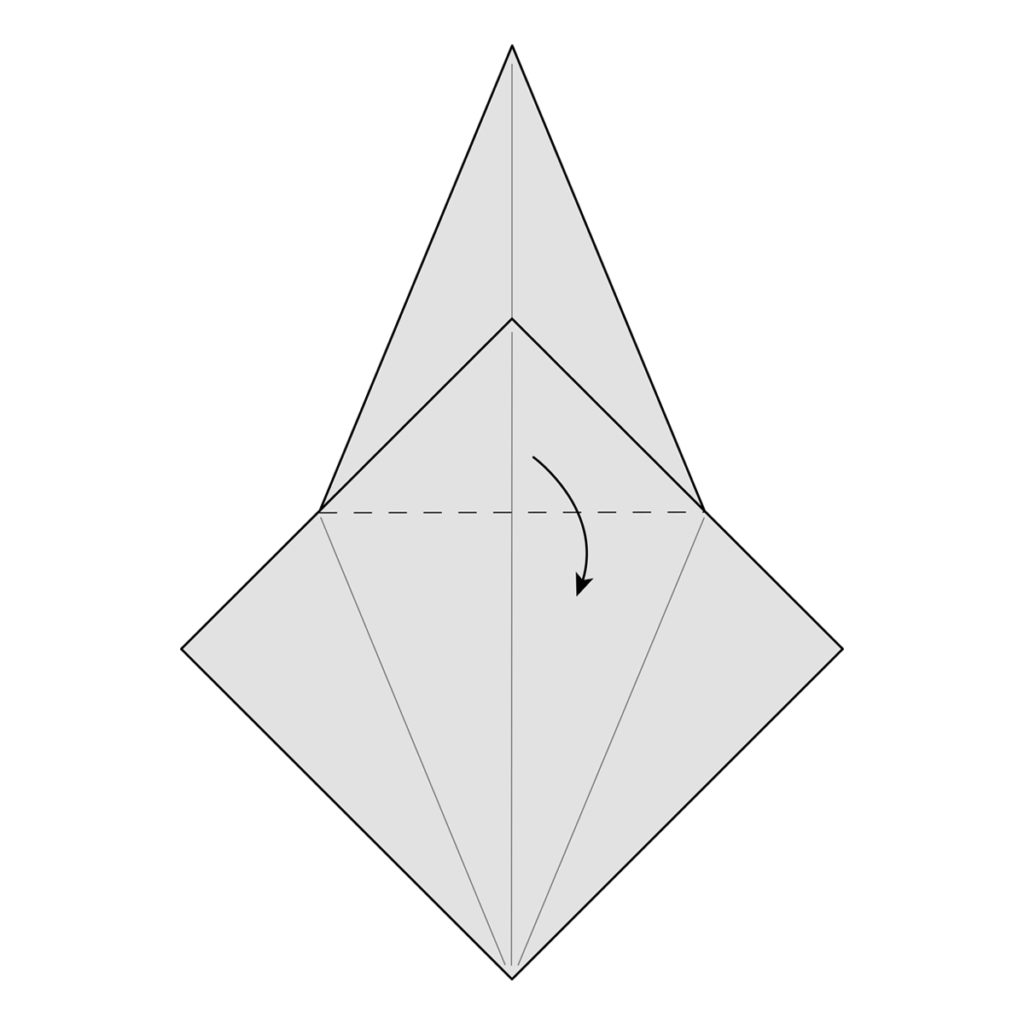
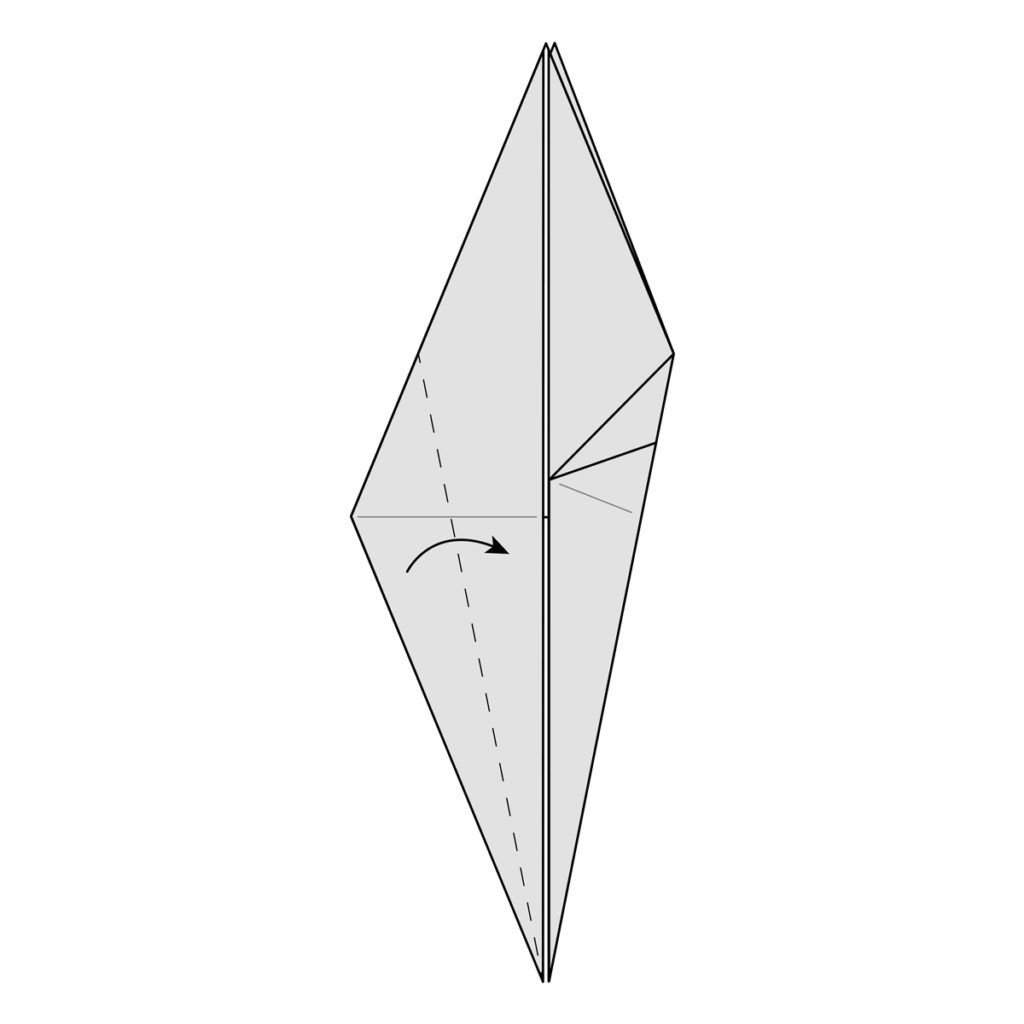
Step-12) Fold the top down along the
dotted line.
Step-13) Crease this well and unfold.
Step-14) Lift the top flap of paper up along
the crease you just made. We’re going to
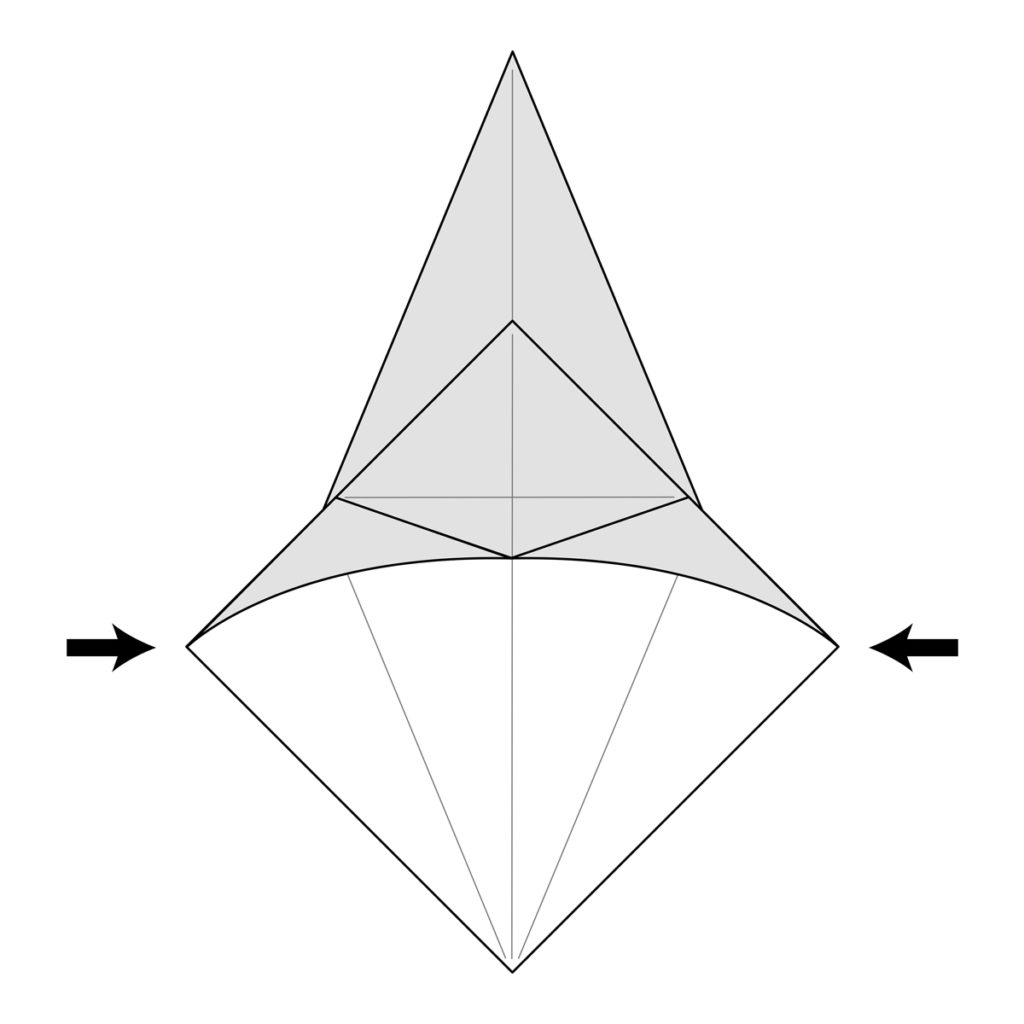
make a petal fold.
Step-15) Continue lifting up and push in the
sides along the creases you made in the
previous couple of steps.
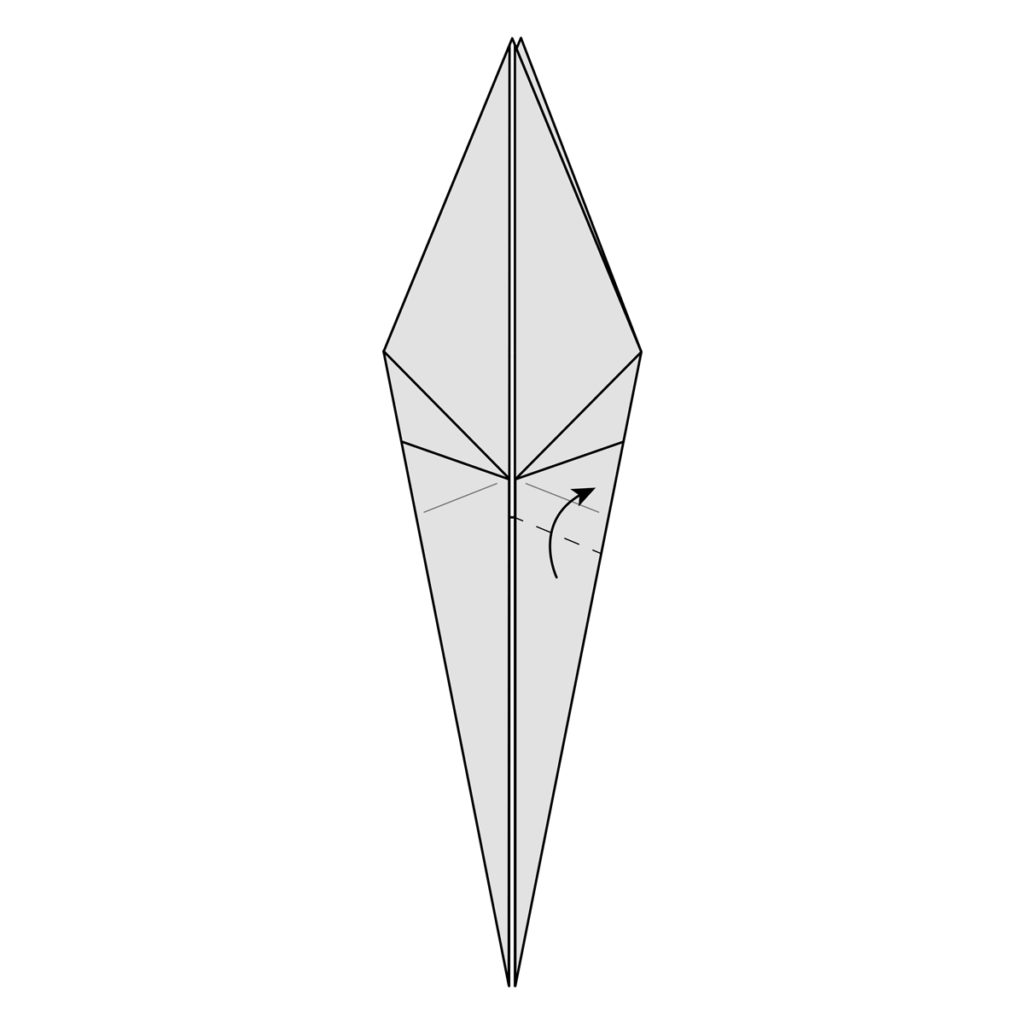
Step-16)
Flatten everything along the
creases you already made.
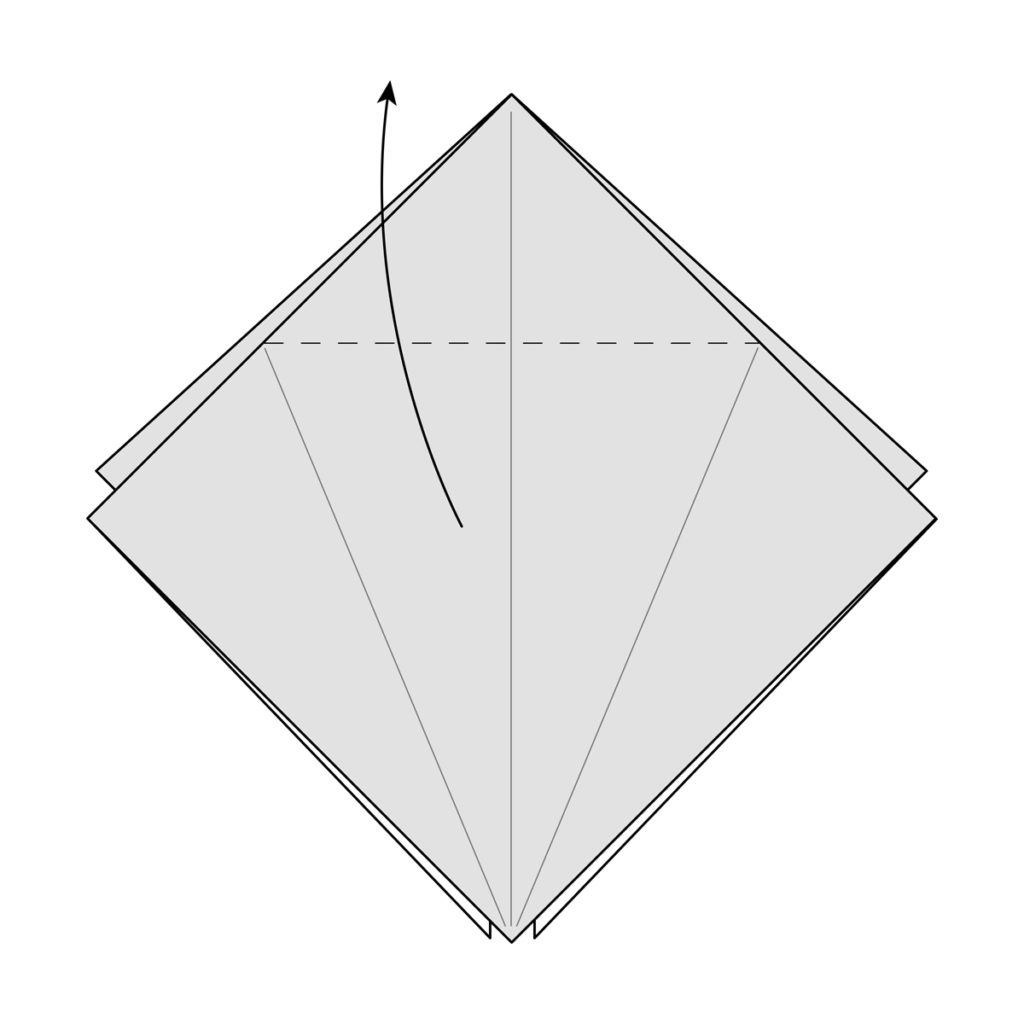
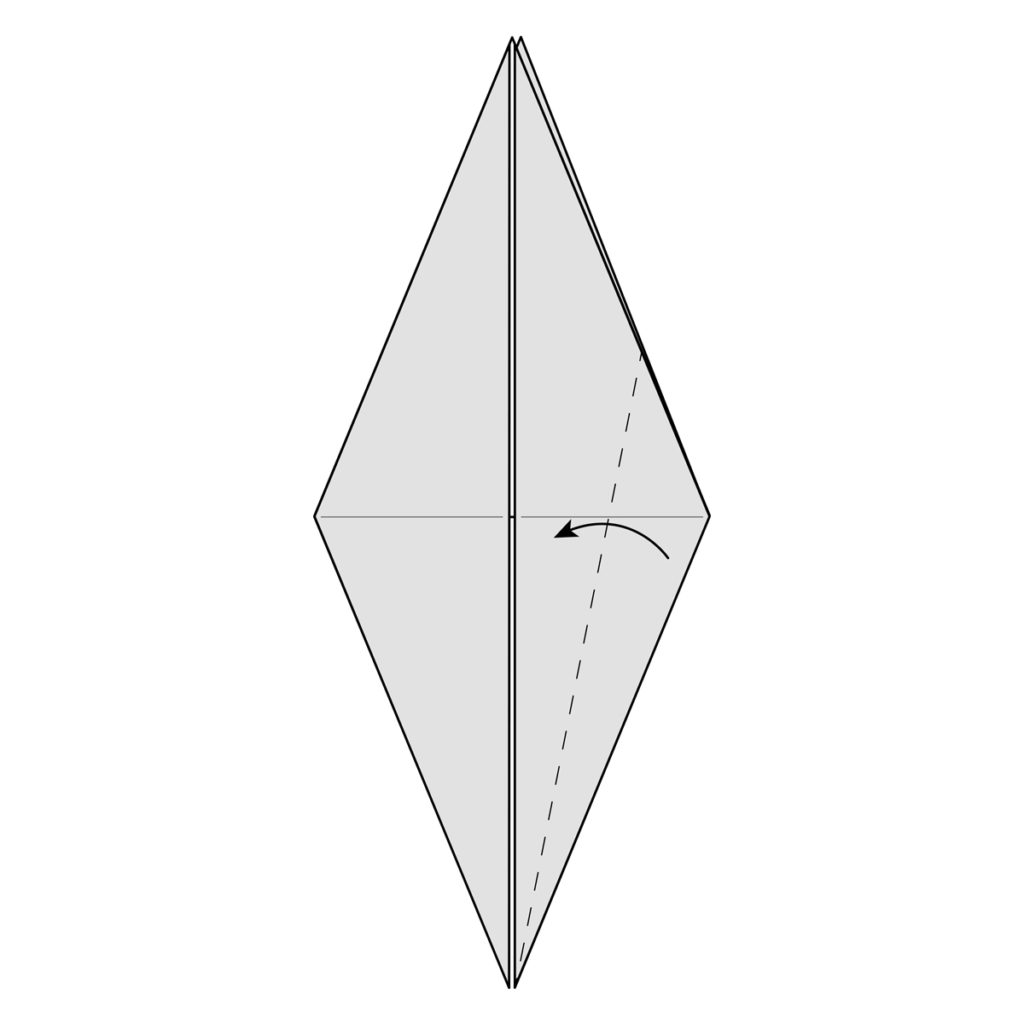
Step-17) The completed petal fold. Turn the
model over, we’re going to make a petal fold
on the other side too.
Step-18) Fold the side to the centre along
the dotted line.
Step-19) Crease this well and then unfold.
Step-20) Fold the other side to the centre
along the dotted line.
Step-21) Crease this well and unfold.
Step-22)
Fold the top down along the dotted
line.
Step-23) Crease this well and unfold.

Step-24) Lift the top flap of paper up along
the crease you just made. We’re going to
make another petal fold.
Step-25)
Continue lifting up and push in the
sides along the creases you made in the
previous couple of steps.

Step-26) Flatten everything along the
creases you already made.
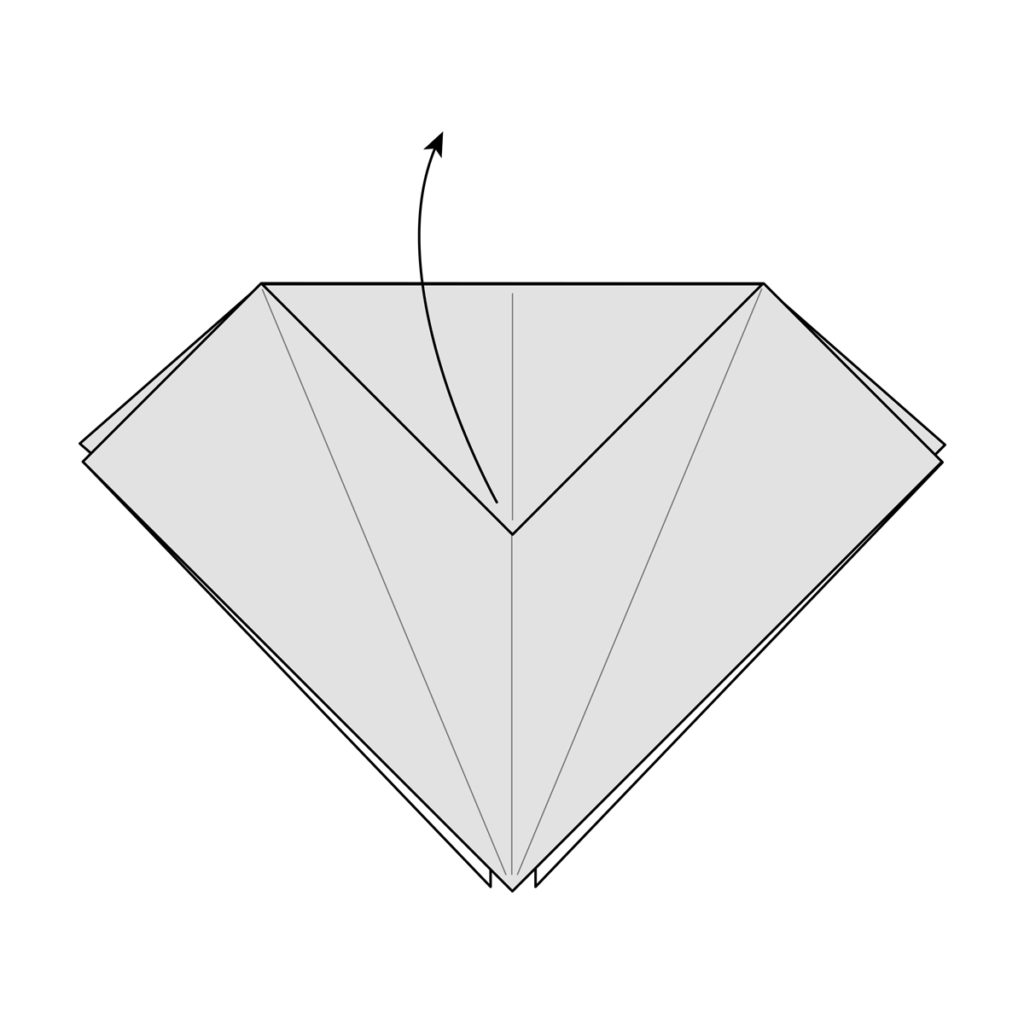
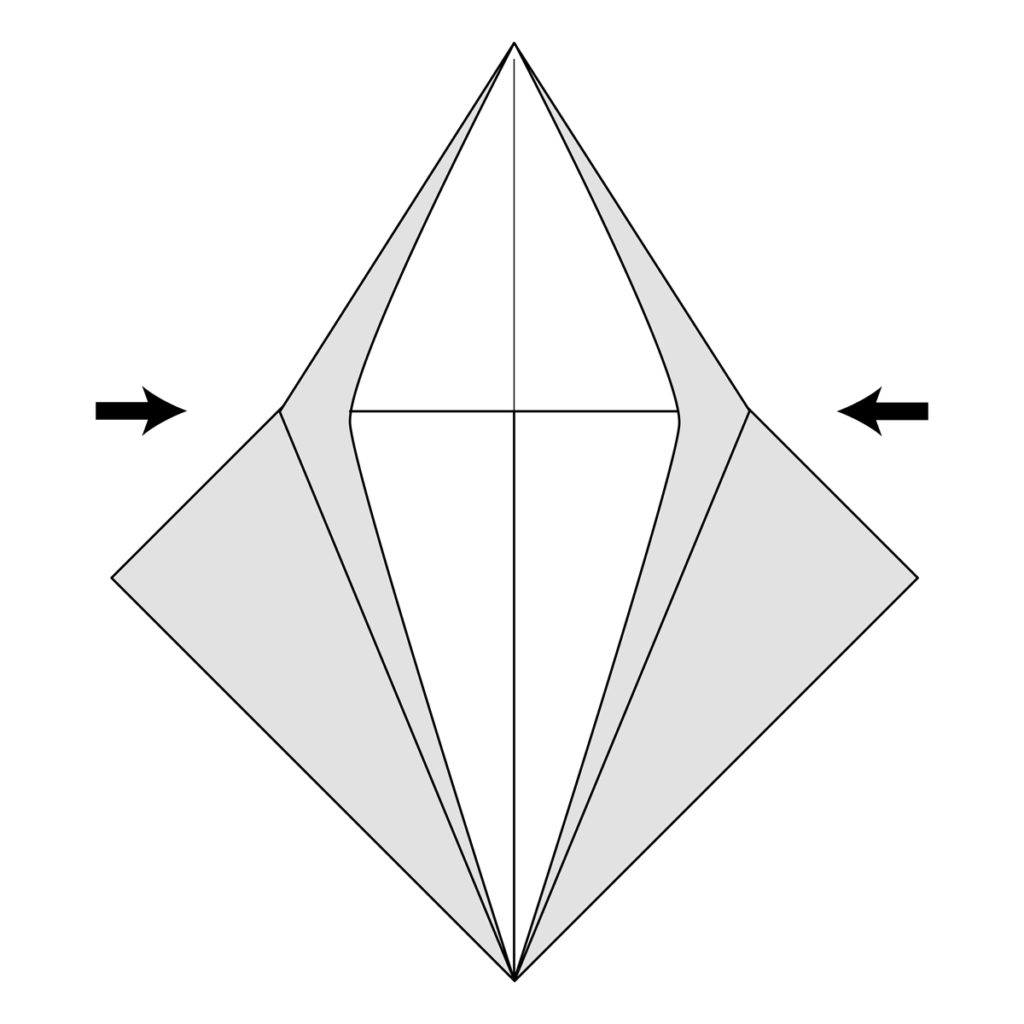
Step-27) The completed petal fold. At this
point you also have a completed bird base.
Next we’re going to fold the neck and the
tail. Fold the top flap on the right to the
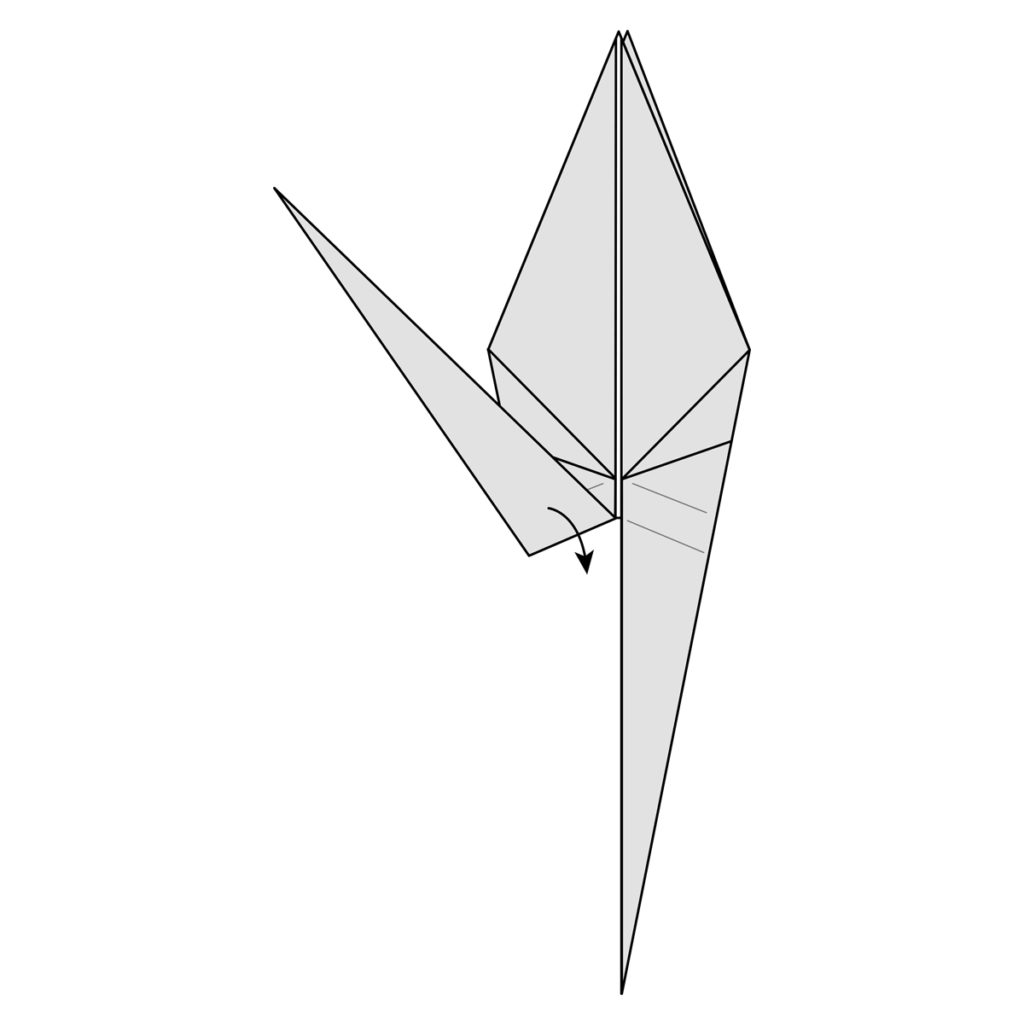
centre along the dotted line.
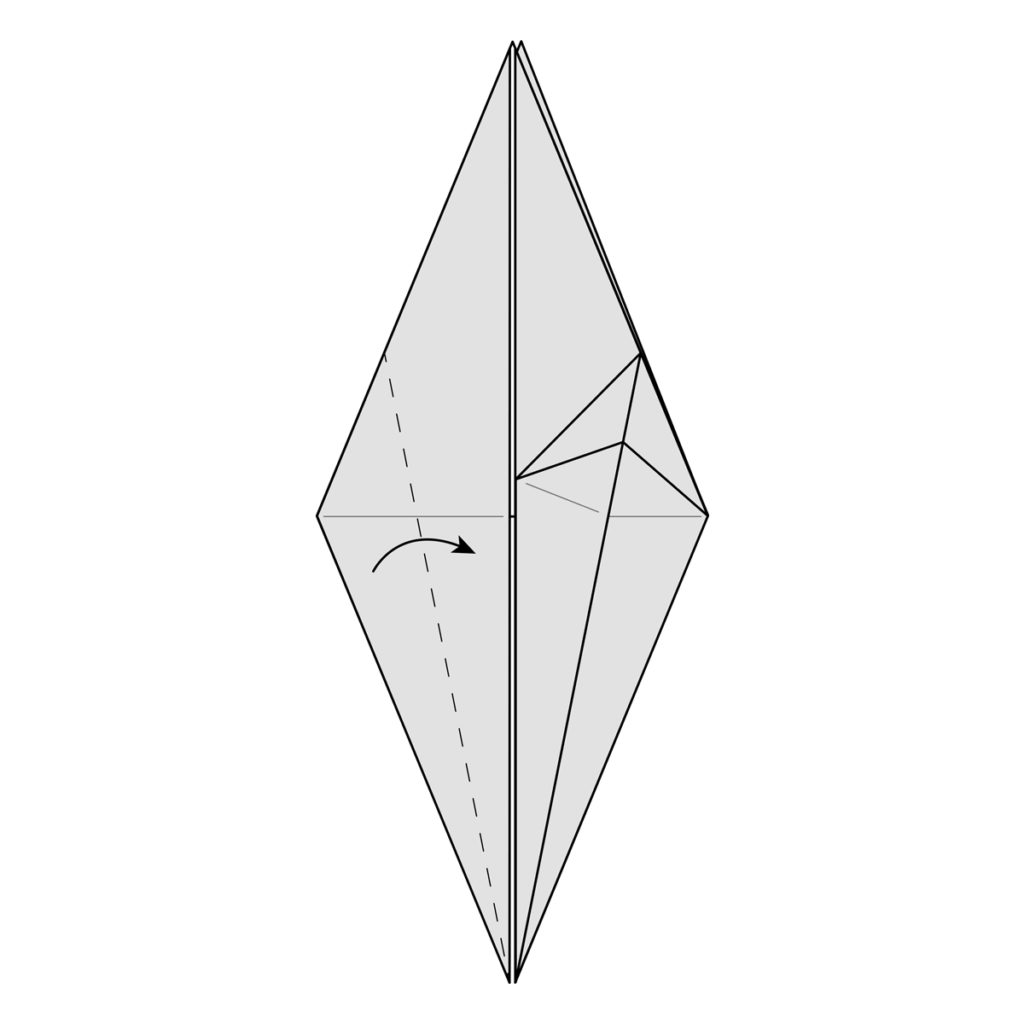
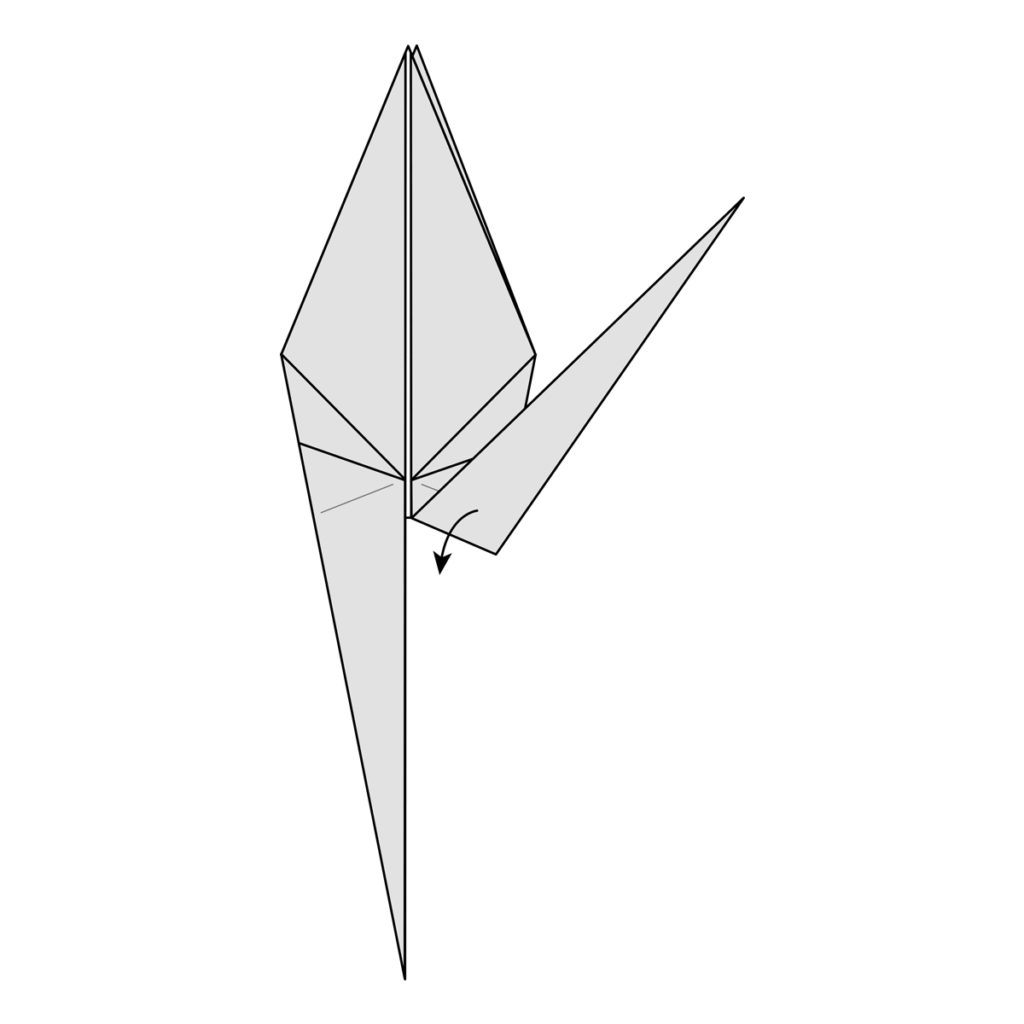
Step-28)
Fold the top flap on the left to the
centre along the dotted line as well.
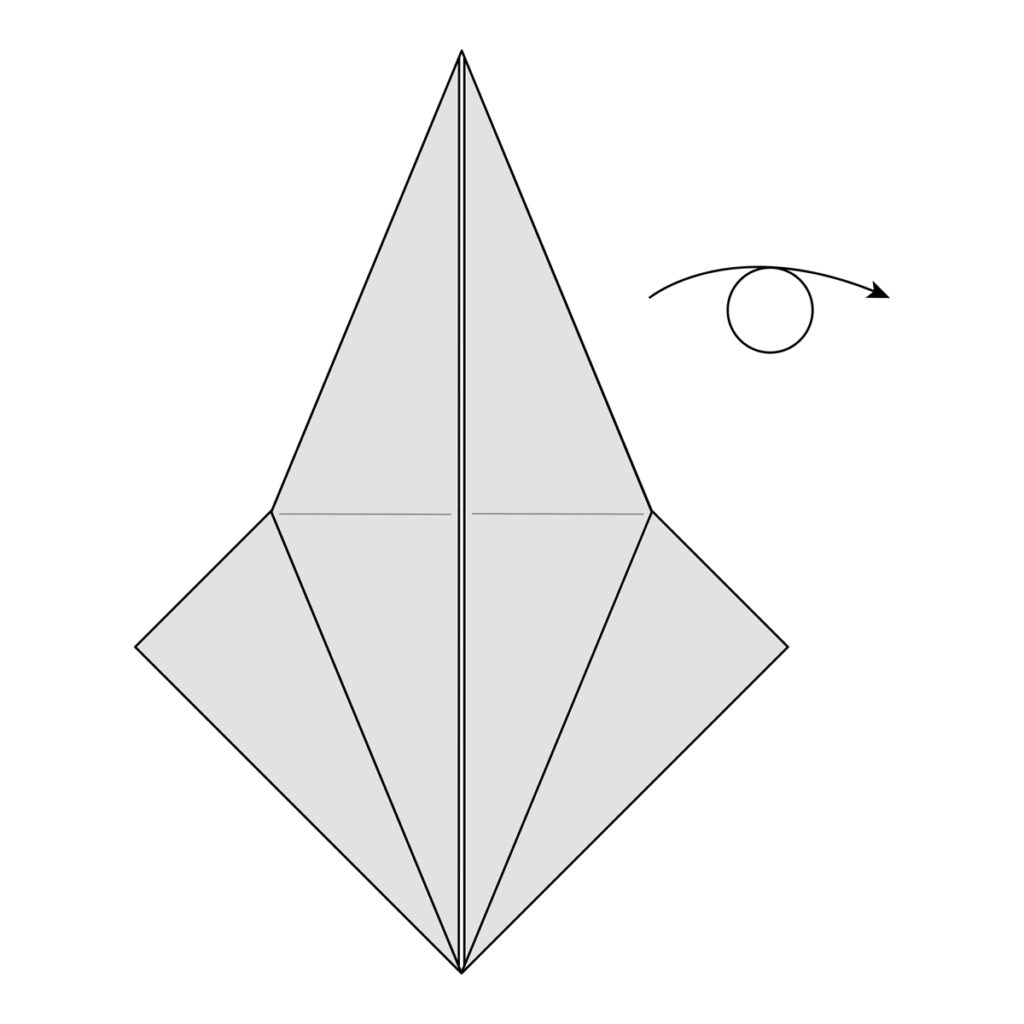
Step-29) Turn the model over, we’re going
to repeat the last to steps on the other side.
Step-30) Fold the top flap on the left to the
centre along the dotted line.
Step-31)
Fold the top flap on the right to the
centre along the dotted line as well.
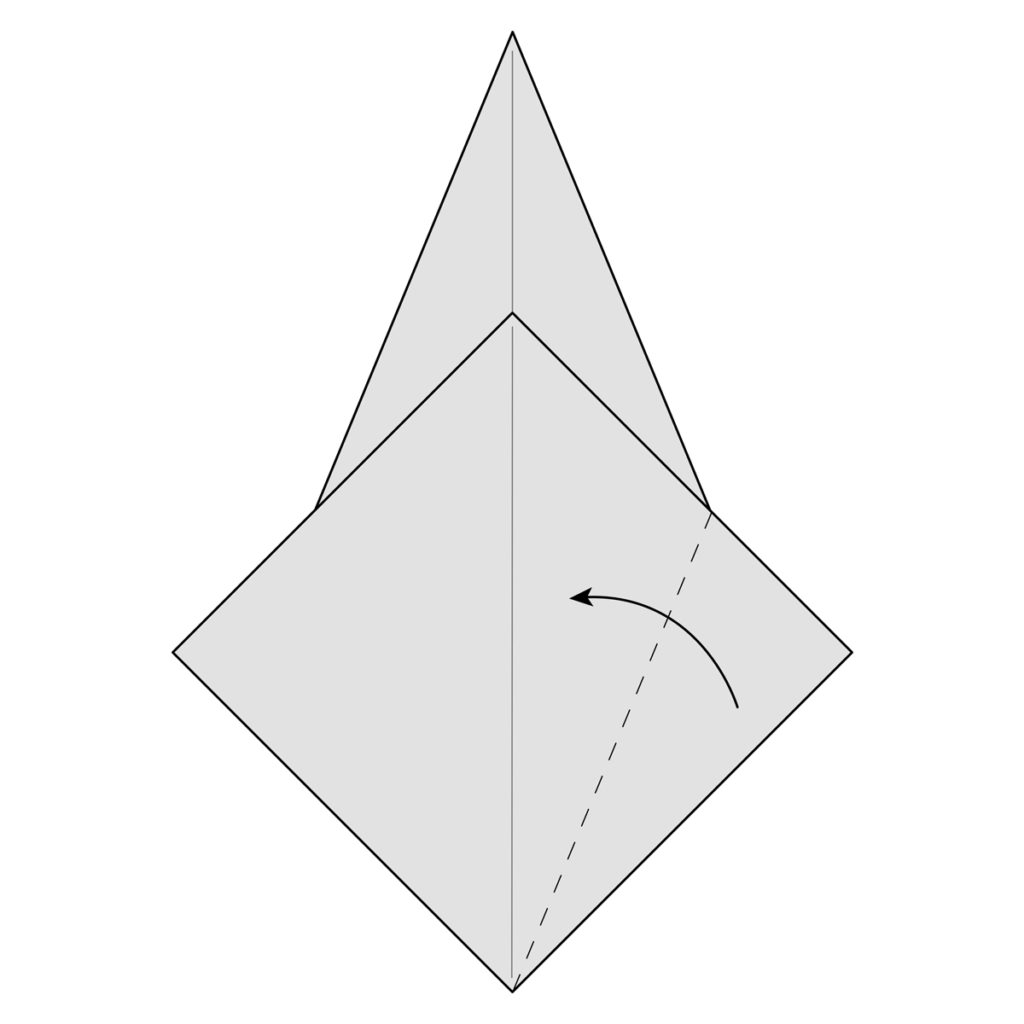
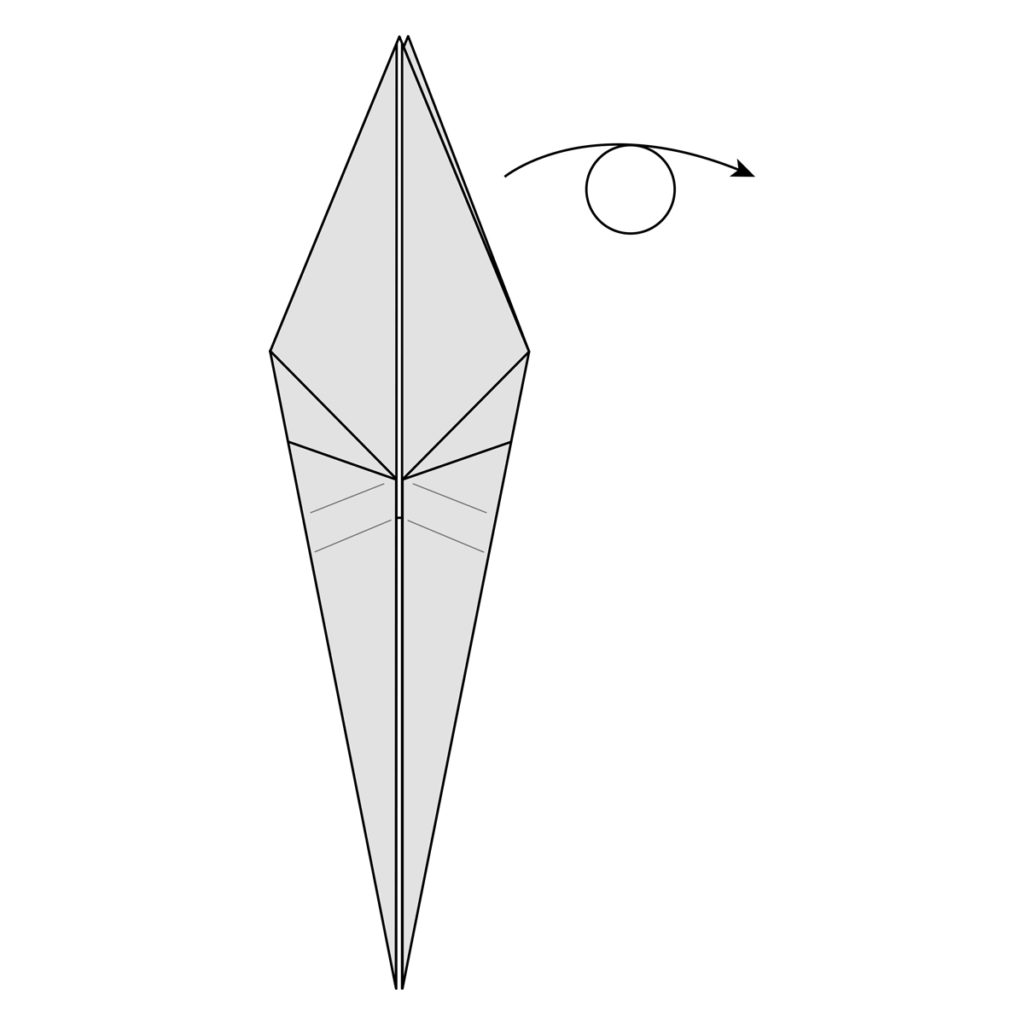
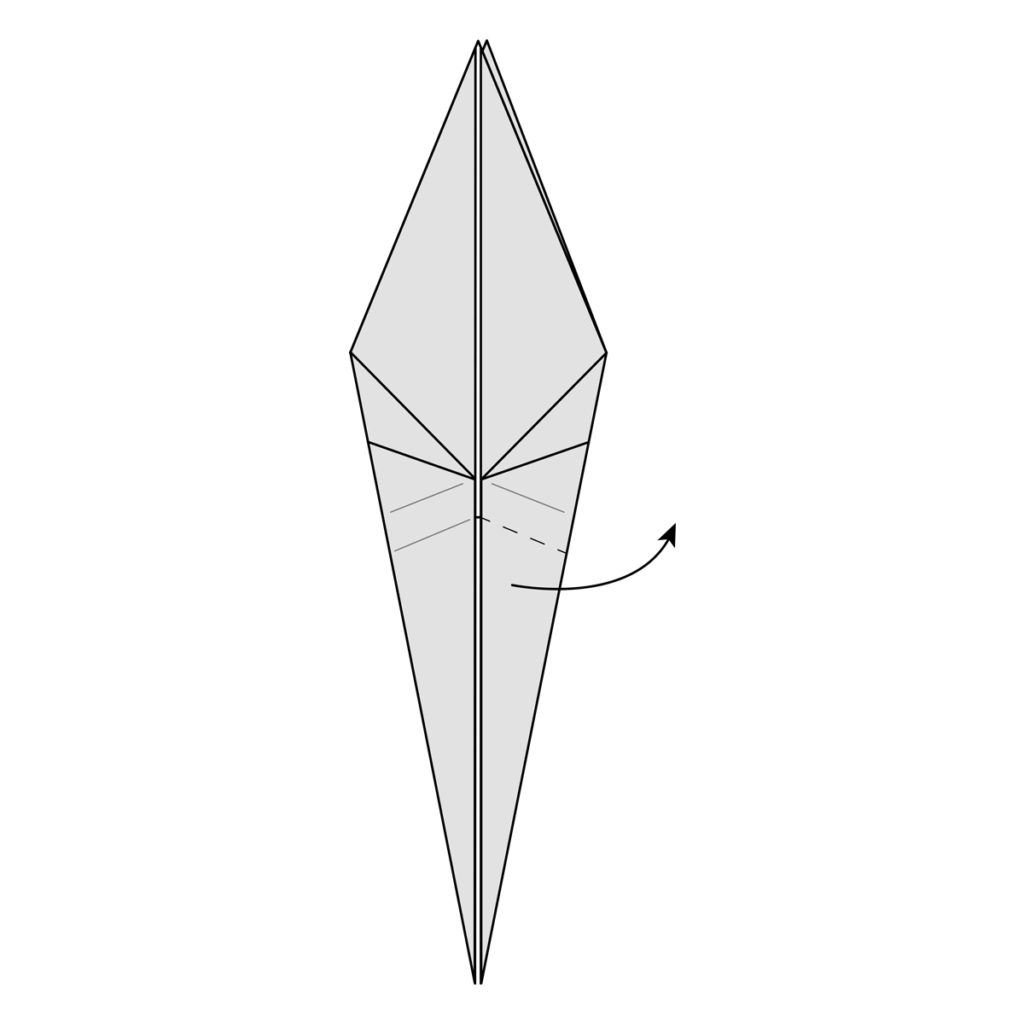
Step-32) Fold the long thin section of paper
on the right up along the dotted line.
Step-33)Crease this well and unfold.

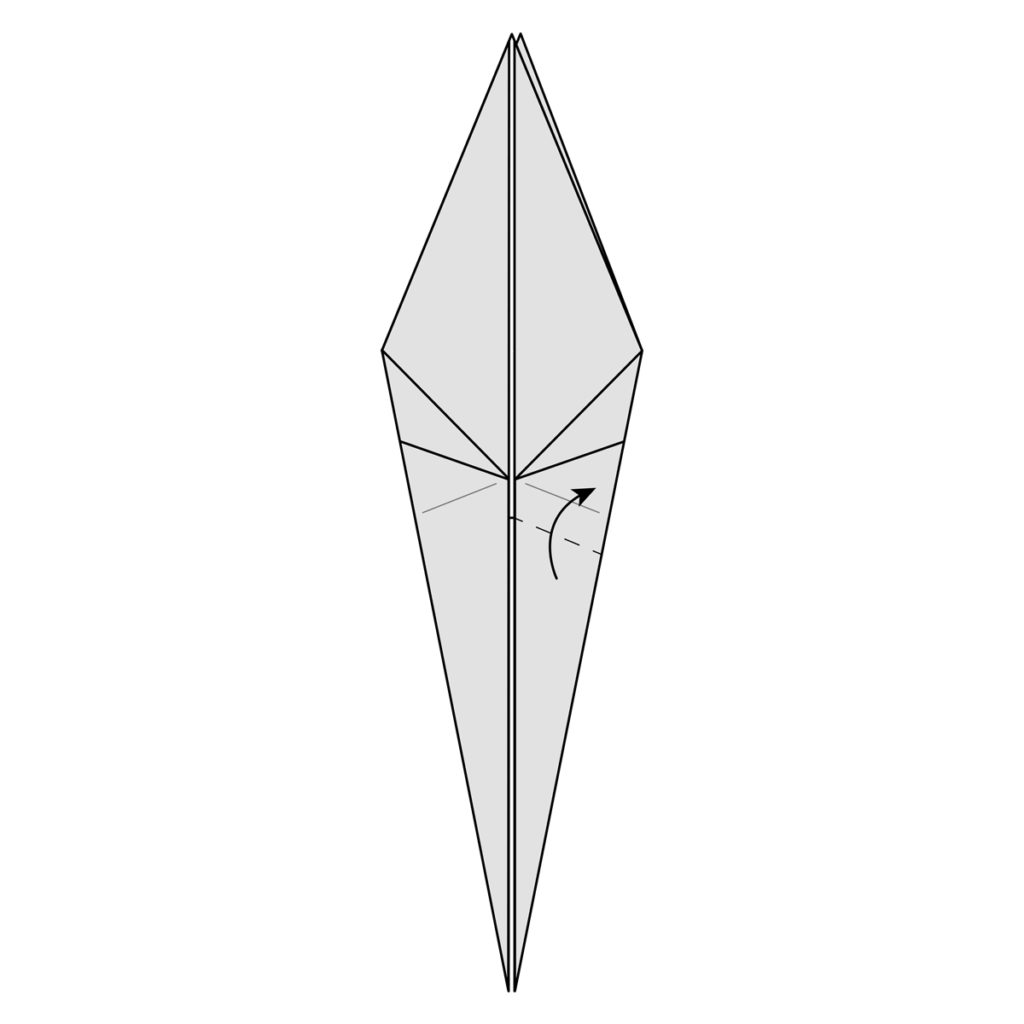
Step-34) Fold the long thin section of paper
on the left up just like you did on the other
side.

Step-35) Crease this well and unfold.
Step-36) Turn the model over, we’re going
to repeat the last couple of steps on the
other side.
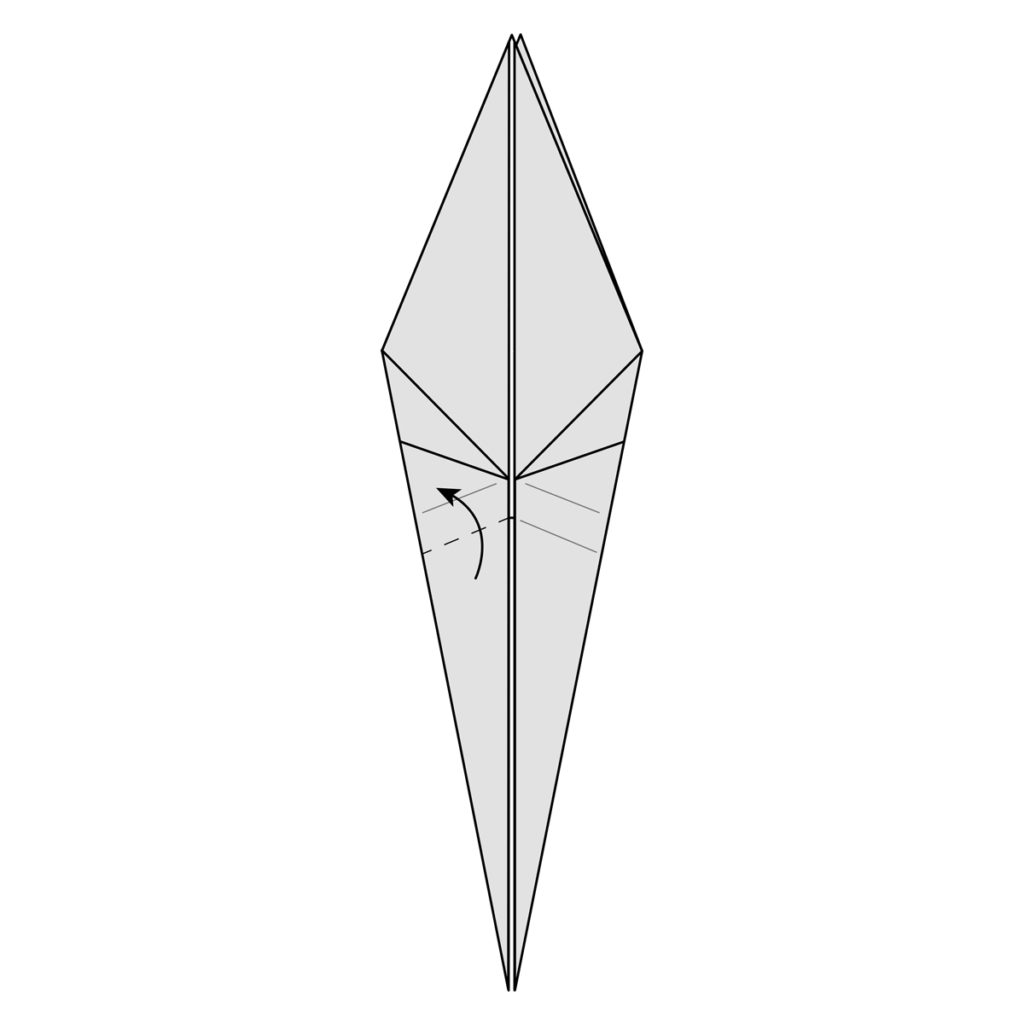
Step-37) Fold the long thin section of paper
on the right up along the dotted line.
There’s already a crease here but now
you’re going to fold it the other way.

Step-38) Crease this well and unfold.
Step-39) Fold the long thin section of paper
on the left up just like you did on the other
side. There’s also a crease here already
and you’re also going to fold it the other way
Step-40) Crease this well and unfold.
Step-41)
Now we’re going to make an inside
reverse fold along the creases you just
made on the right side of the model.
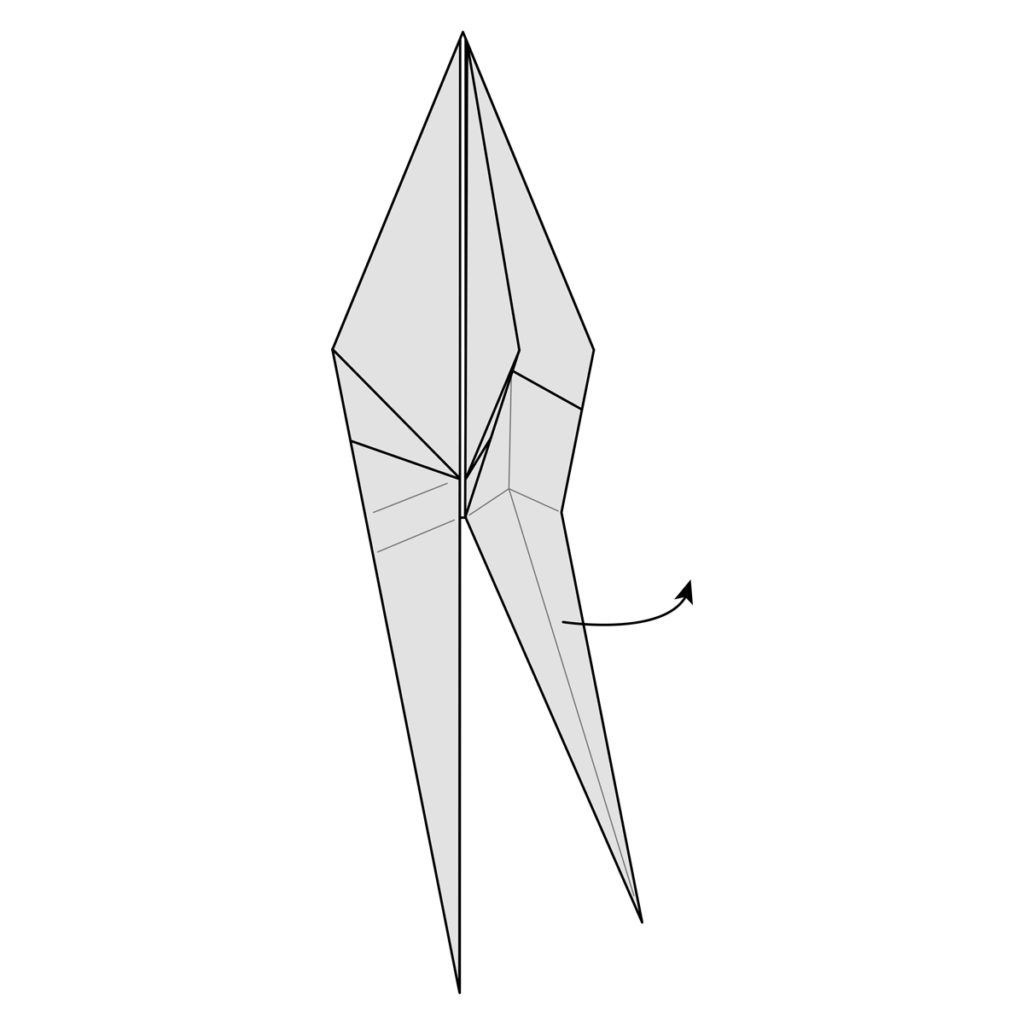
Step-42)
Lift the paper up inside the model
along the creases you already made and
flatten everything.
Step-43)
Make another inside reverse fold
along the creases you already made along
the left side of the model.
Step-44)
Lift the paper up inside the model
along the creases you already made and
flatten everythin
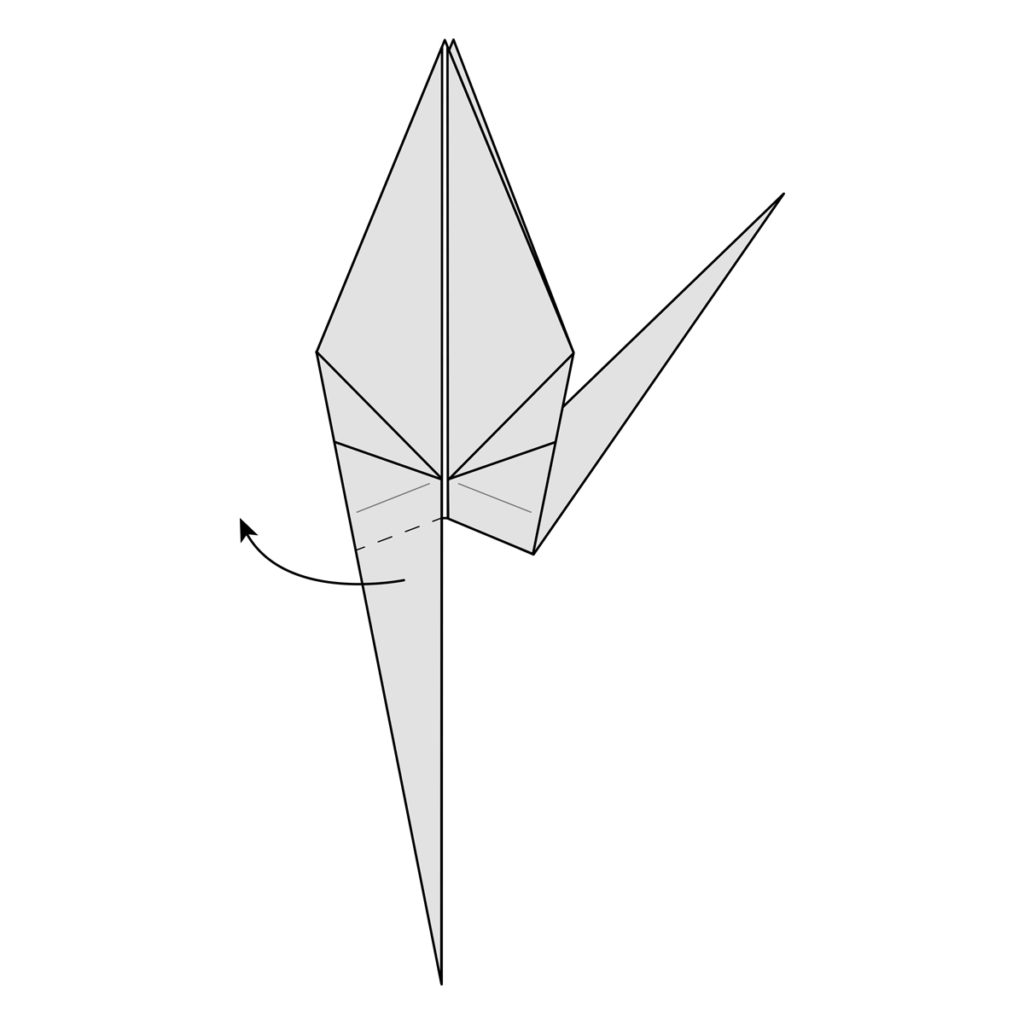
Step-45)
Now we’re going to fold the head.
Fold the long thin section of paper on the
left down along the dotted line.
Step-46) Crease this well and unfold.
Step-47)
Turn the model over so we can
repeat this on the other side.
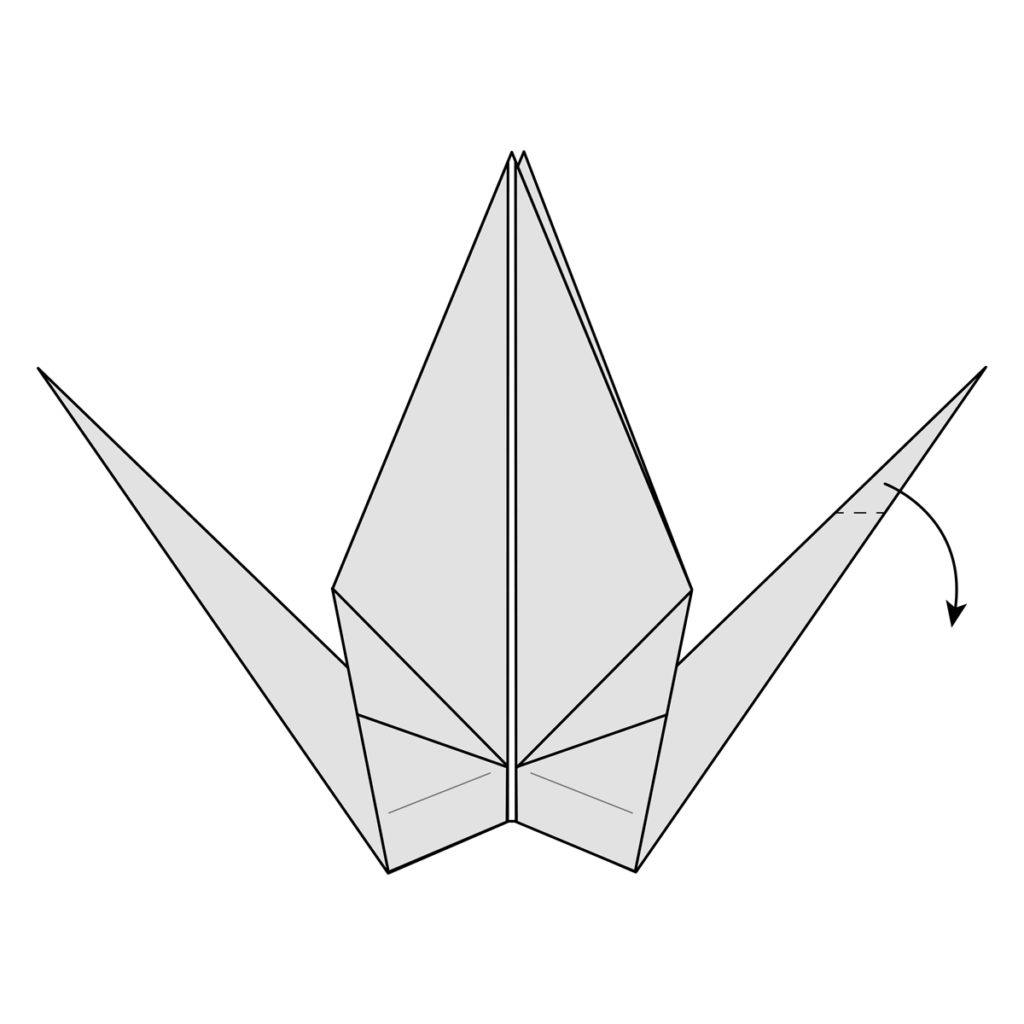
Step-48)
Fold the long thin section of paper
on the left side now down along the dotted
line. This is folded the opposite way along
the crease you already folded on the other side.
Step-49) Crease this well and unfold.
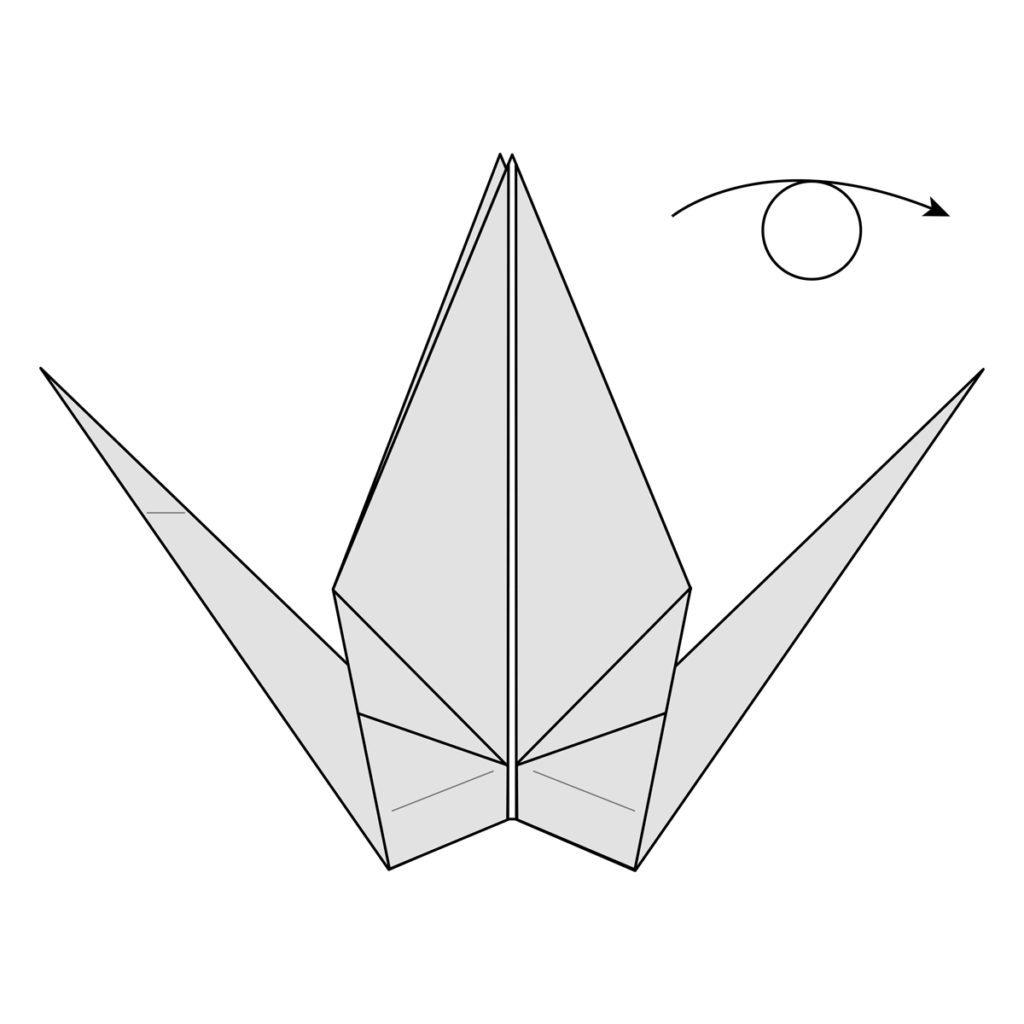
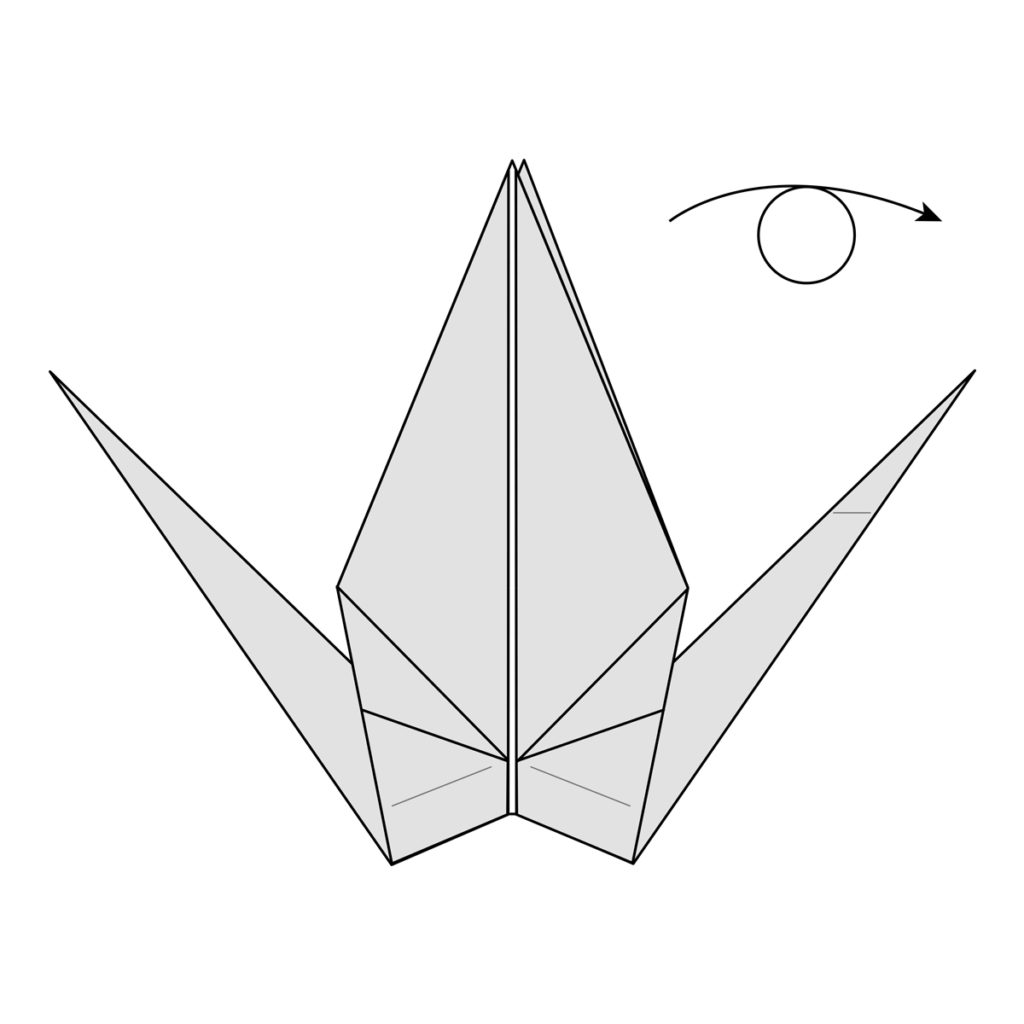
Step-50)
Turn the model over again so it’s
facing the way it was before.
Step-51)
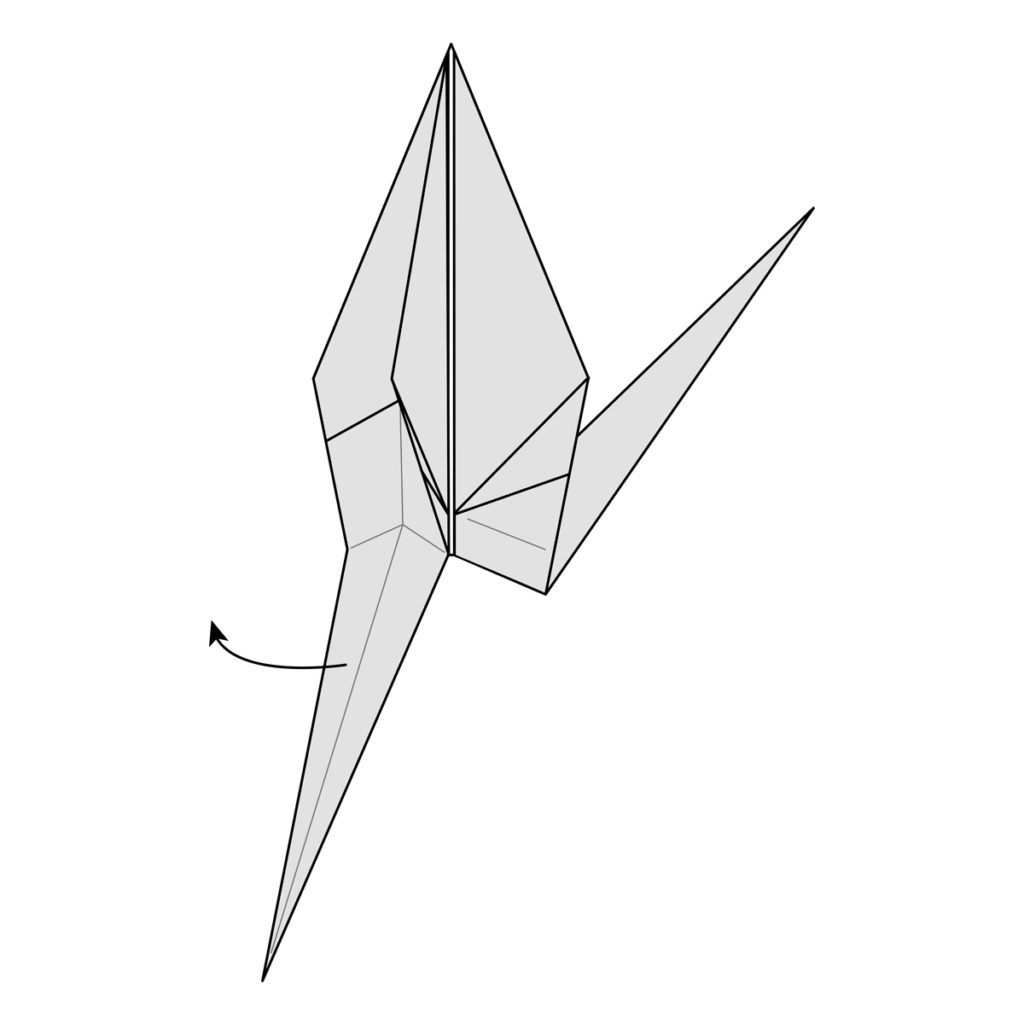
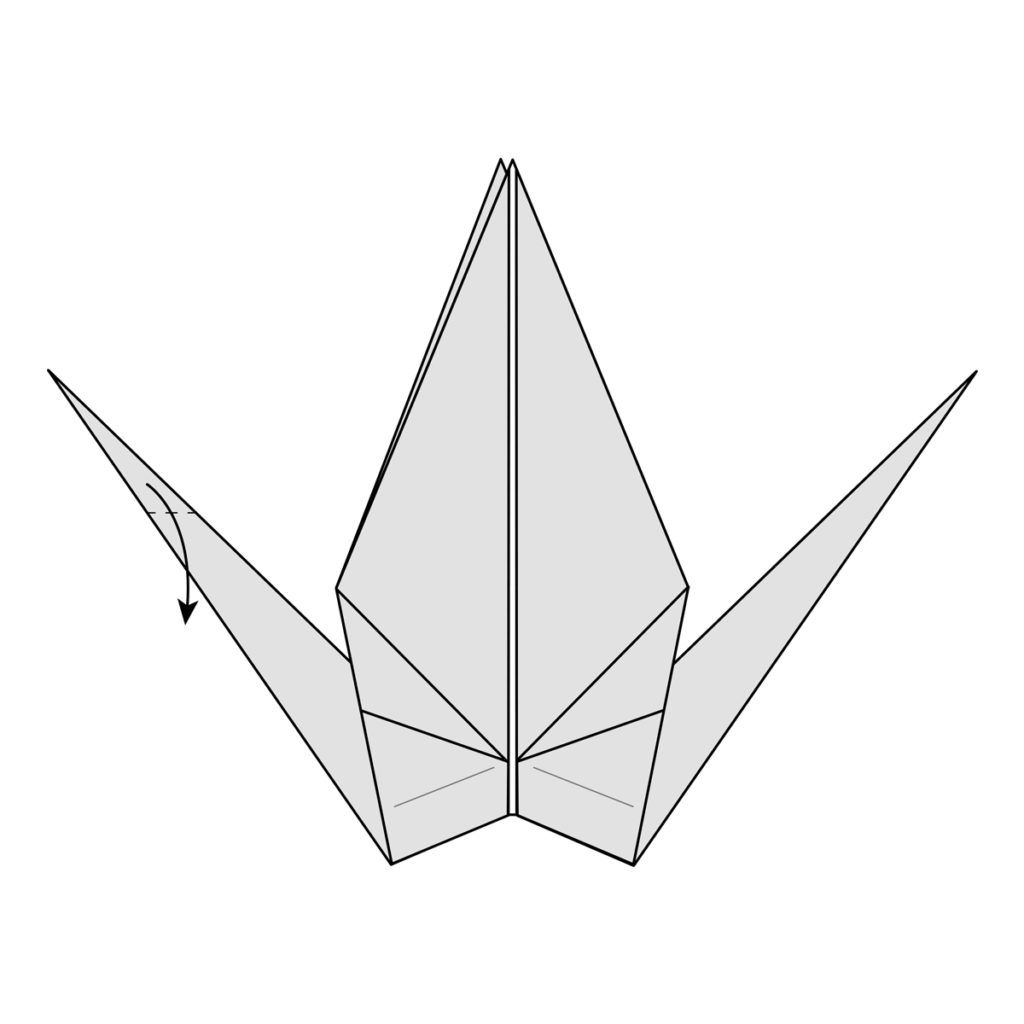
Fold the head by making an inside
reverse fold along the creases you made
in the previous couple of steps. The head
is then folded inside the neck.
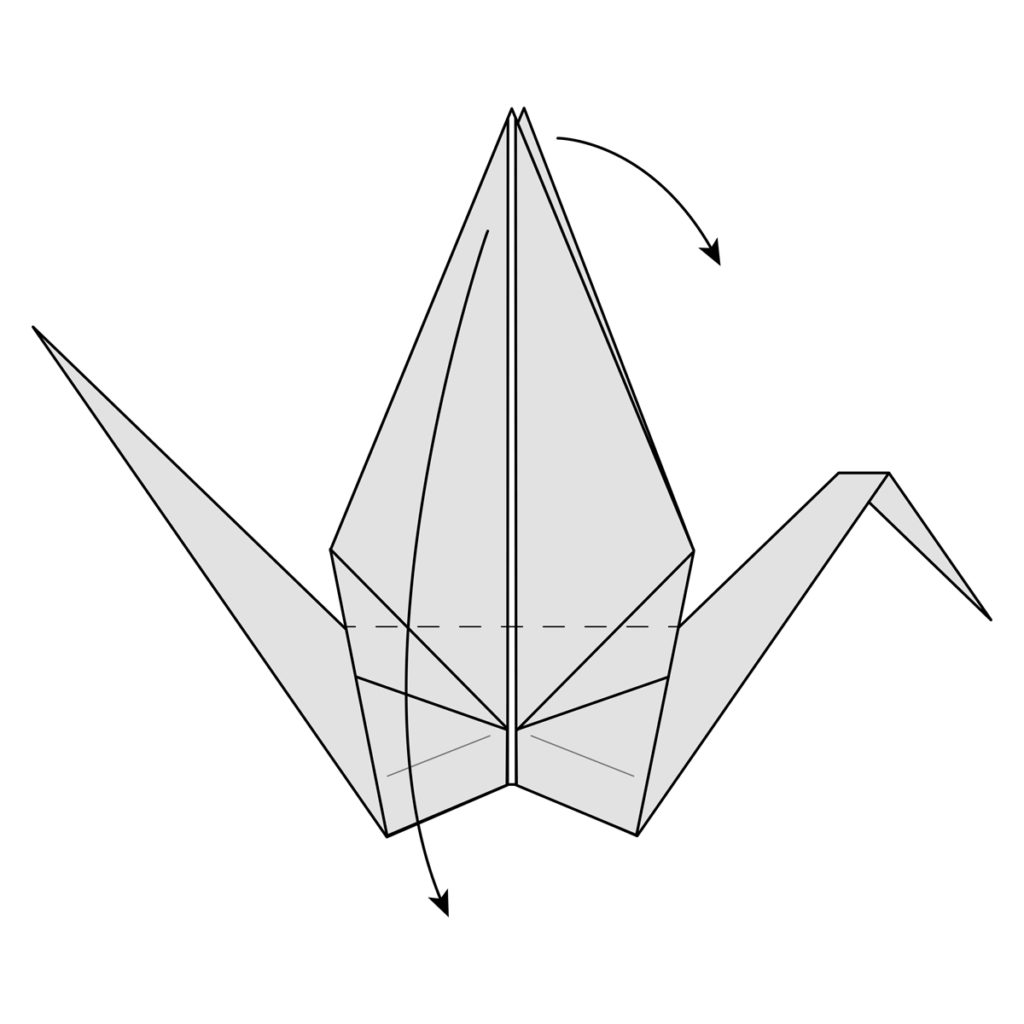
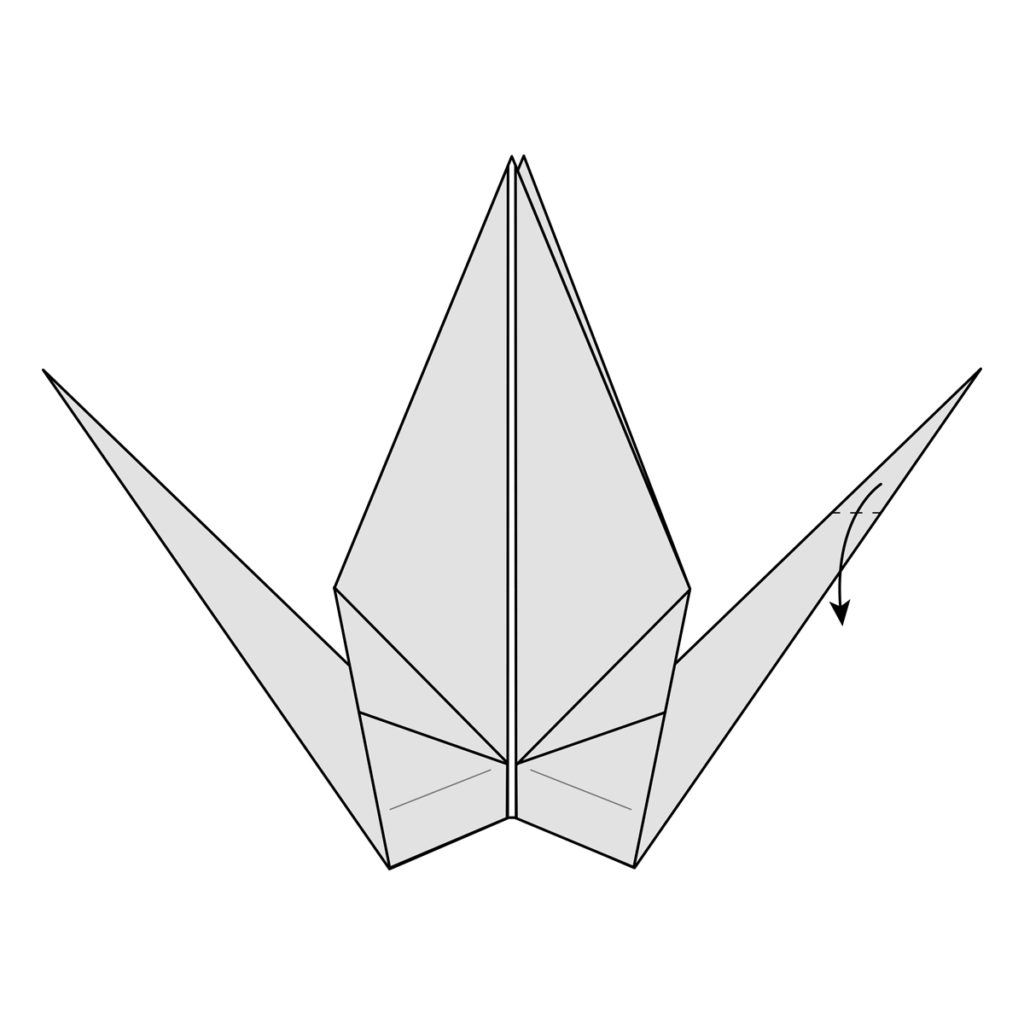
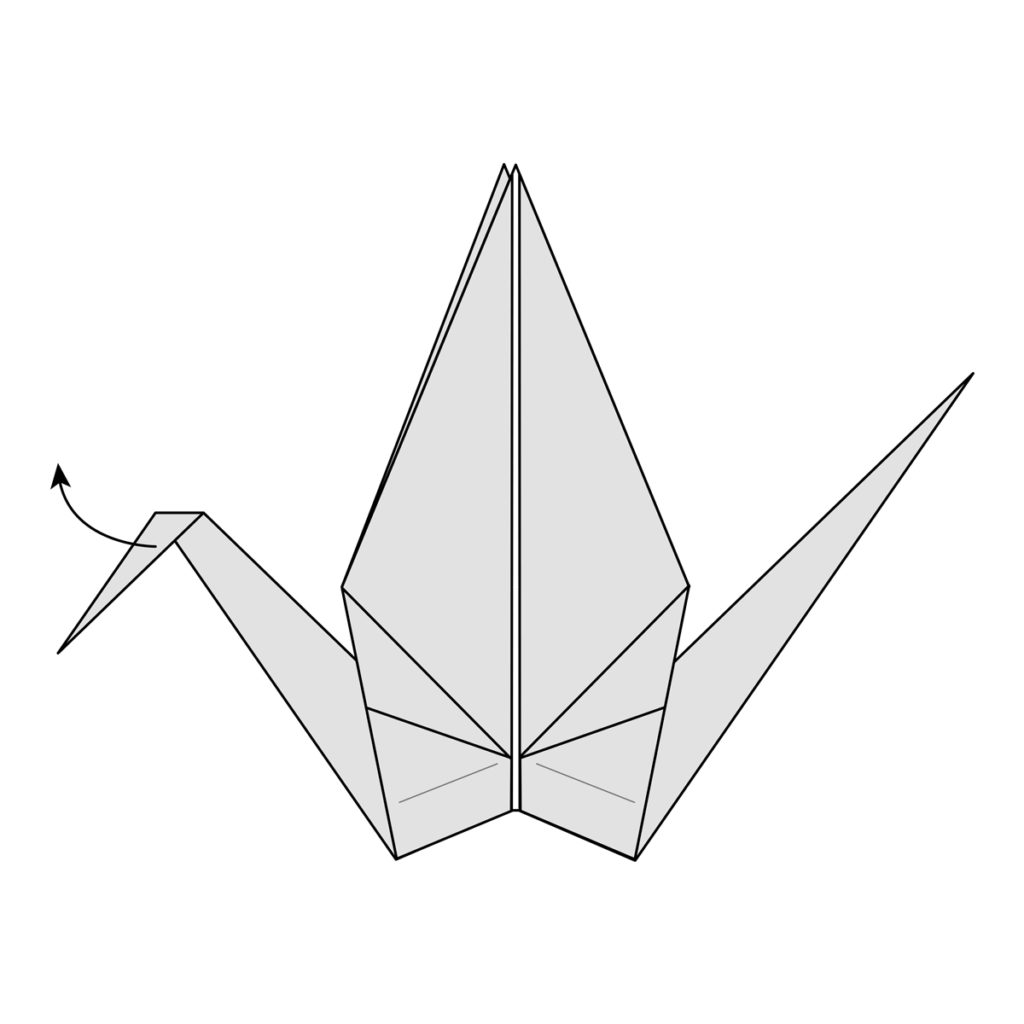
Step-52)
Fold down the wings on
both sides along the dotted line.
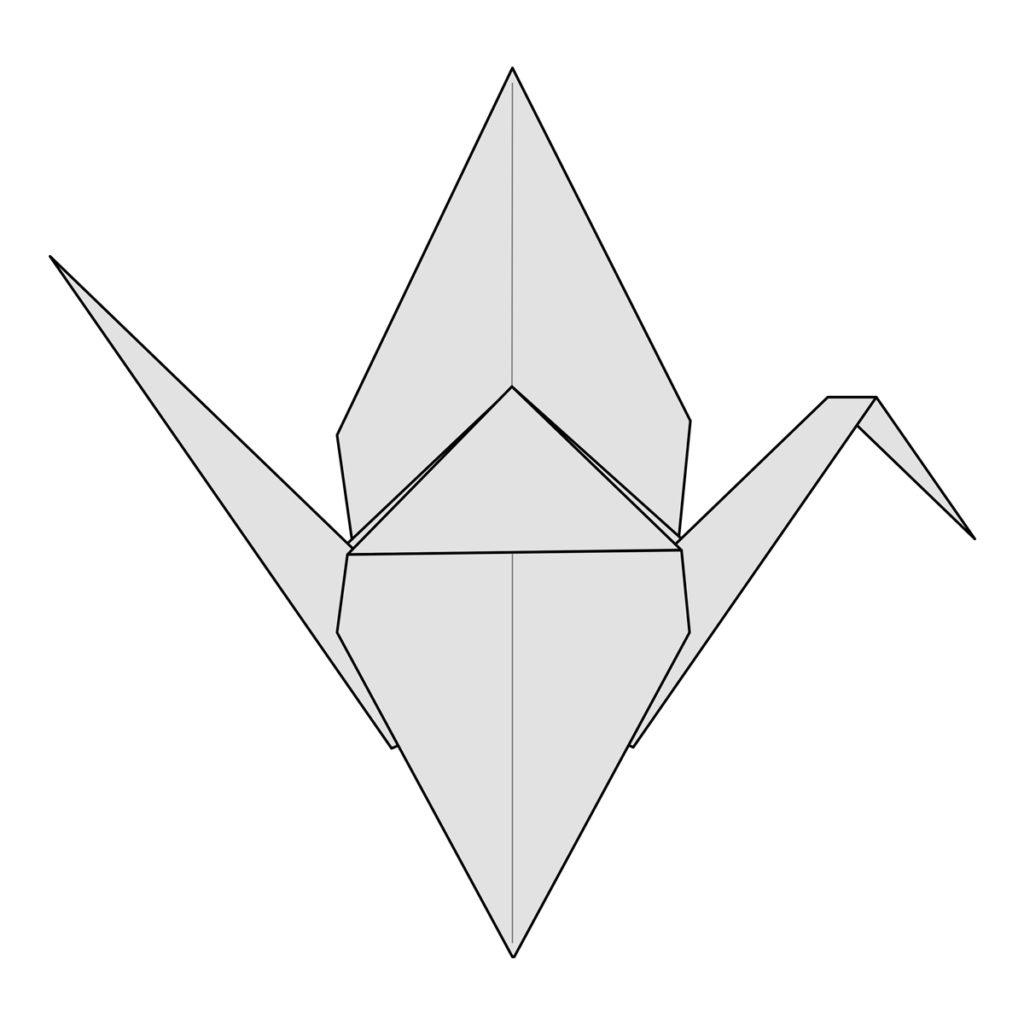
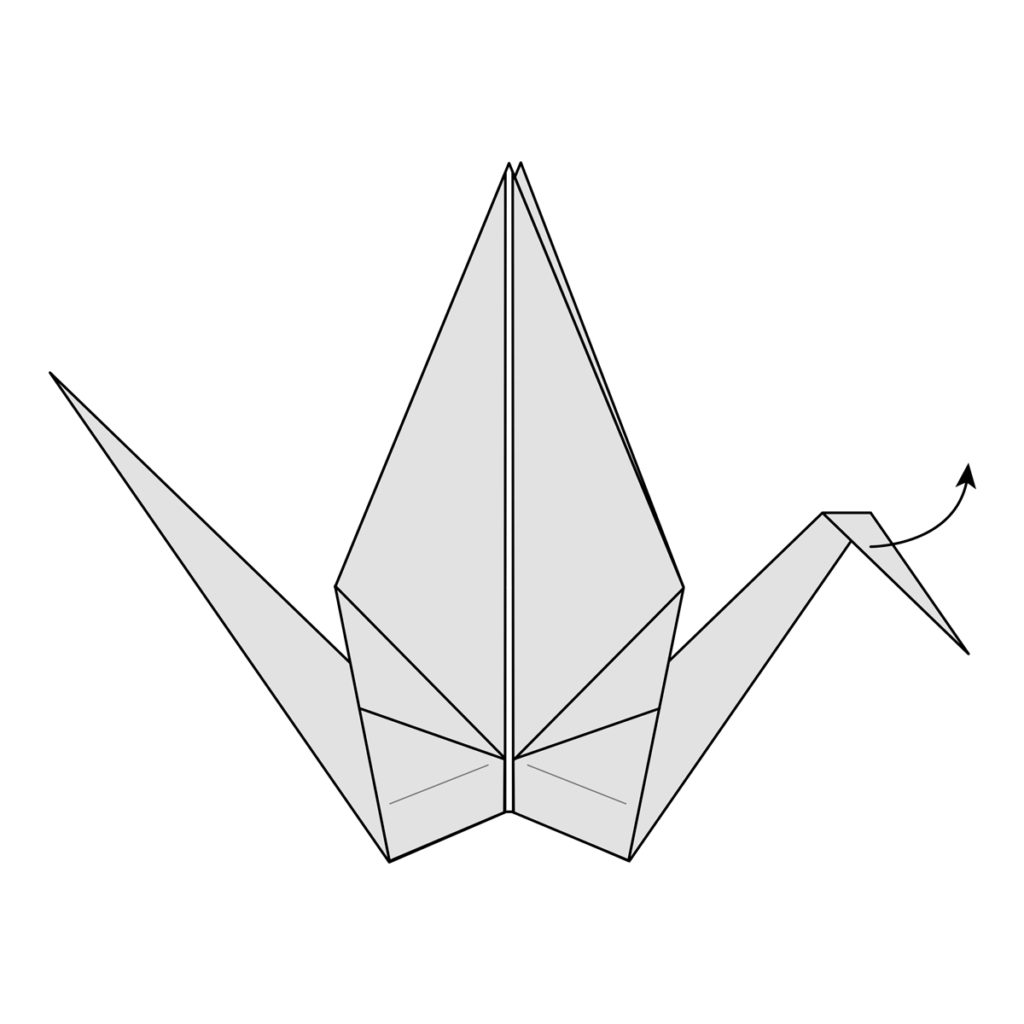
The completed origami crane, good job!

Our Purpose Is To Sustainably Make the Pleasure and Benefits of sports Accessible to the Many.
Copyright-2021 Abdul Haq