How to Fold an Easy Origami Jumping Frog
These easy to follow instructions will show you how to fold a traditional origami jumping frog. This frog can actually jump pretty far if you press down on it’s back! When you fold this model the paper will get pretty thick near the end. Don’t worry if your folds aren’t completely perfect. The frog will still look good in the end and it’ll still jump.
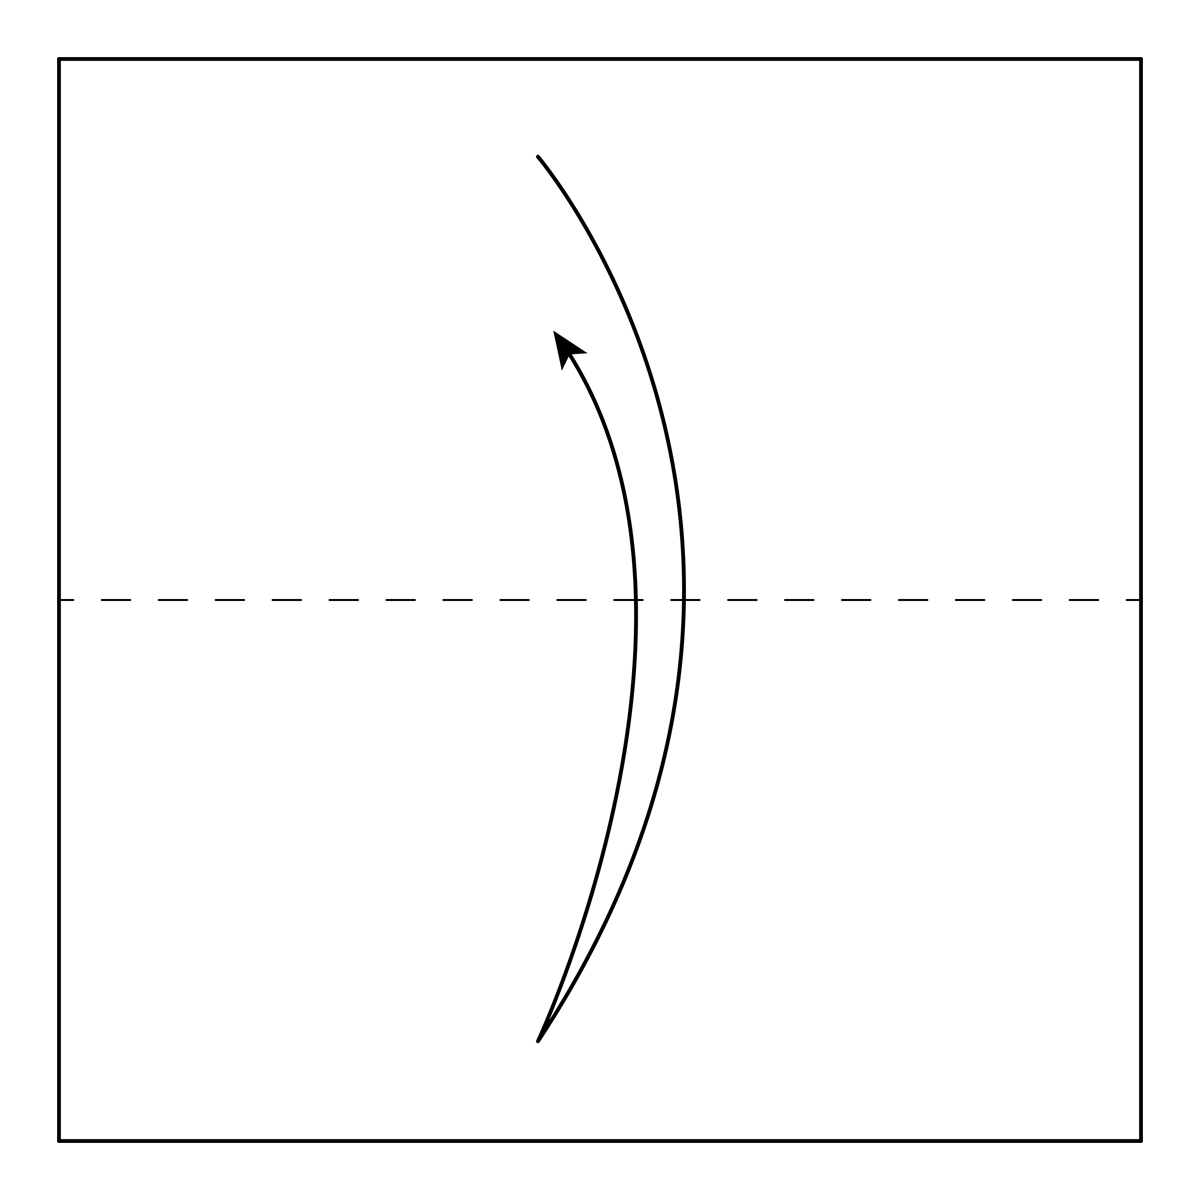
Step-1) Start with a square sheet of paper with the white side up. Fold it in half horizontally and un then unfold.
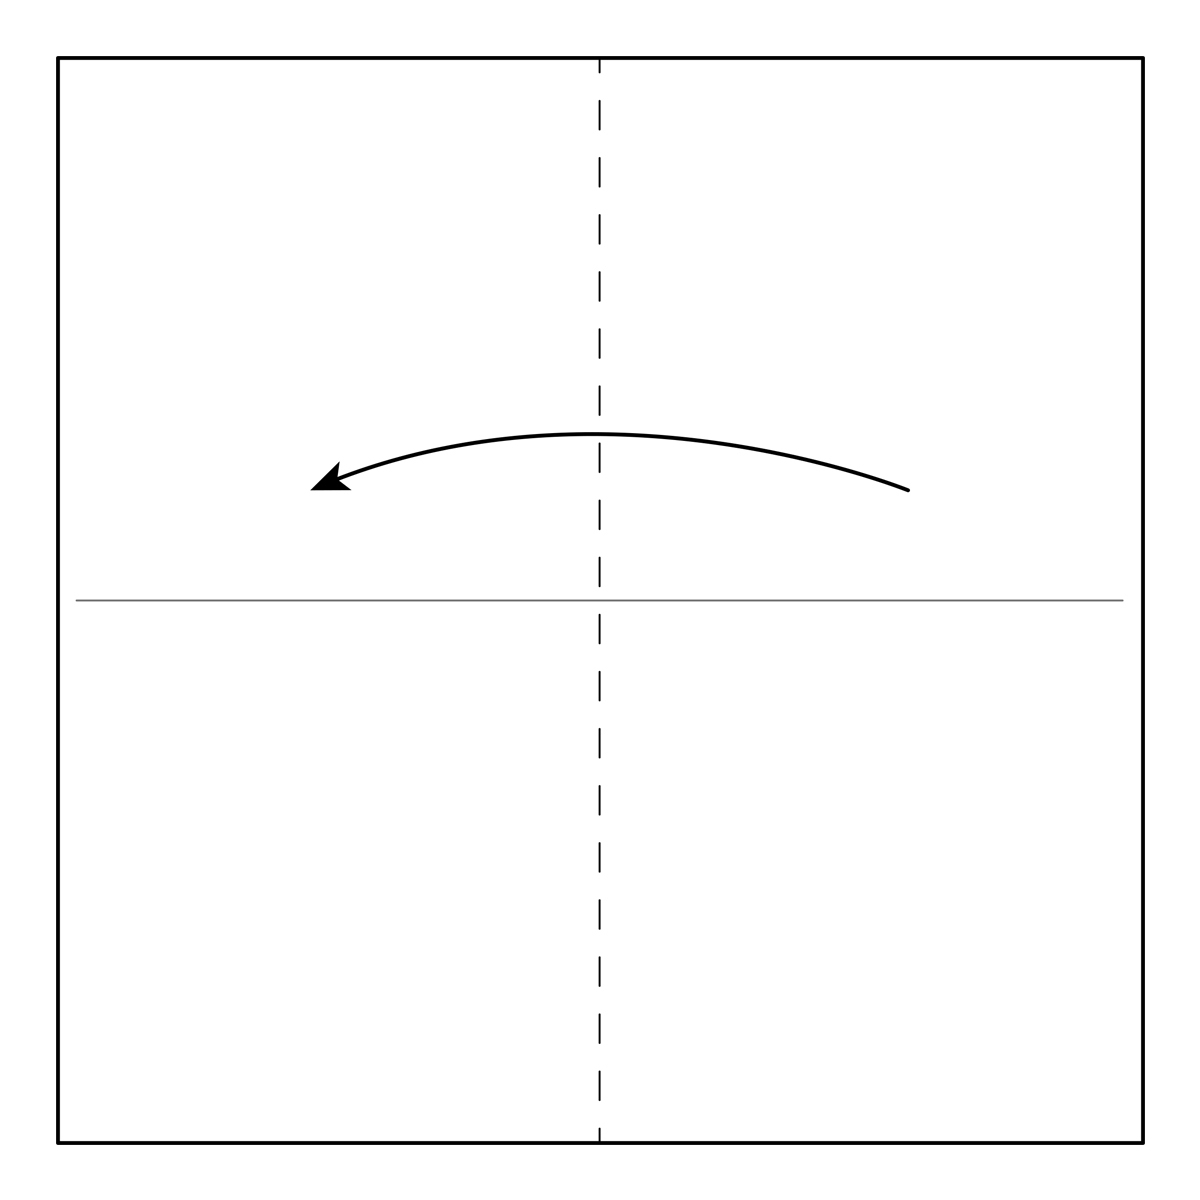
Step-2) Fold the paper in half vertically.
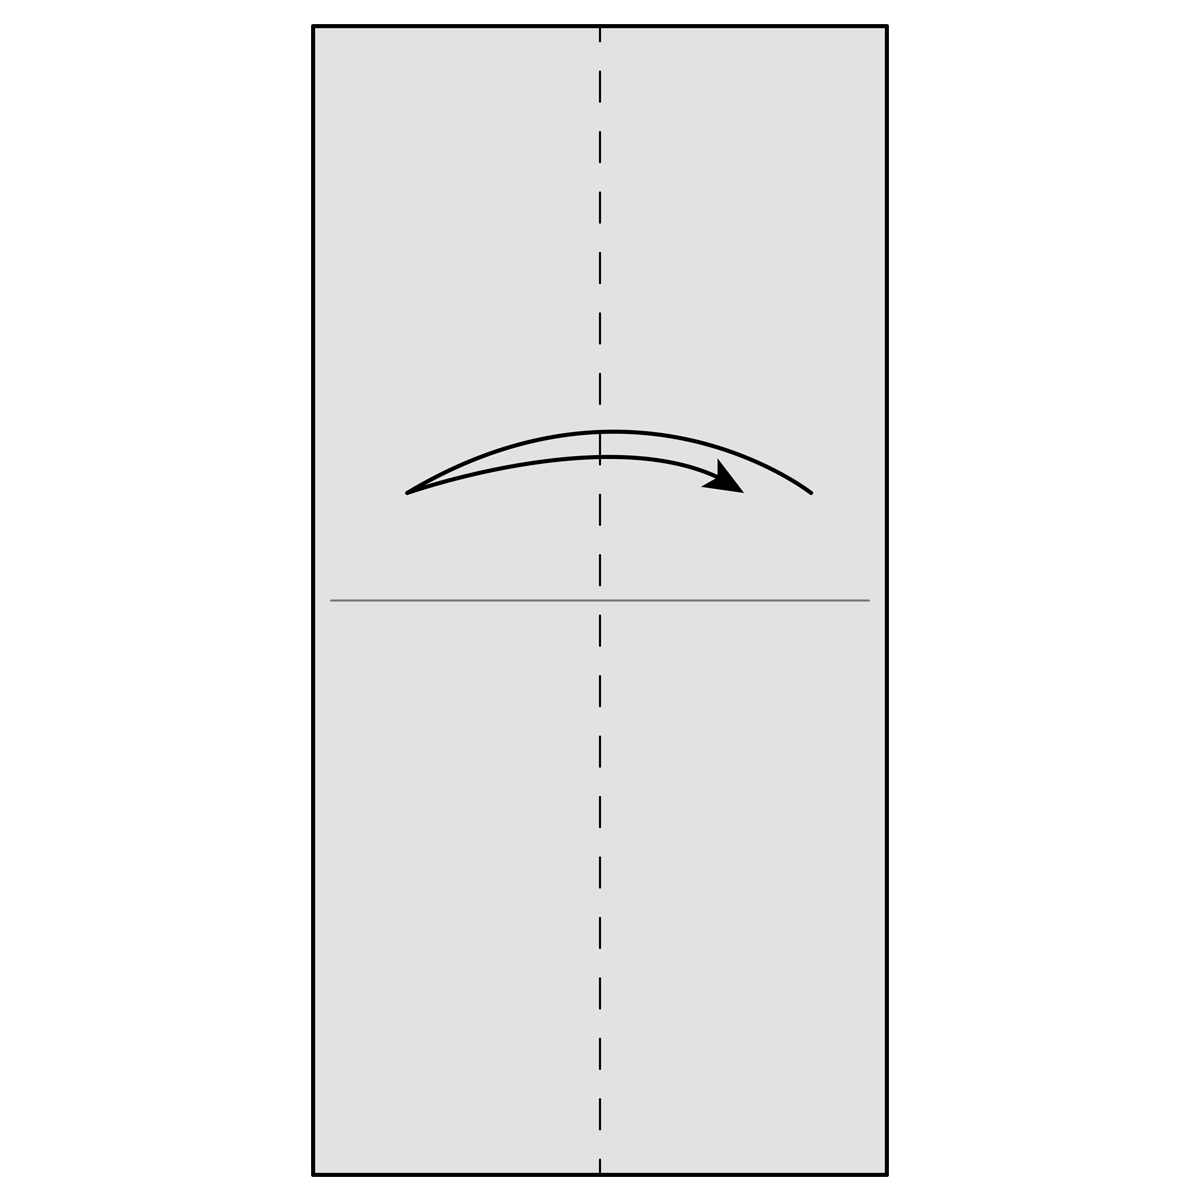
Step-3) Fold the paper in half vertically again and then unfold it. You’ll use this crease as a guide in later steps.
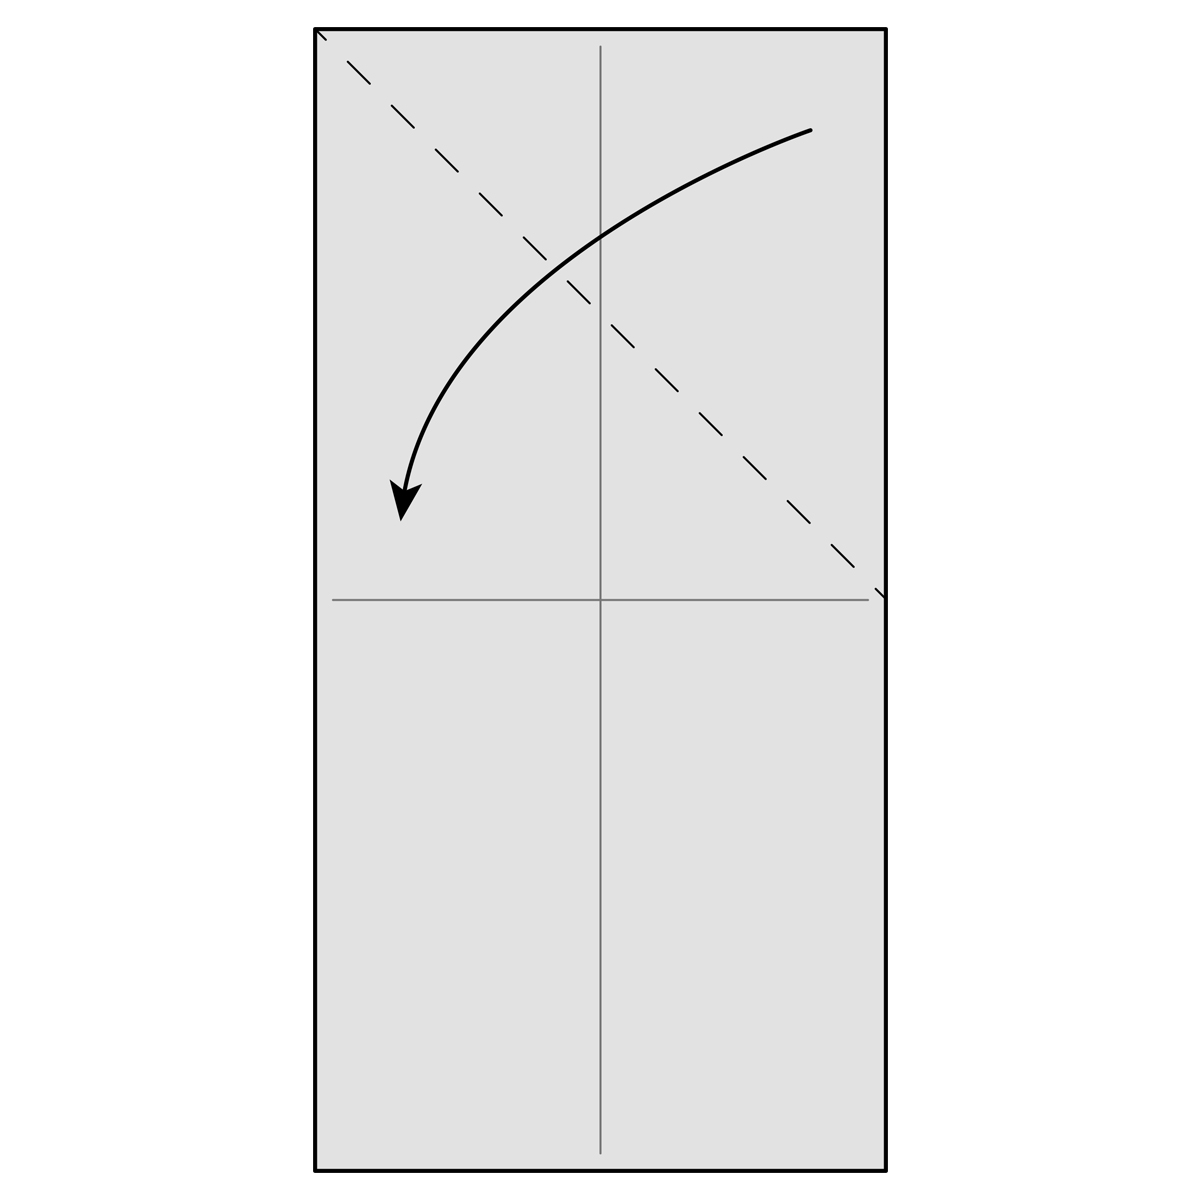
Step-4) Fold the paper down along the dotted line.
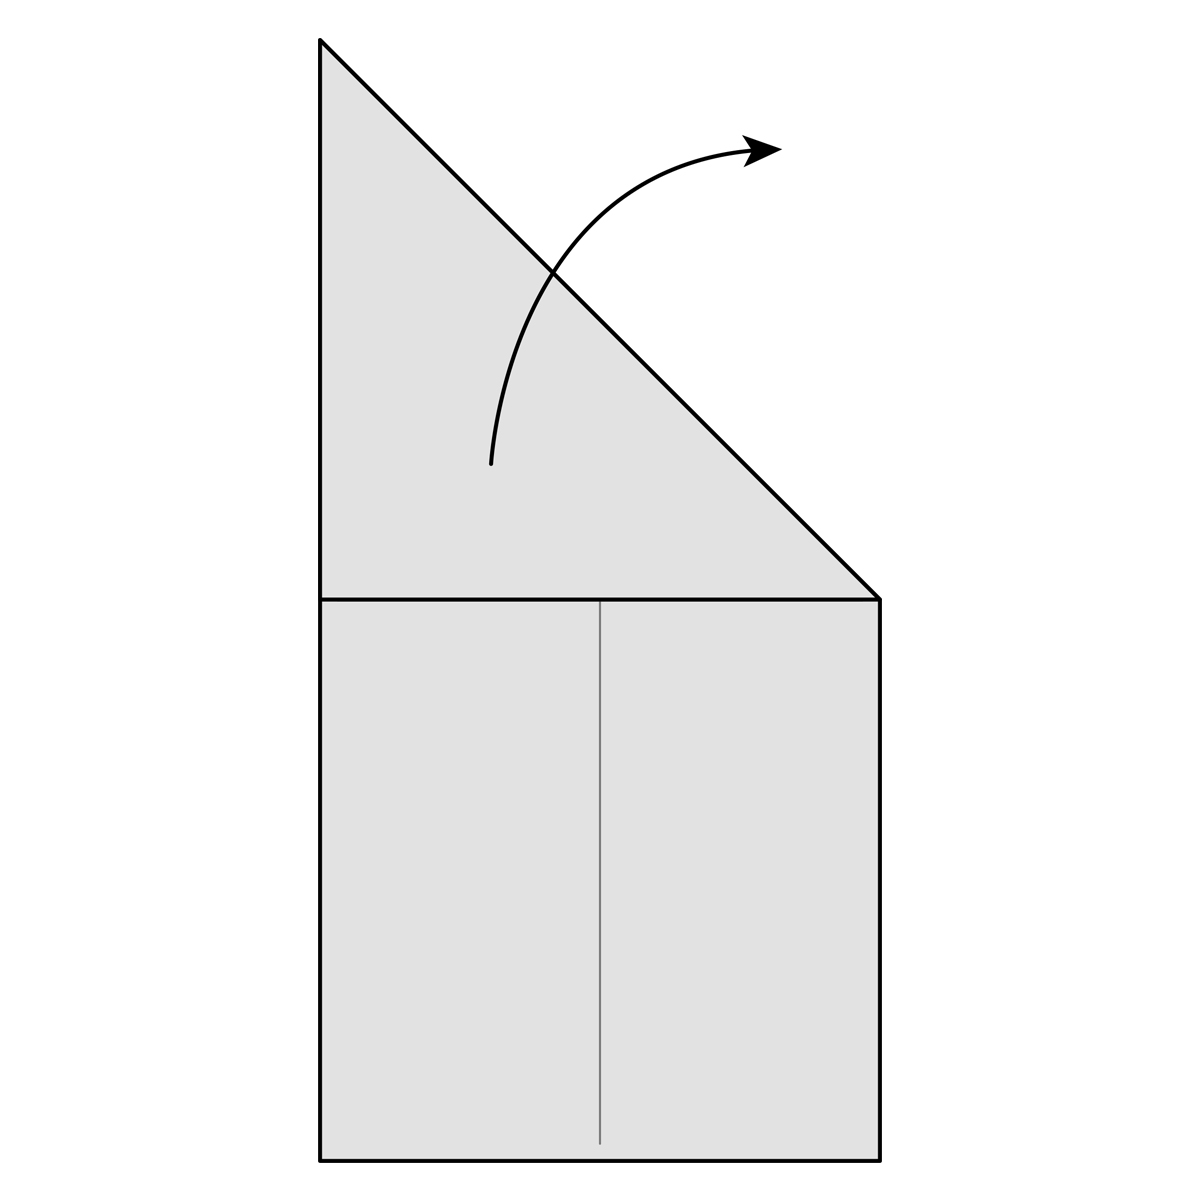
Step-5)Crease this fold well and then unfold it.
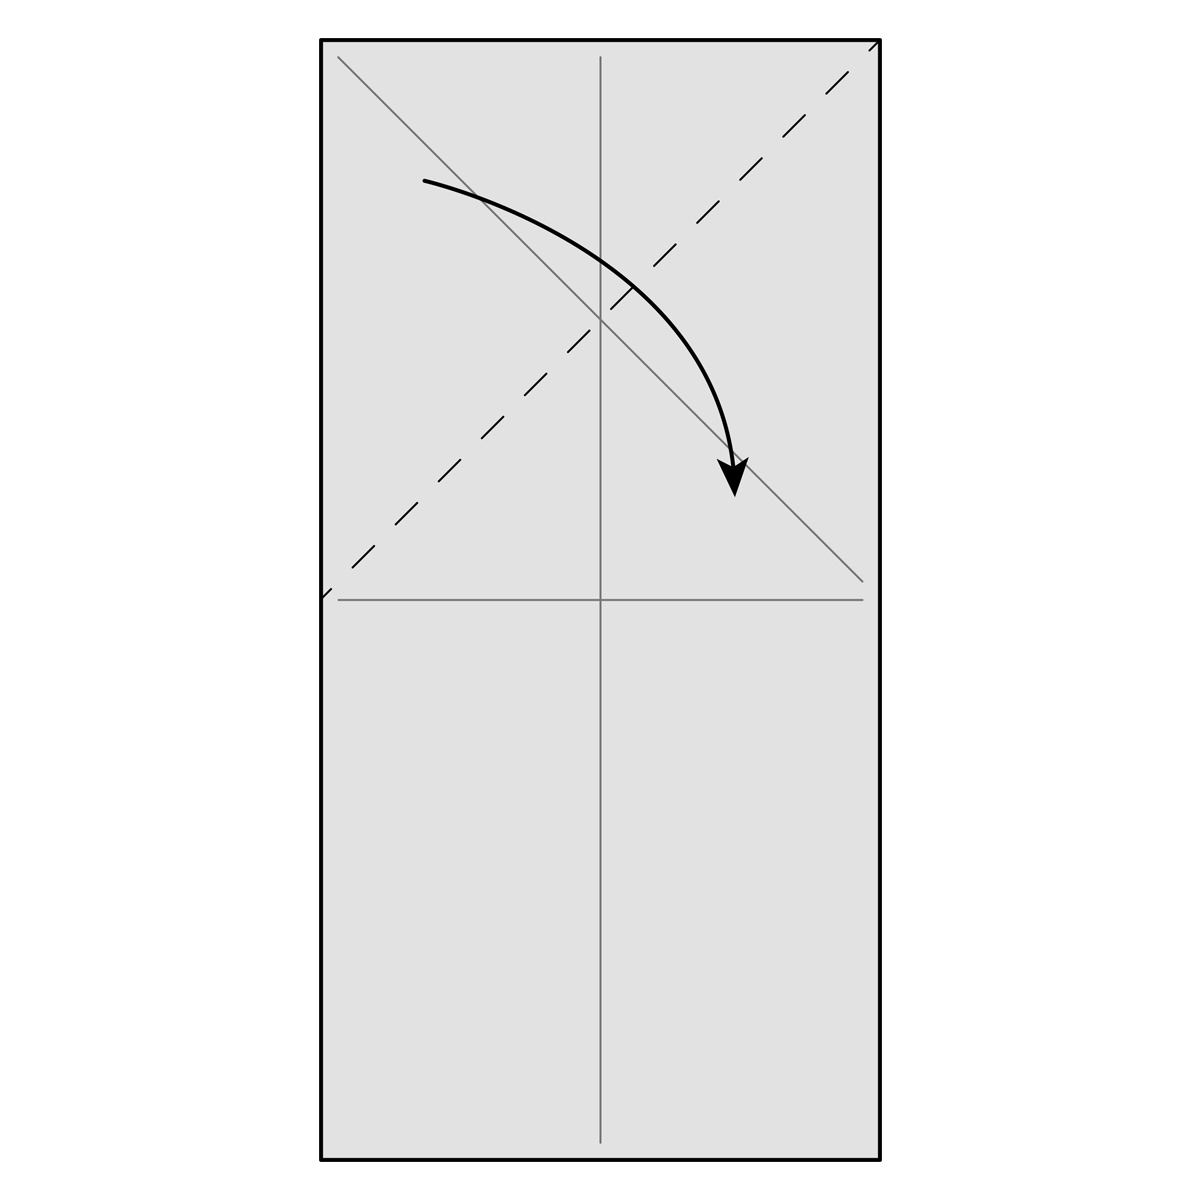
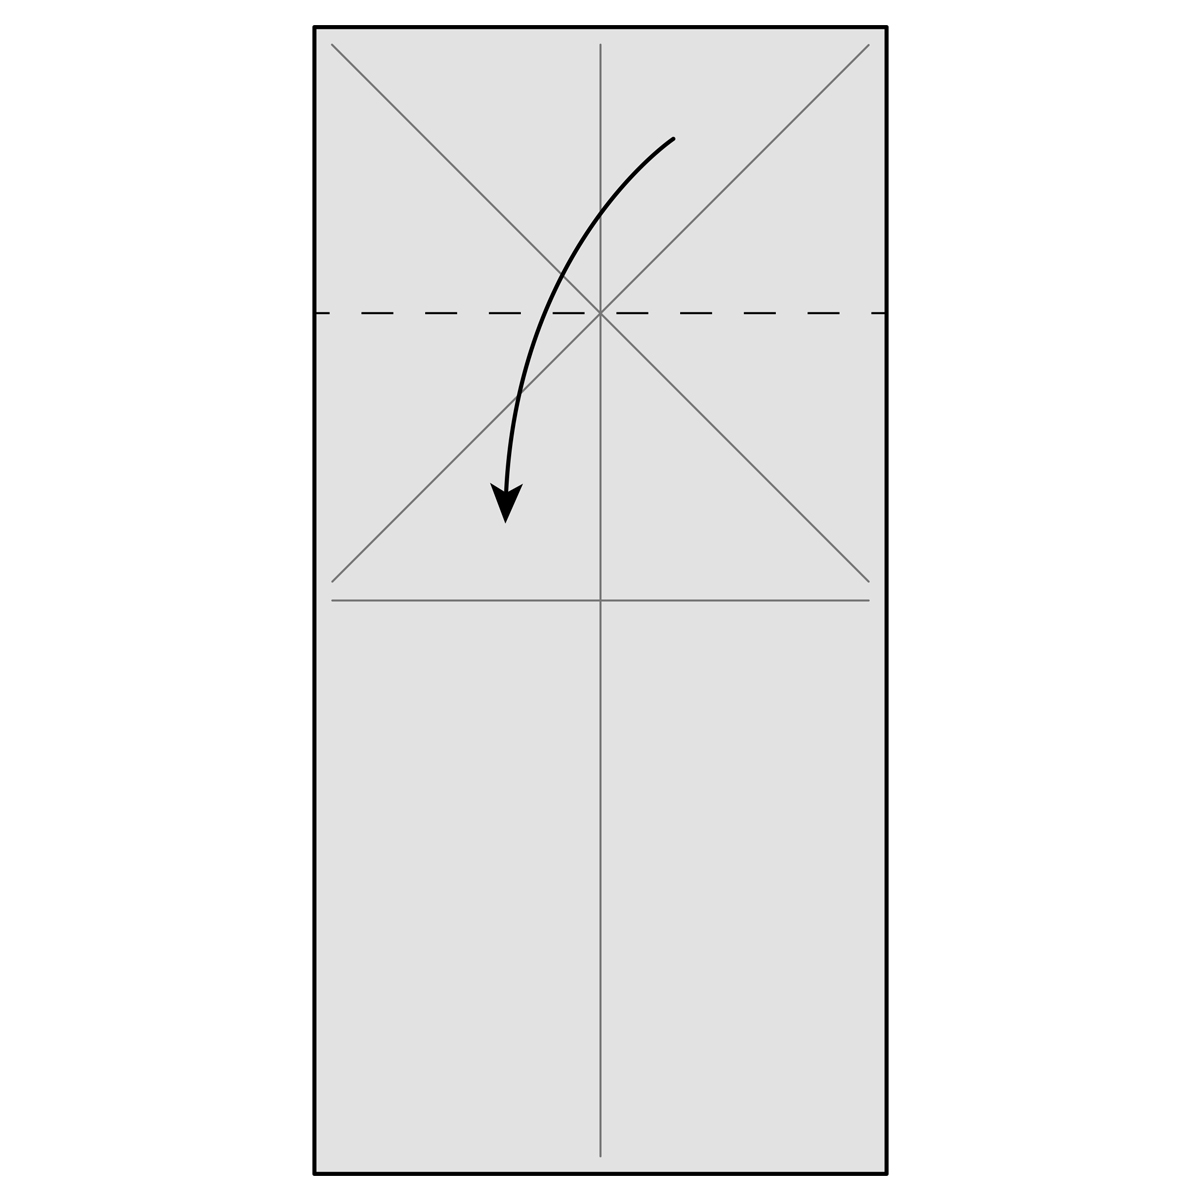
Step-6) Fold the paper down along the dotted line.
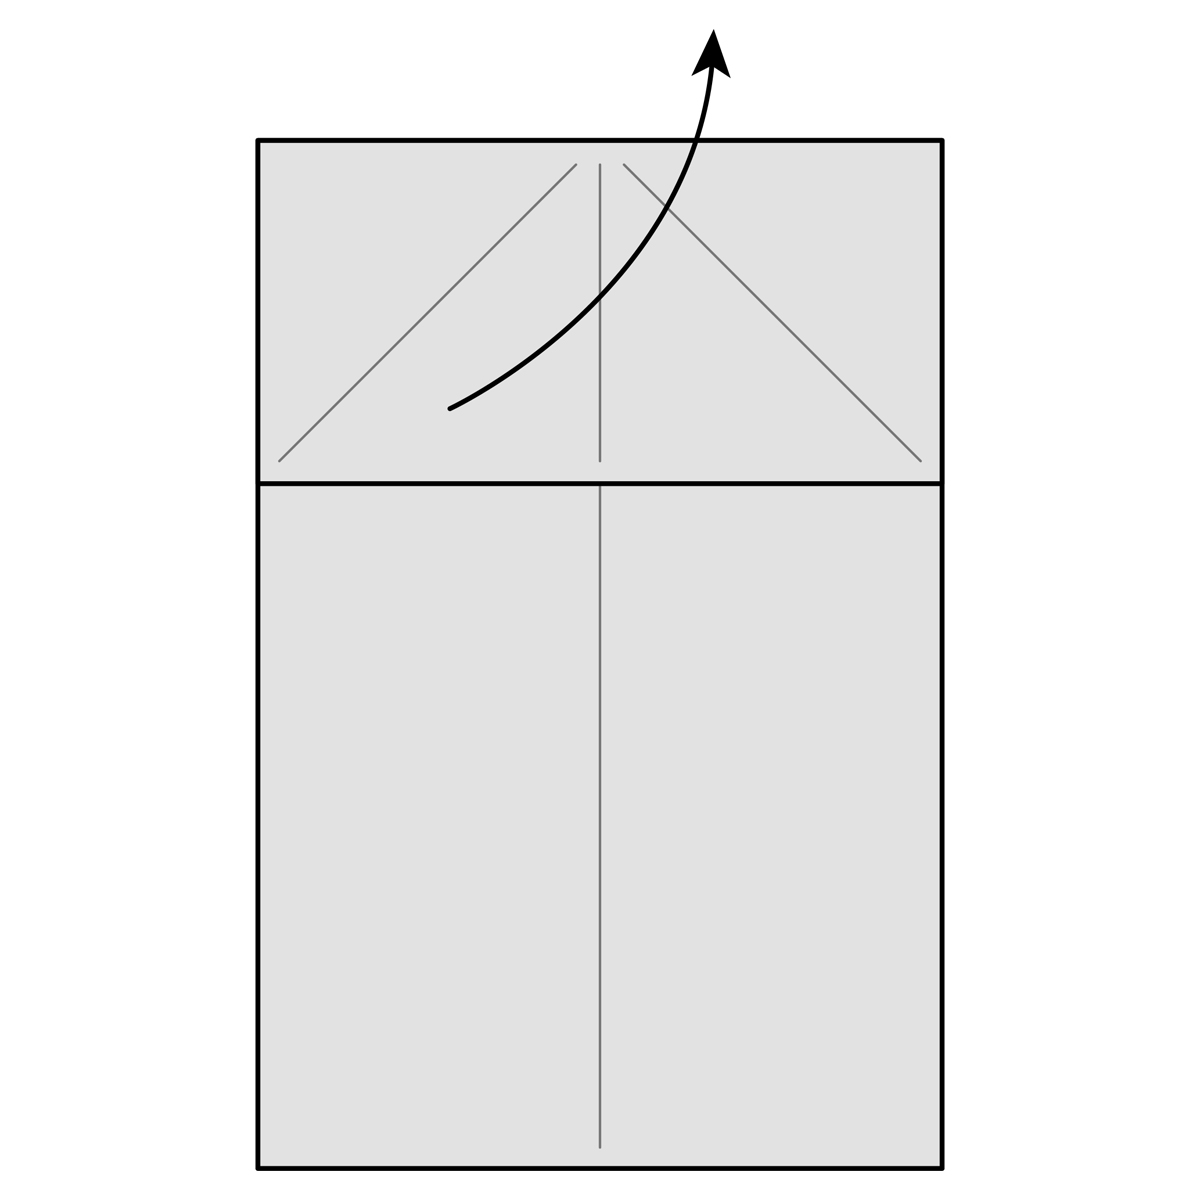
Step-7) Crease this fold well and then unfold it.
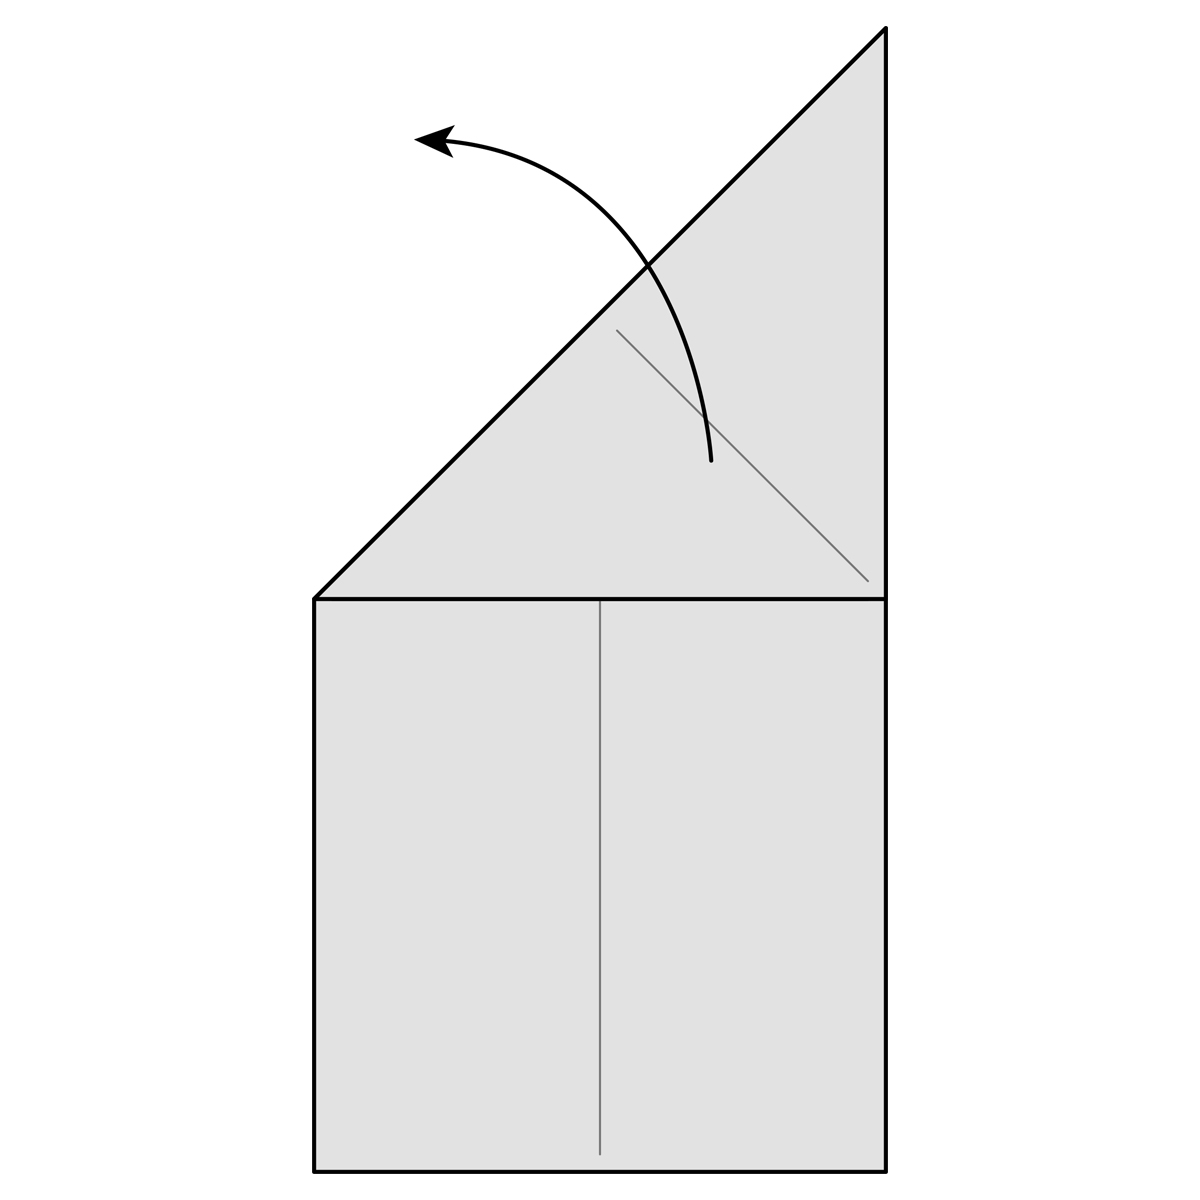
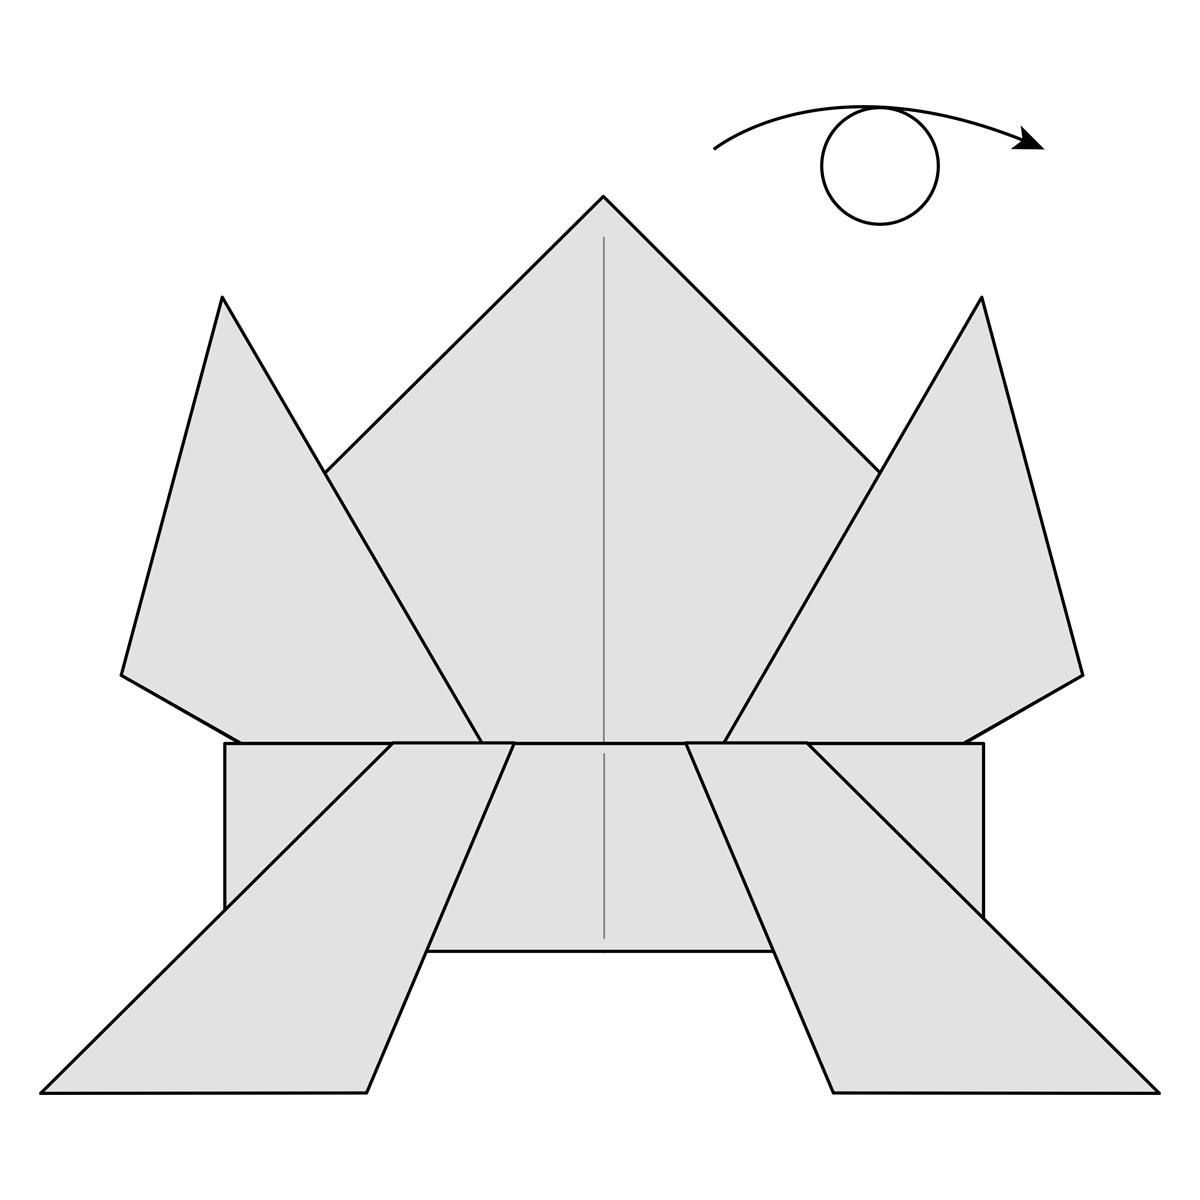
Step-8) Turn the paper over.
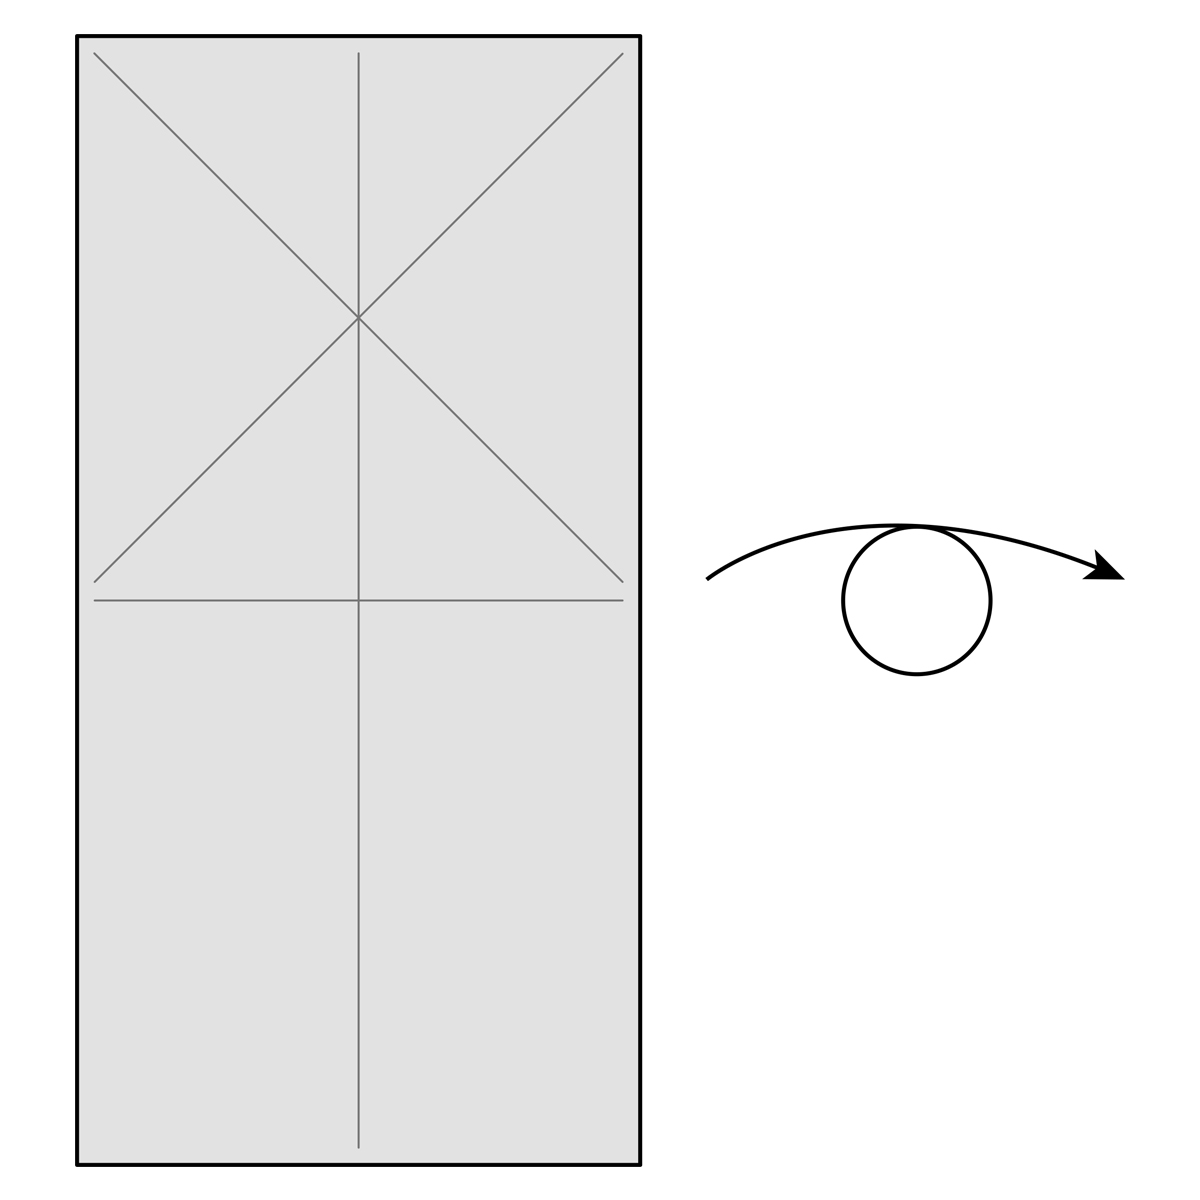
Step-9) Fold the paper down along the horizontal dotted line.
Step-10) Crease this fold well and then unfold it.
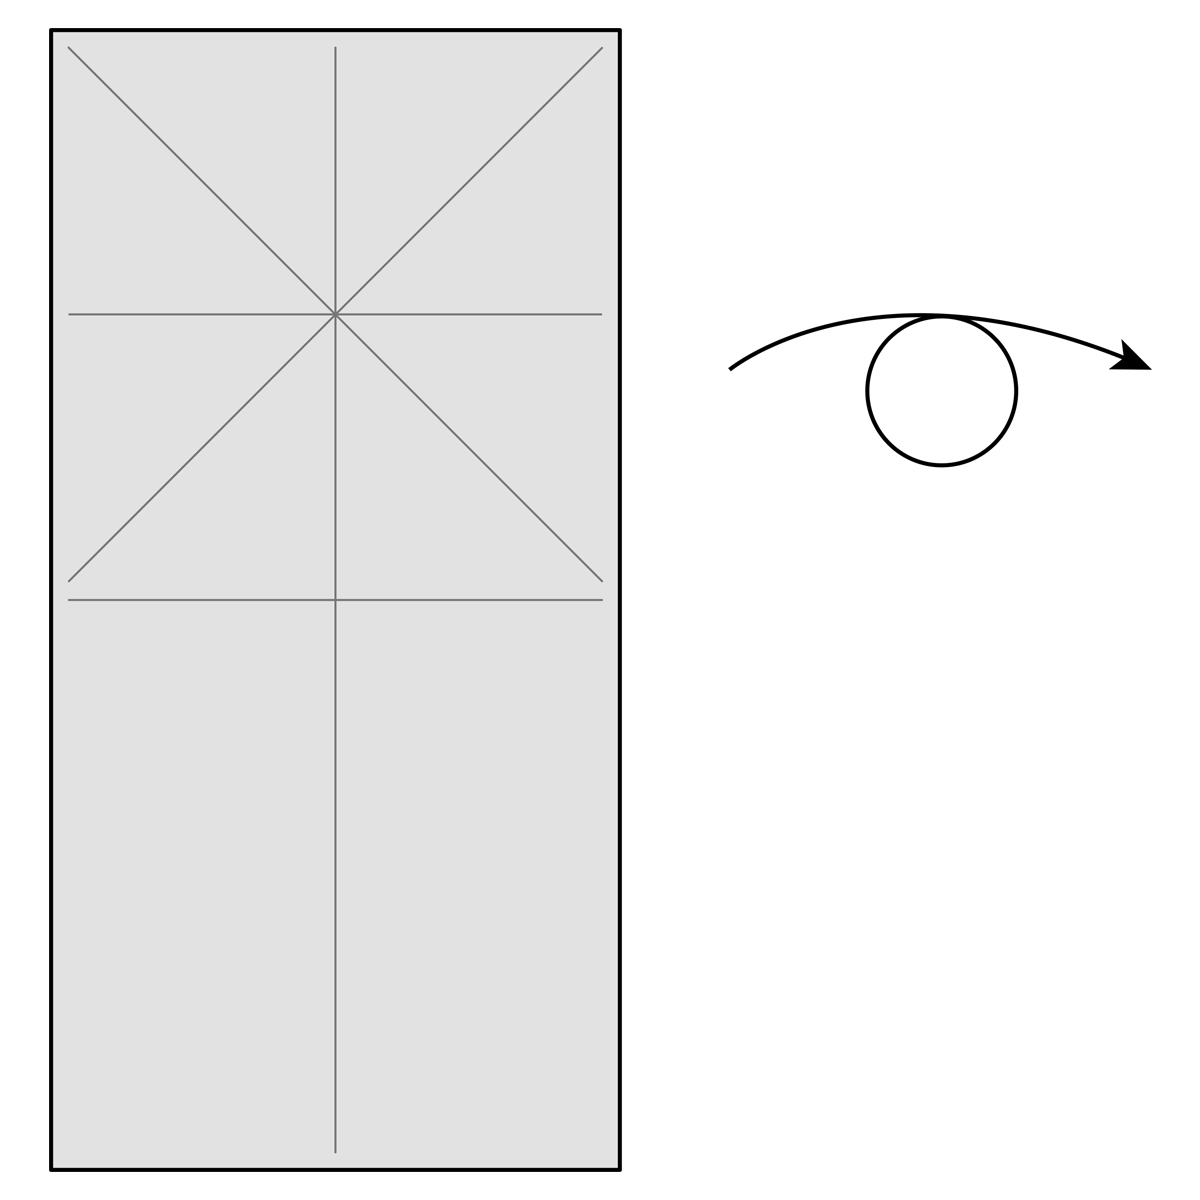
Step-11) Turn the paper back over to the way it was before.
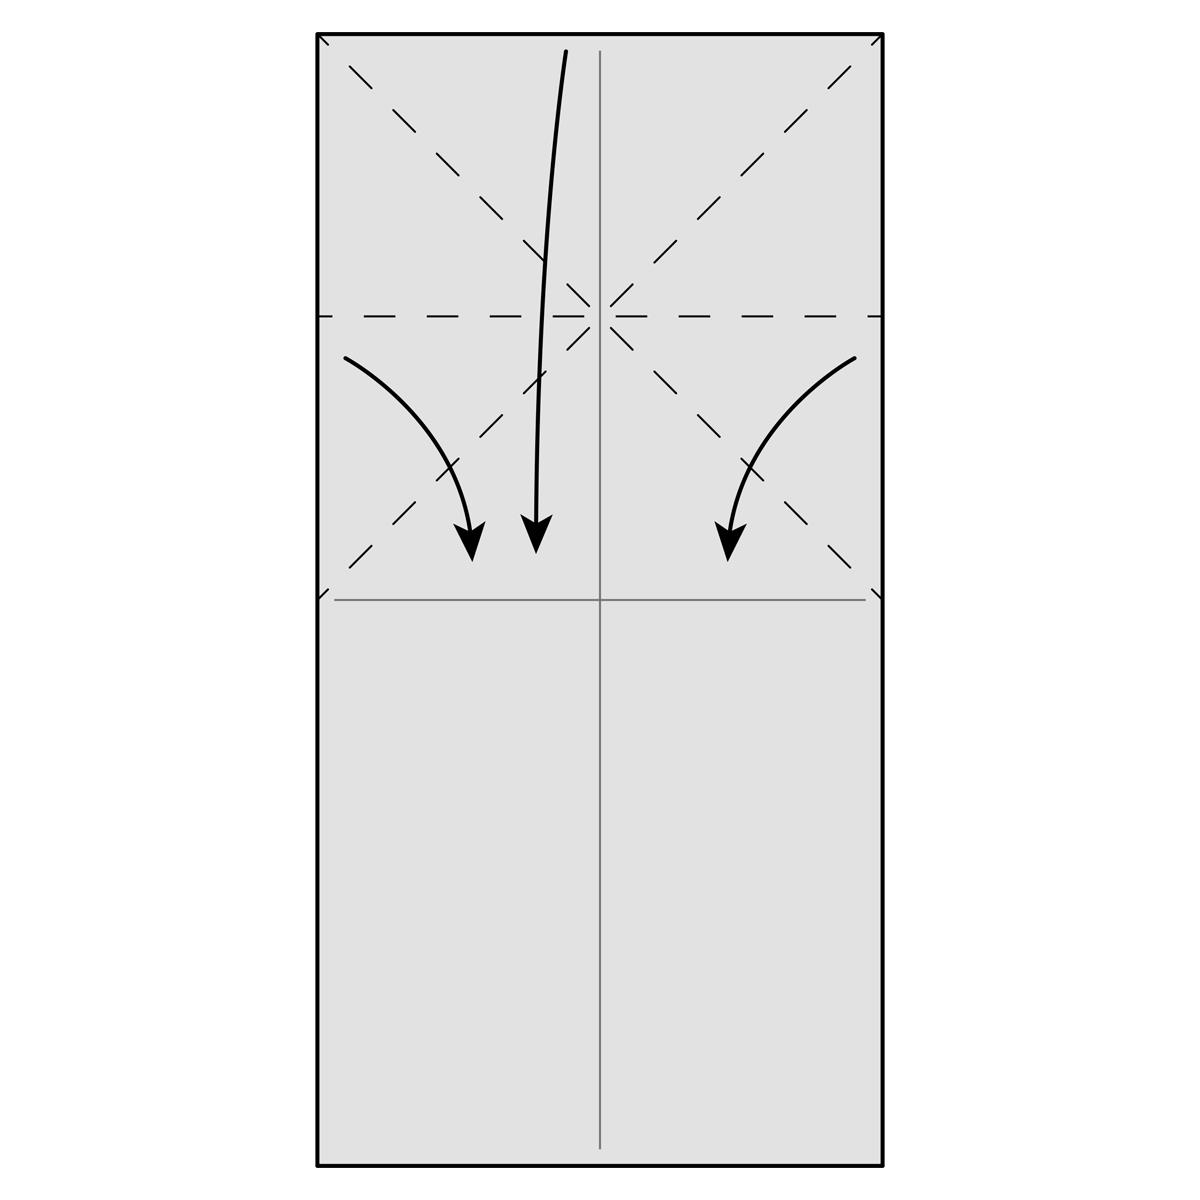
Step-12) Fold the paper down along the existing creases just like you’re making a Water Bomb Base.
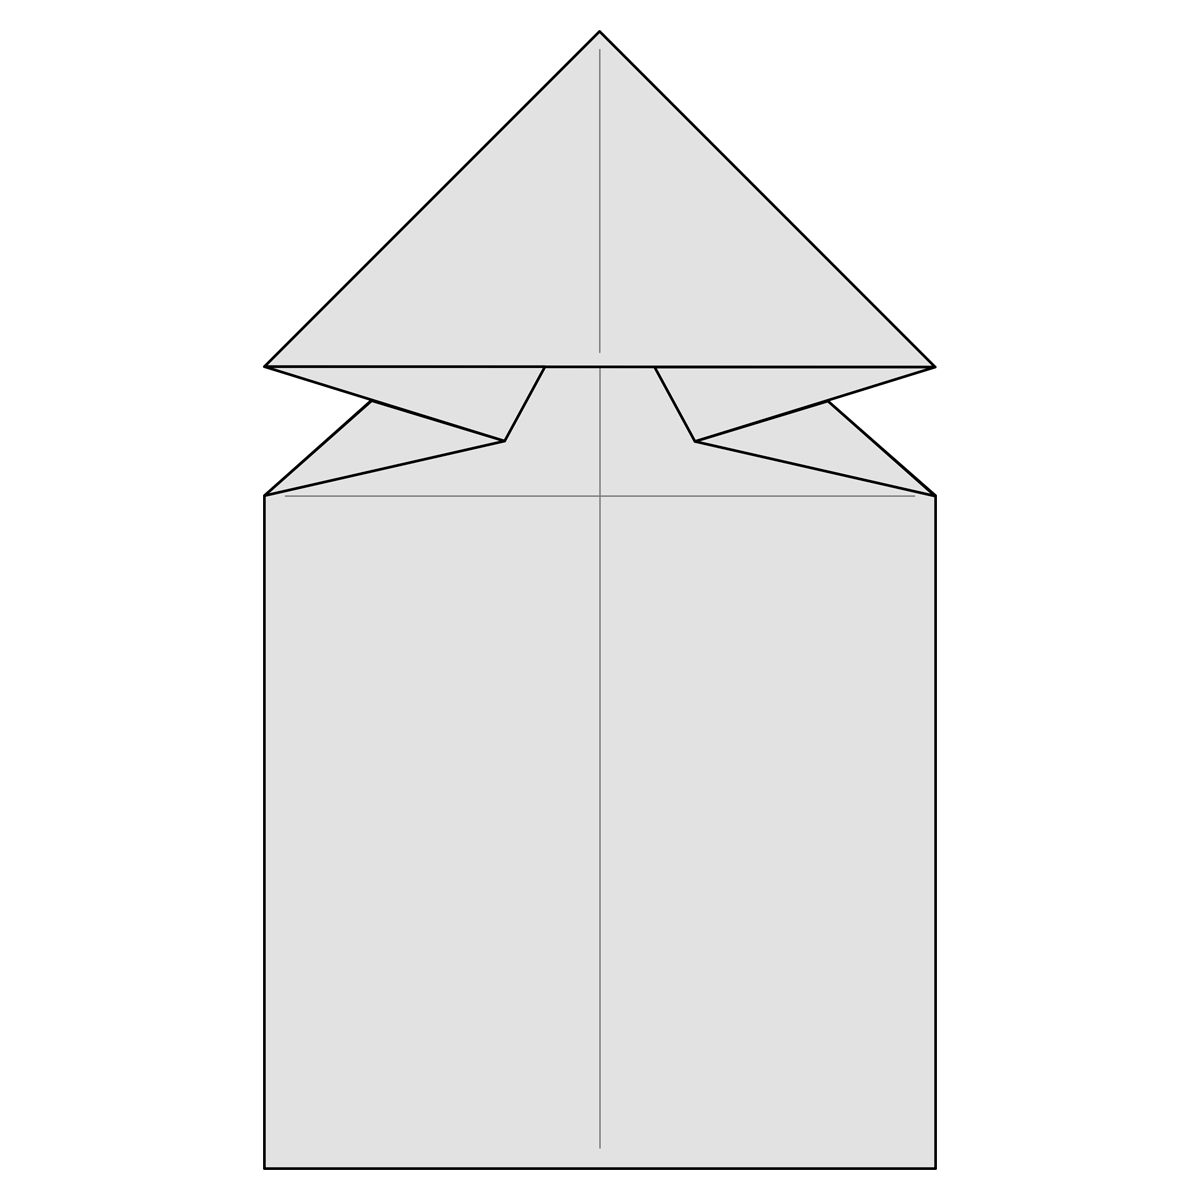
Step-13) Push everything down flat.
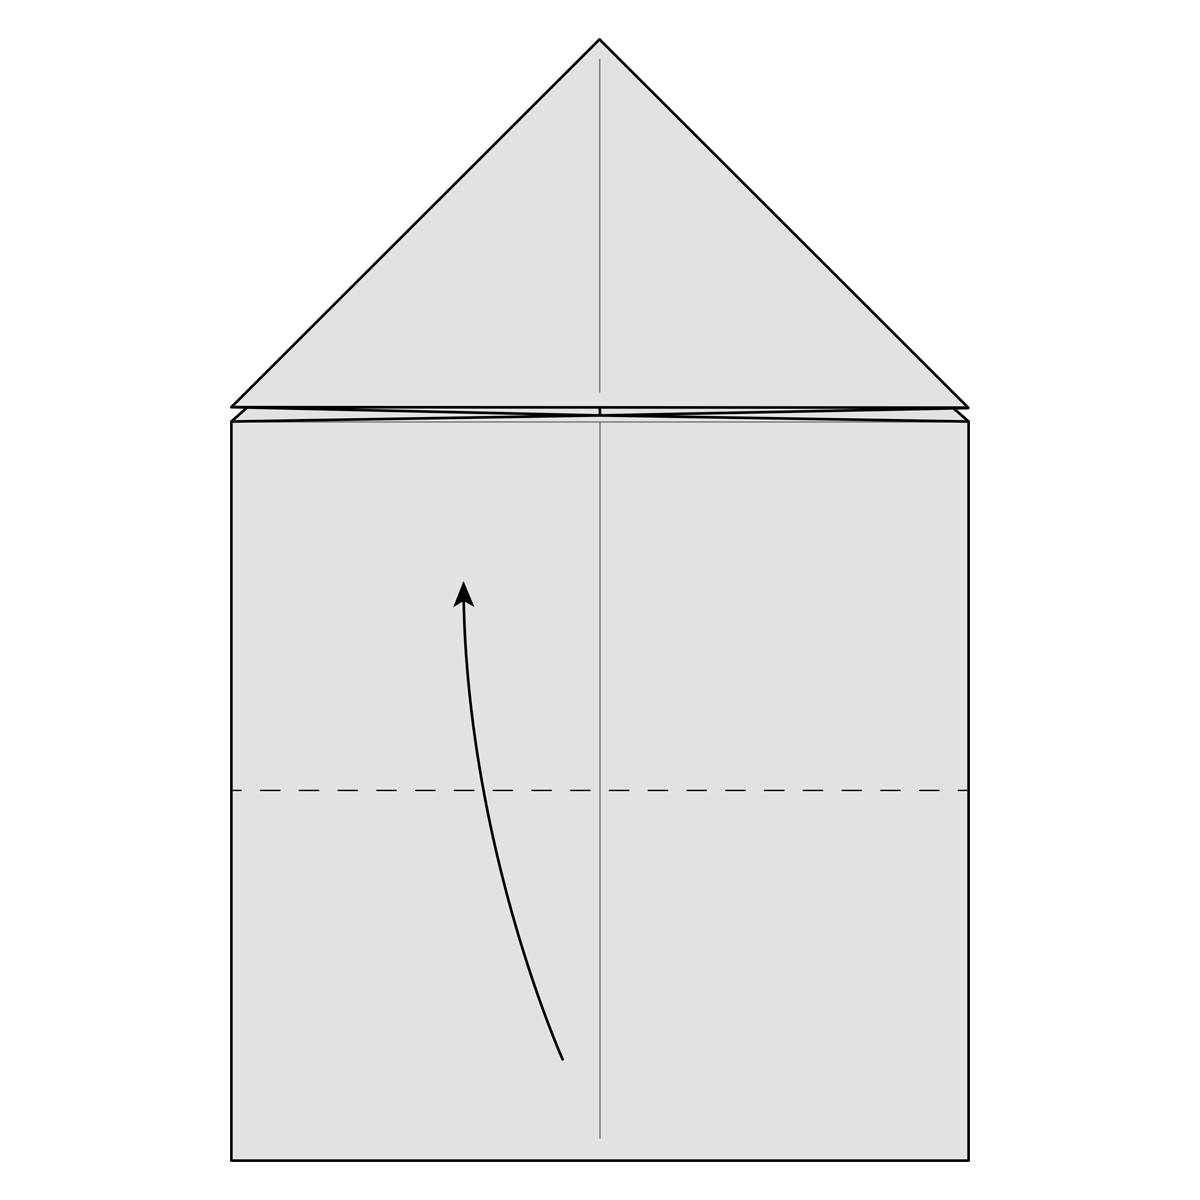
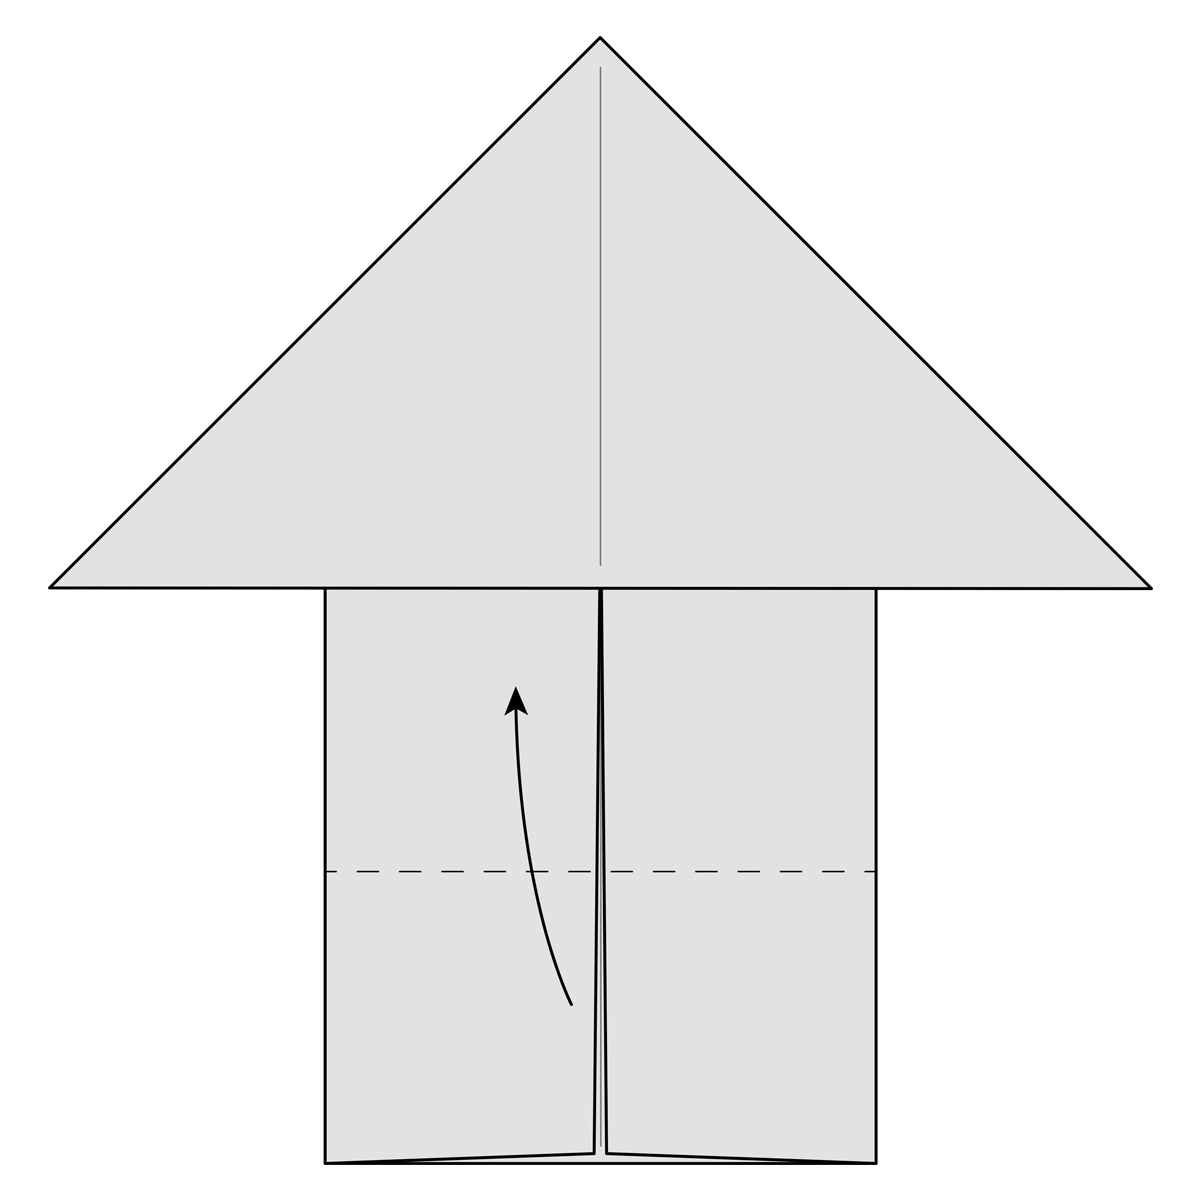
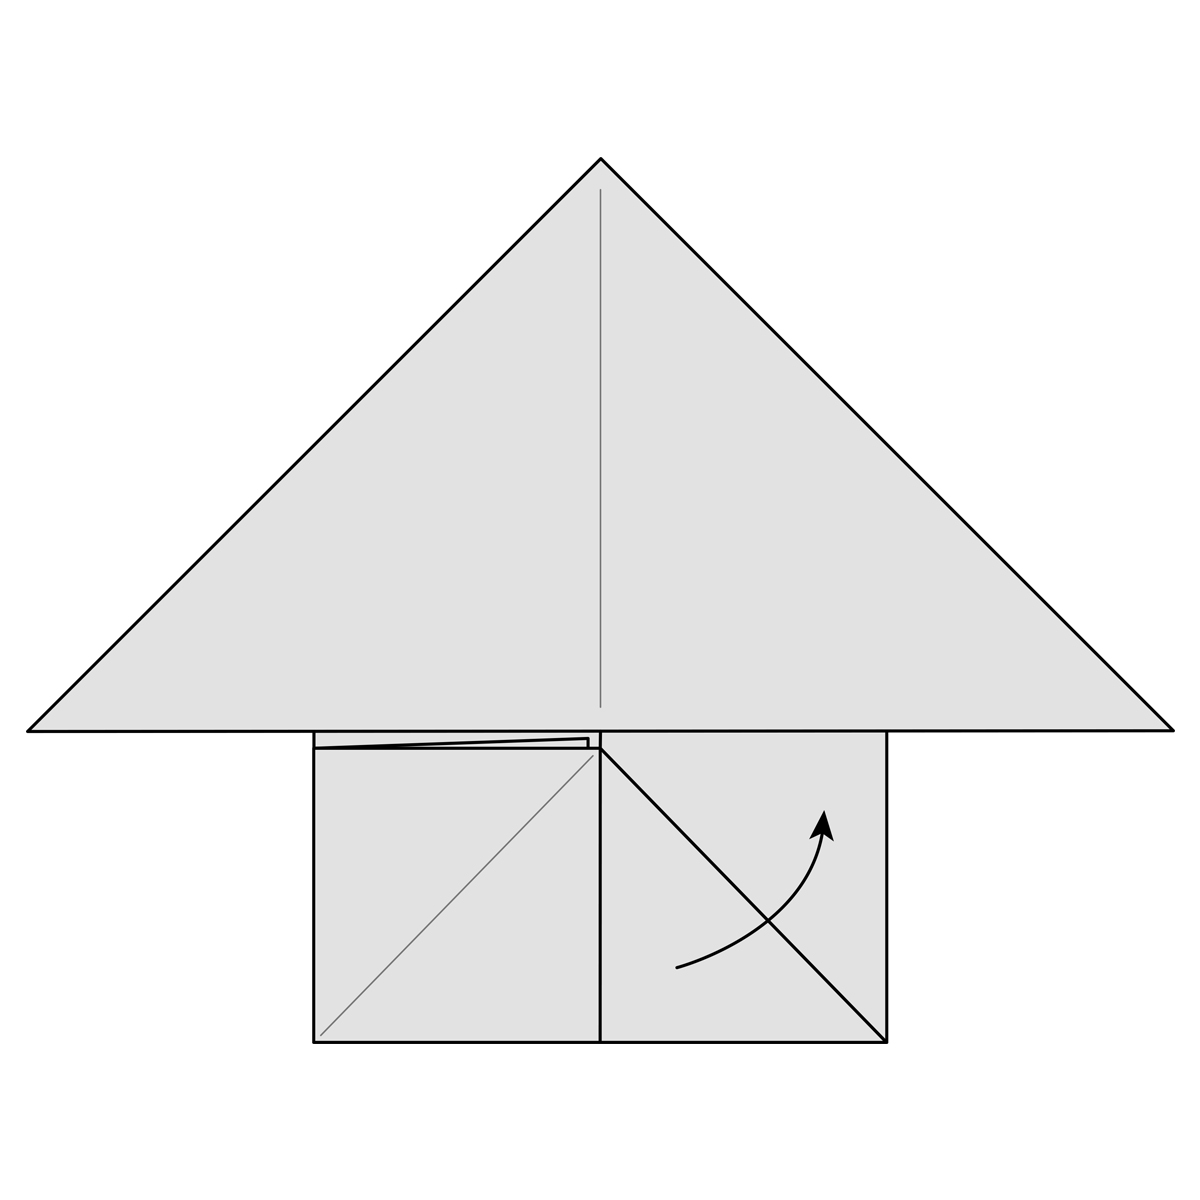
Step-14) Fold the bottom part of the paper up along the dotted line.
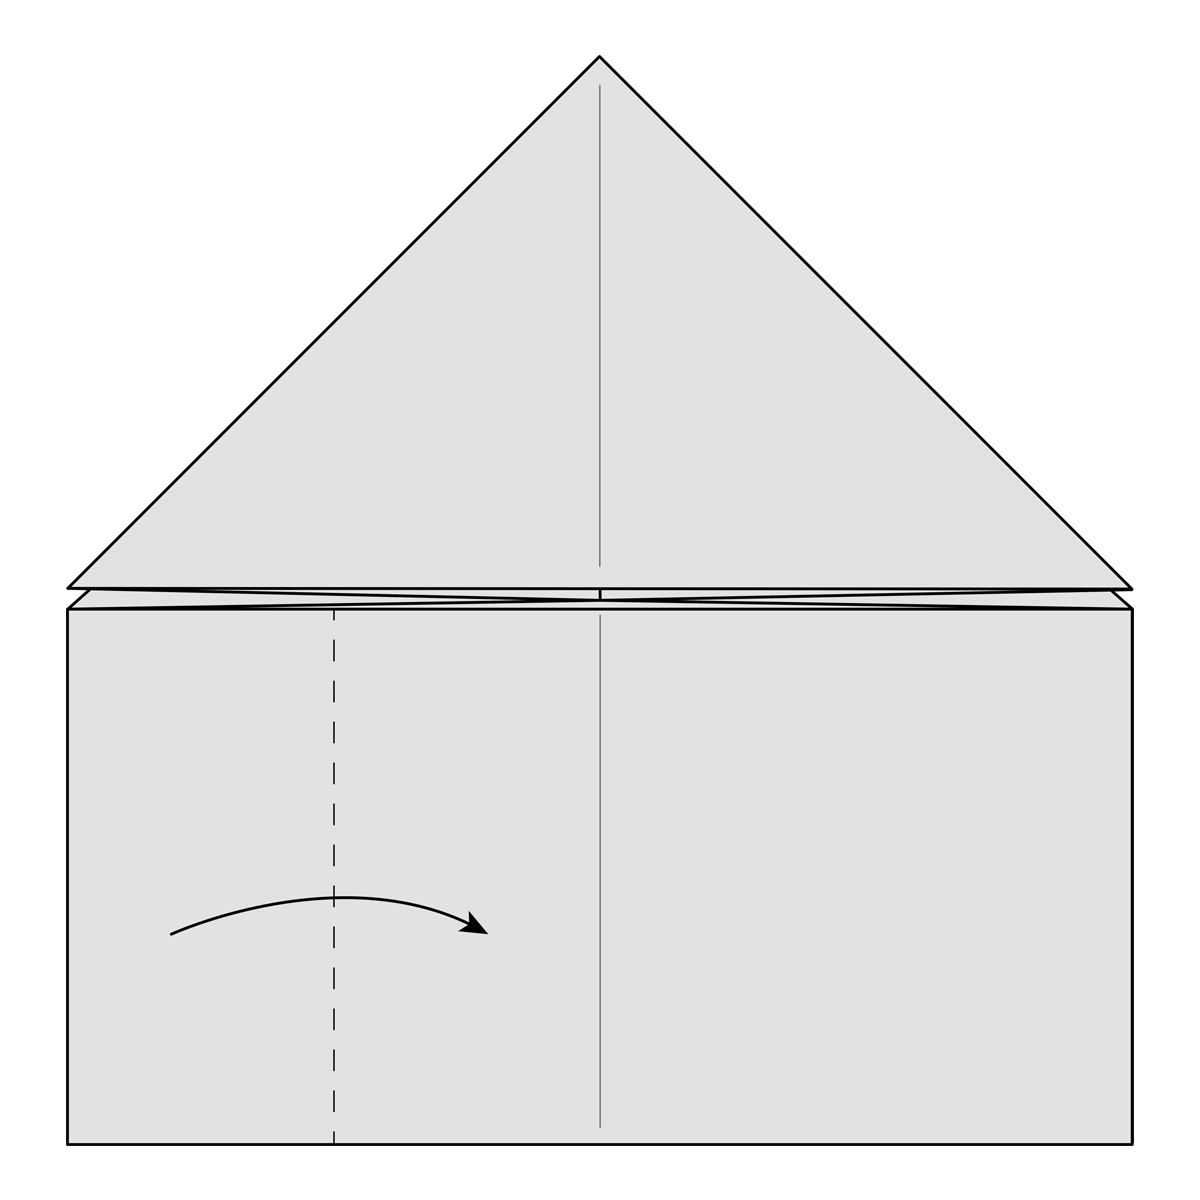
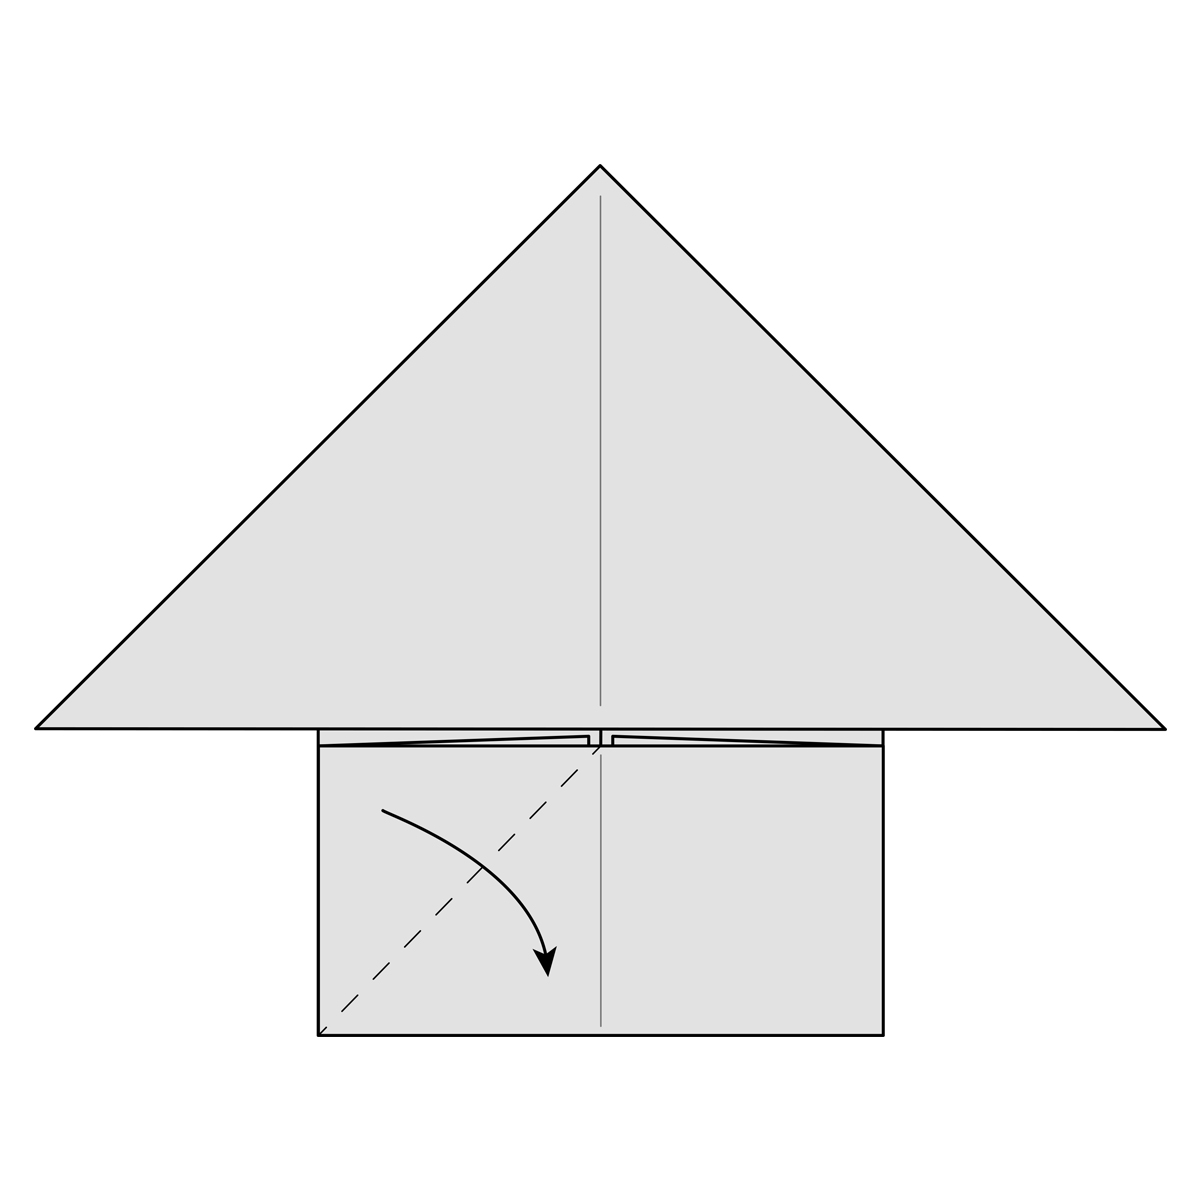
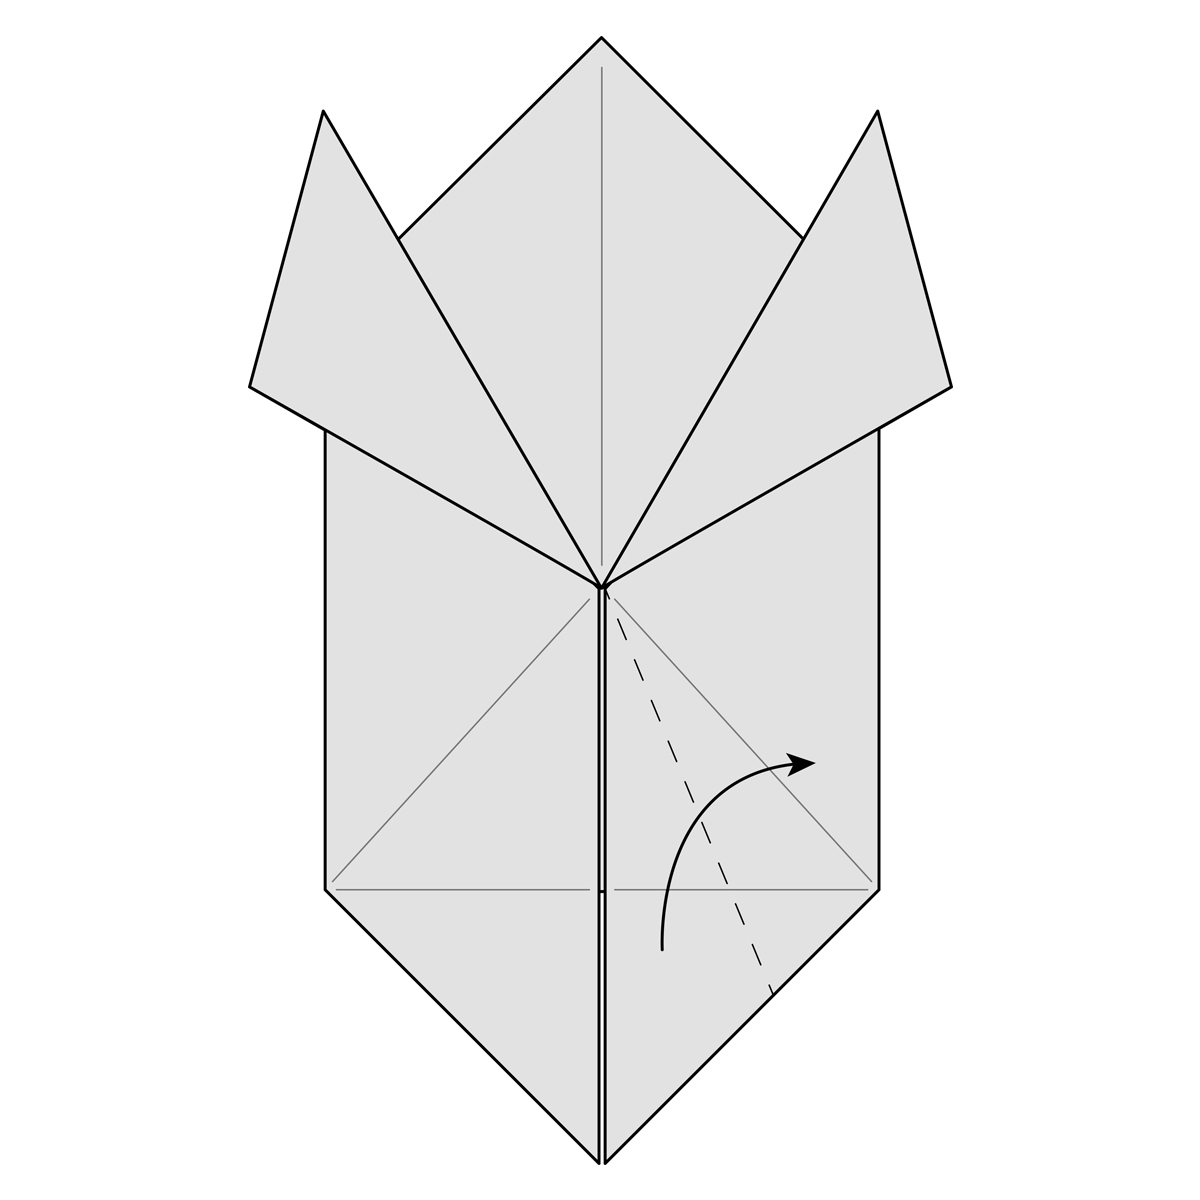
Step-15) Fold the left side of the paper towards the centre along the dotted line. Don’t fold that top triangle. The paper will tuck in behind it.
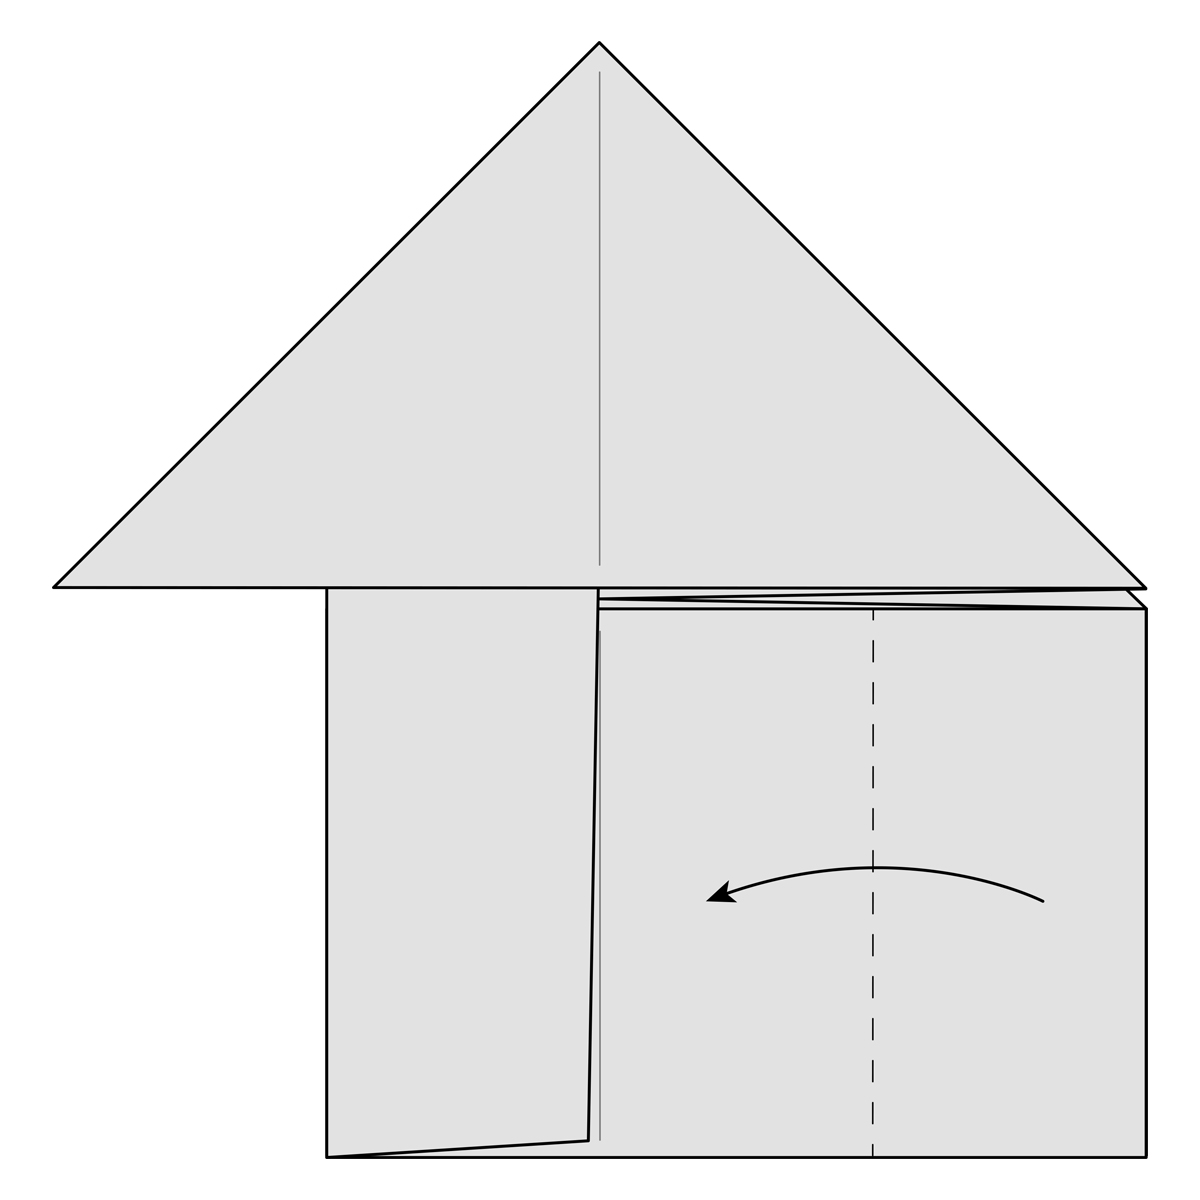
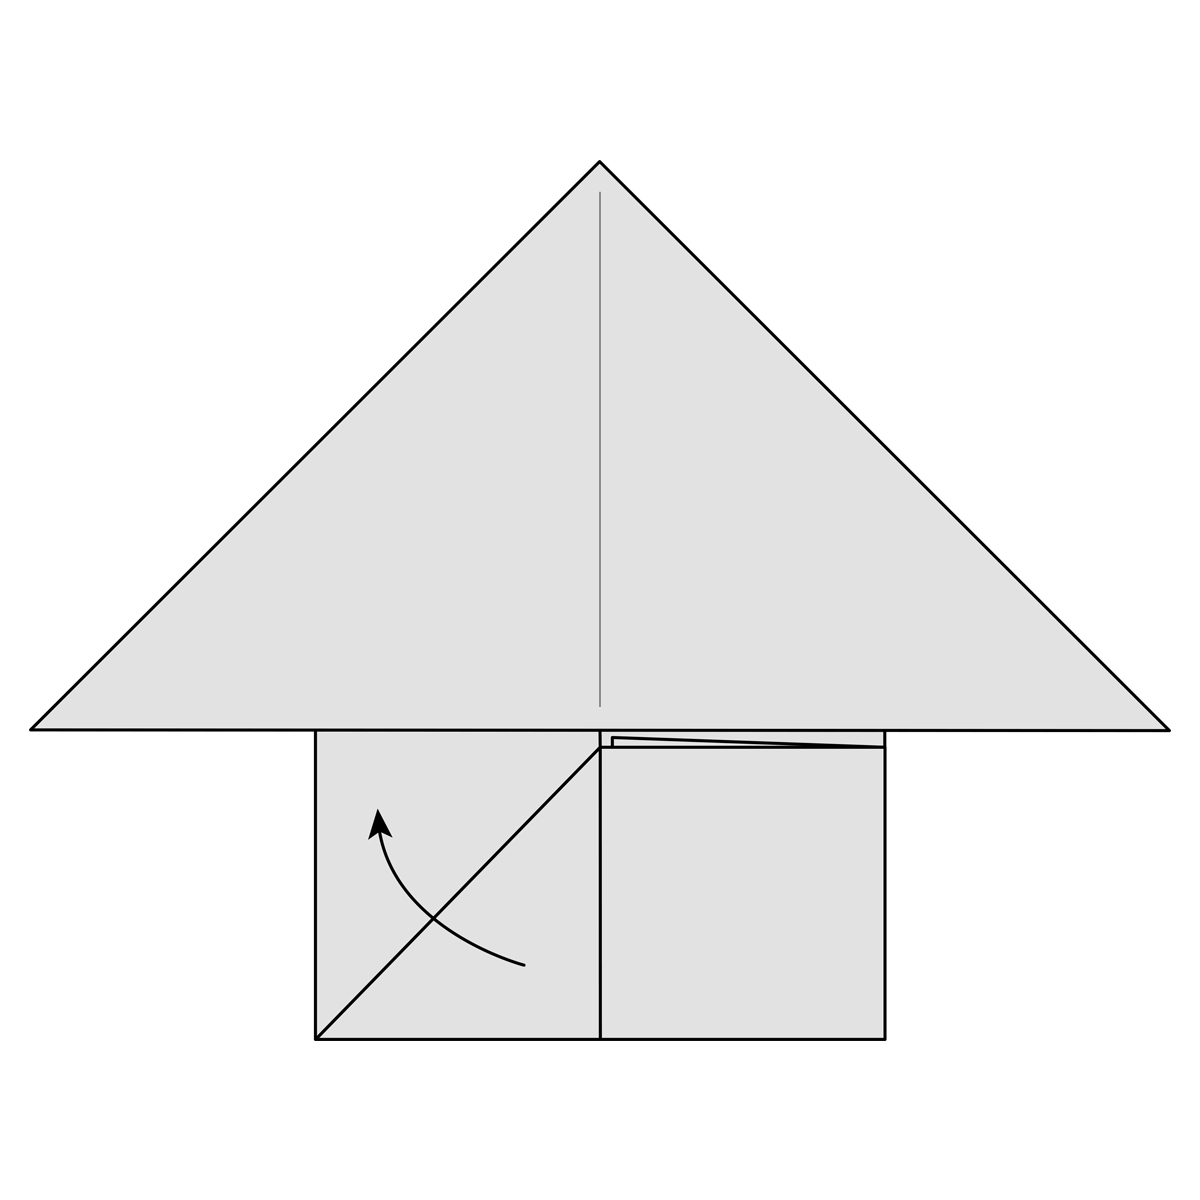
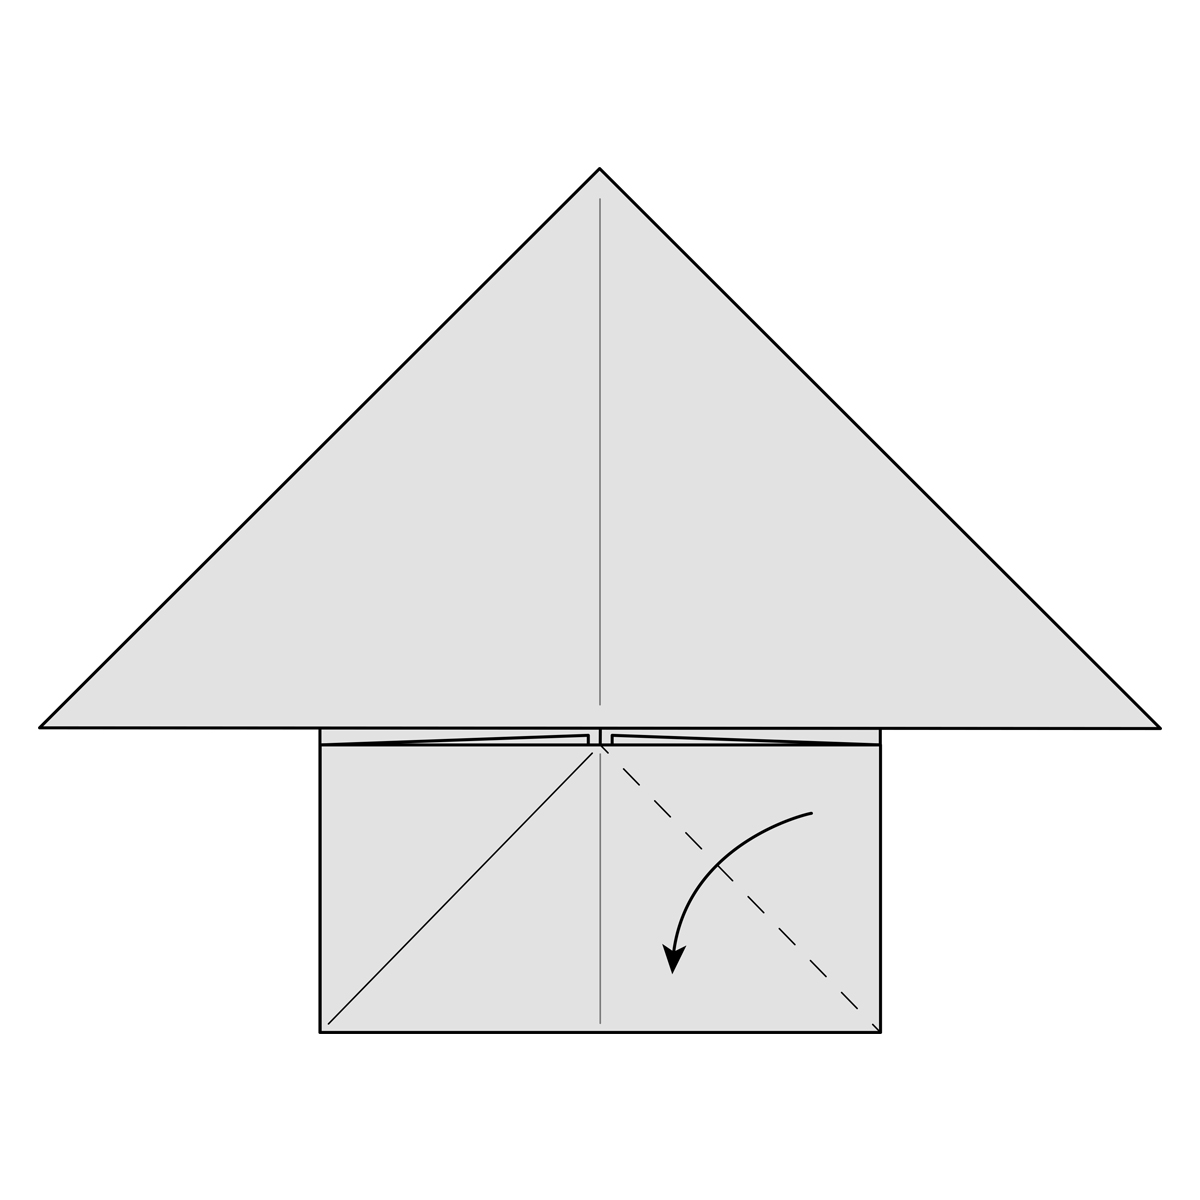
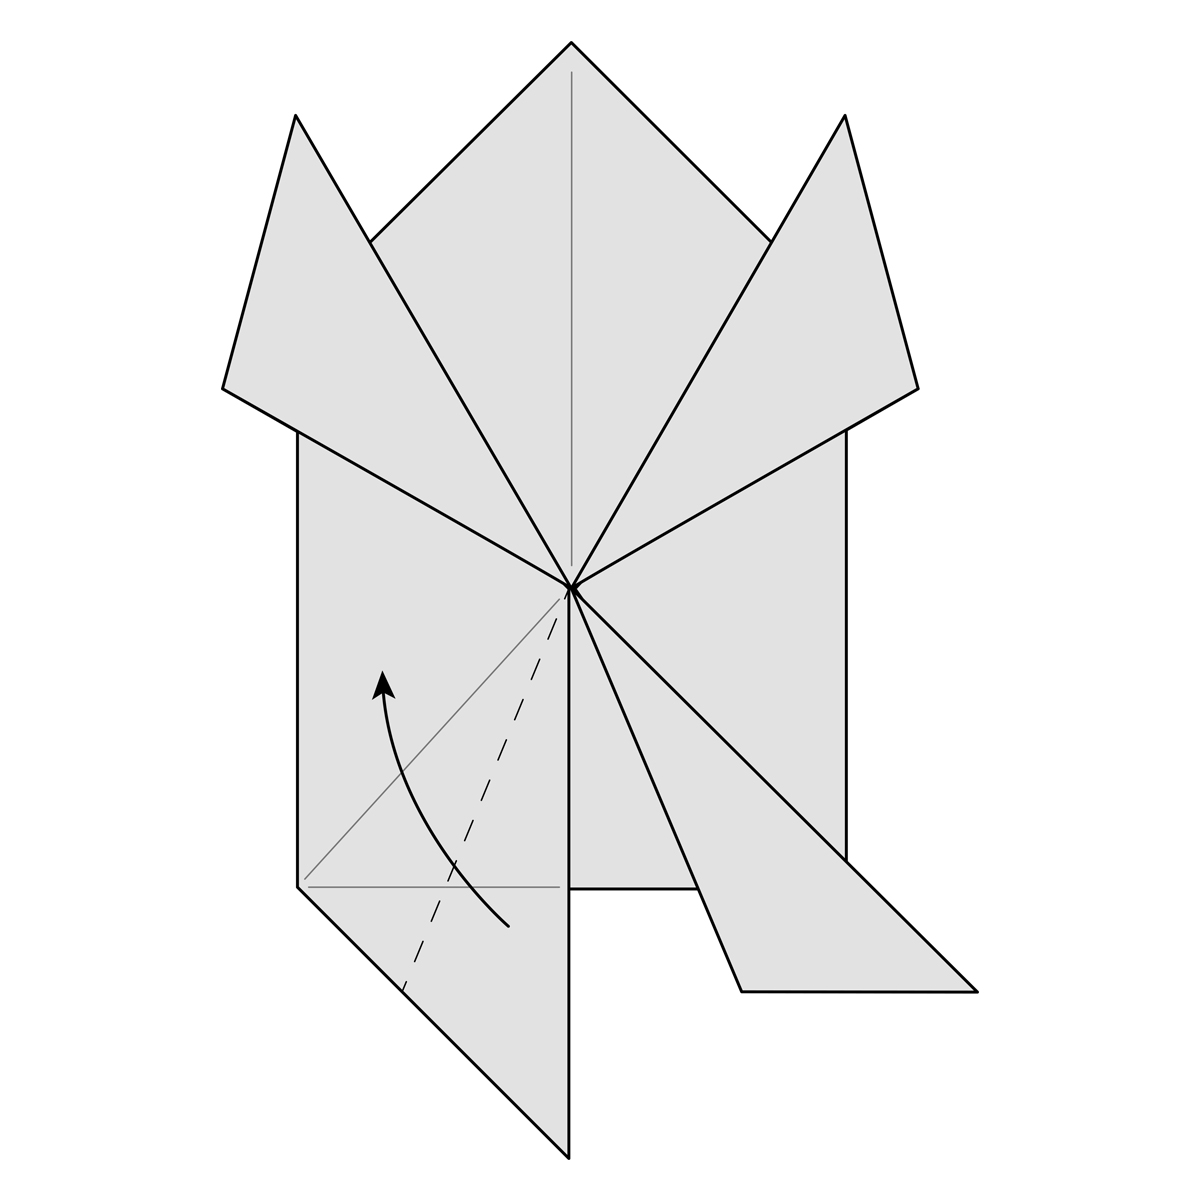
Step-16) Fold the right side of the paper towards the centre along the dotted line. Again, don’t fold the top triangle but tuck the paper in behind it.
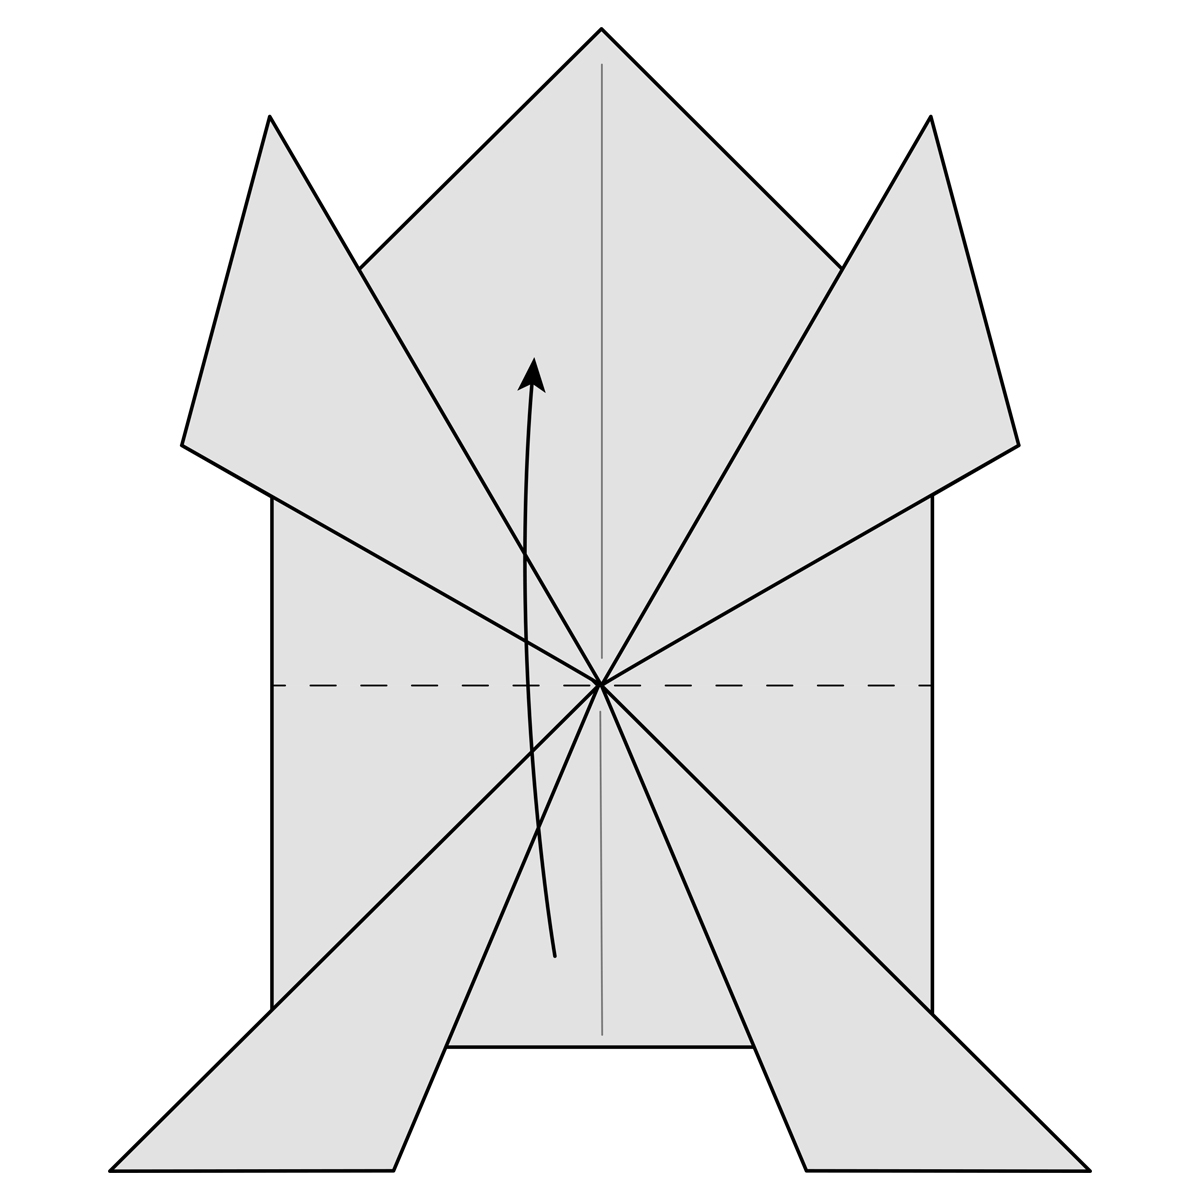
Step-17) Fold the bottom part of the paper up along the dotted line.
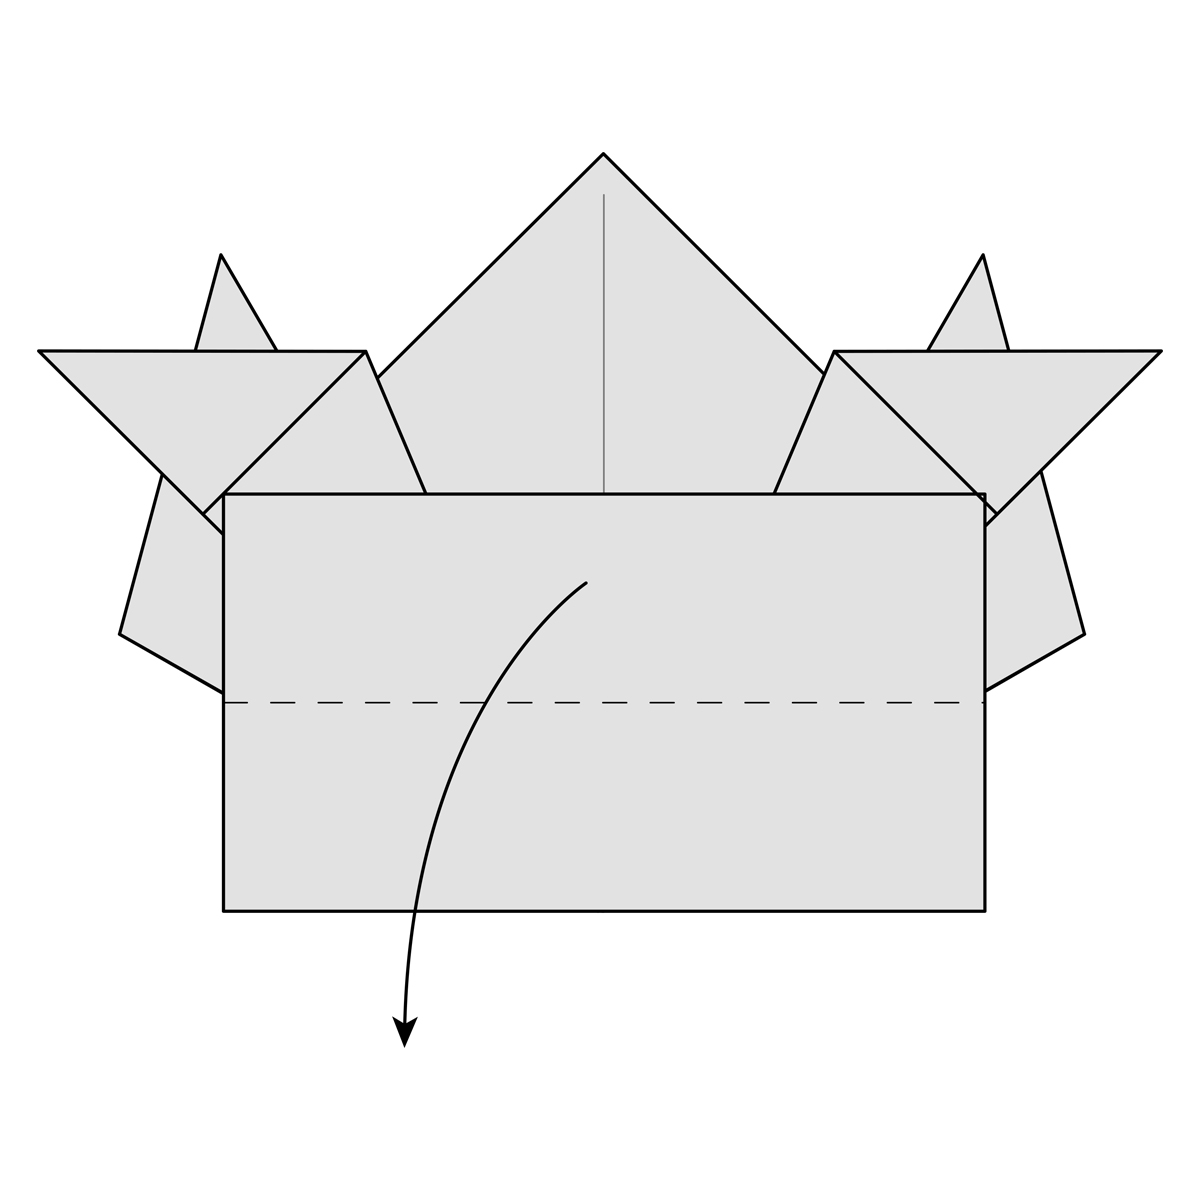
Step-18) Fold the paper down along the dotted line.
Step-19) Crease this fold well and then unfold it.
Step-20) Fold the paper down along the dotted line.
Step-21) Crease this fold well and then unfold it.

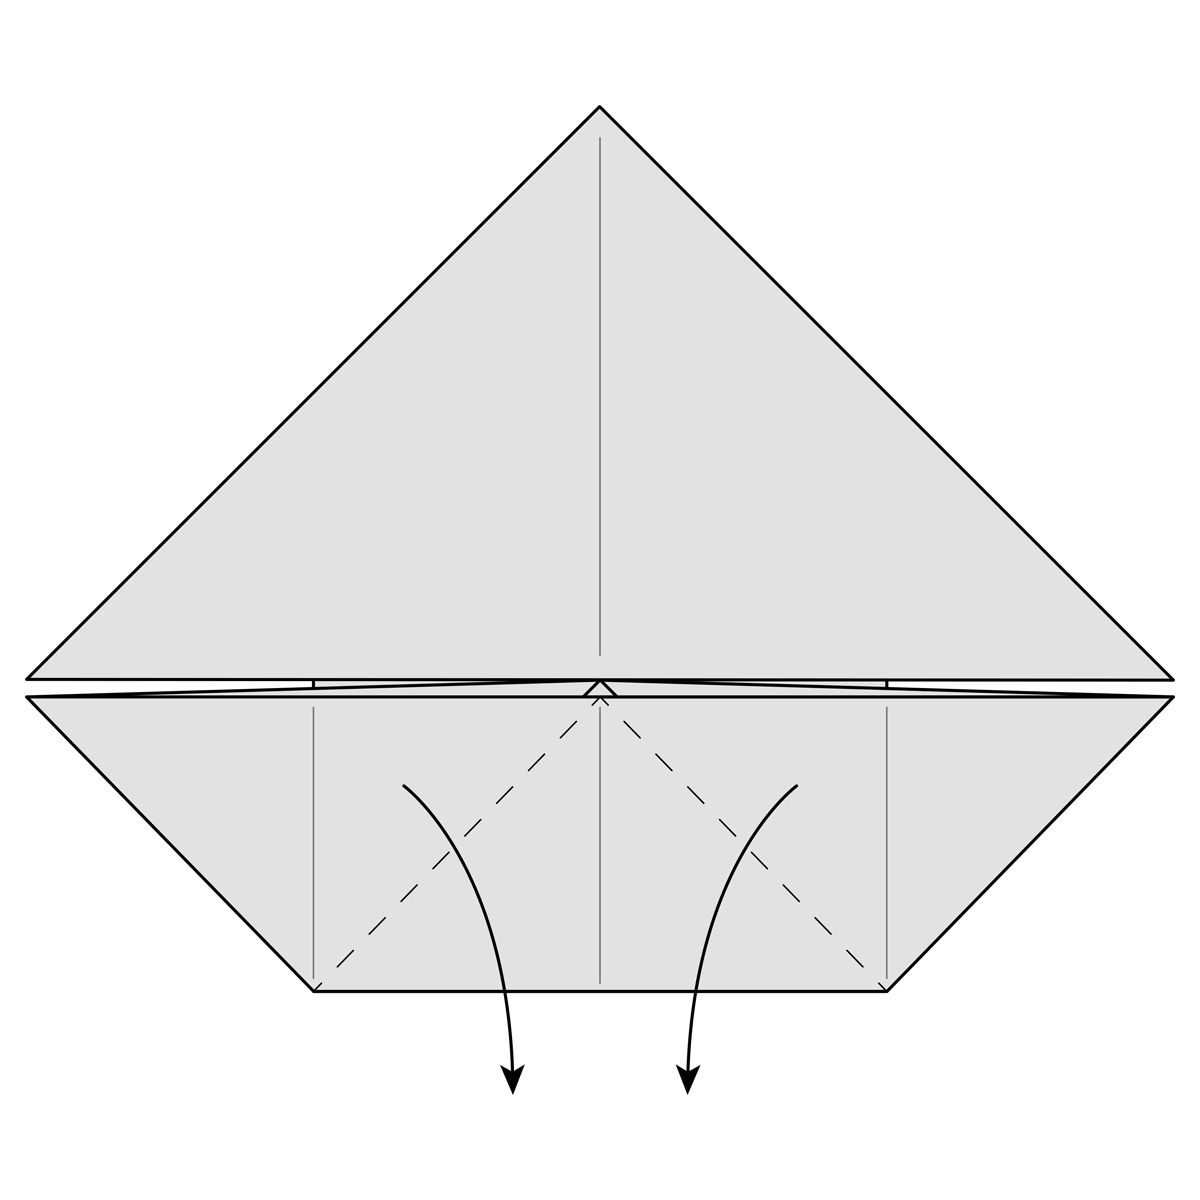
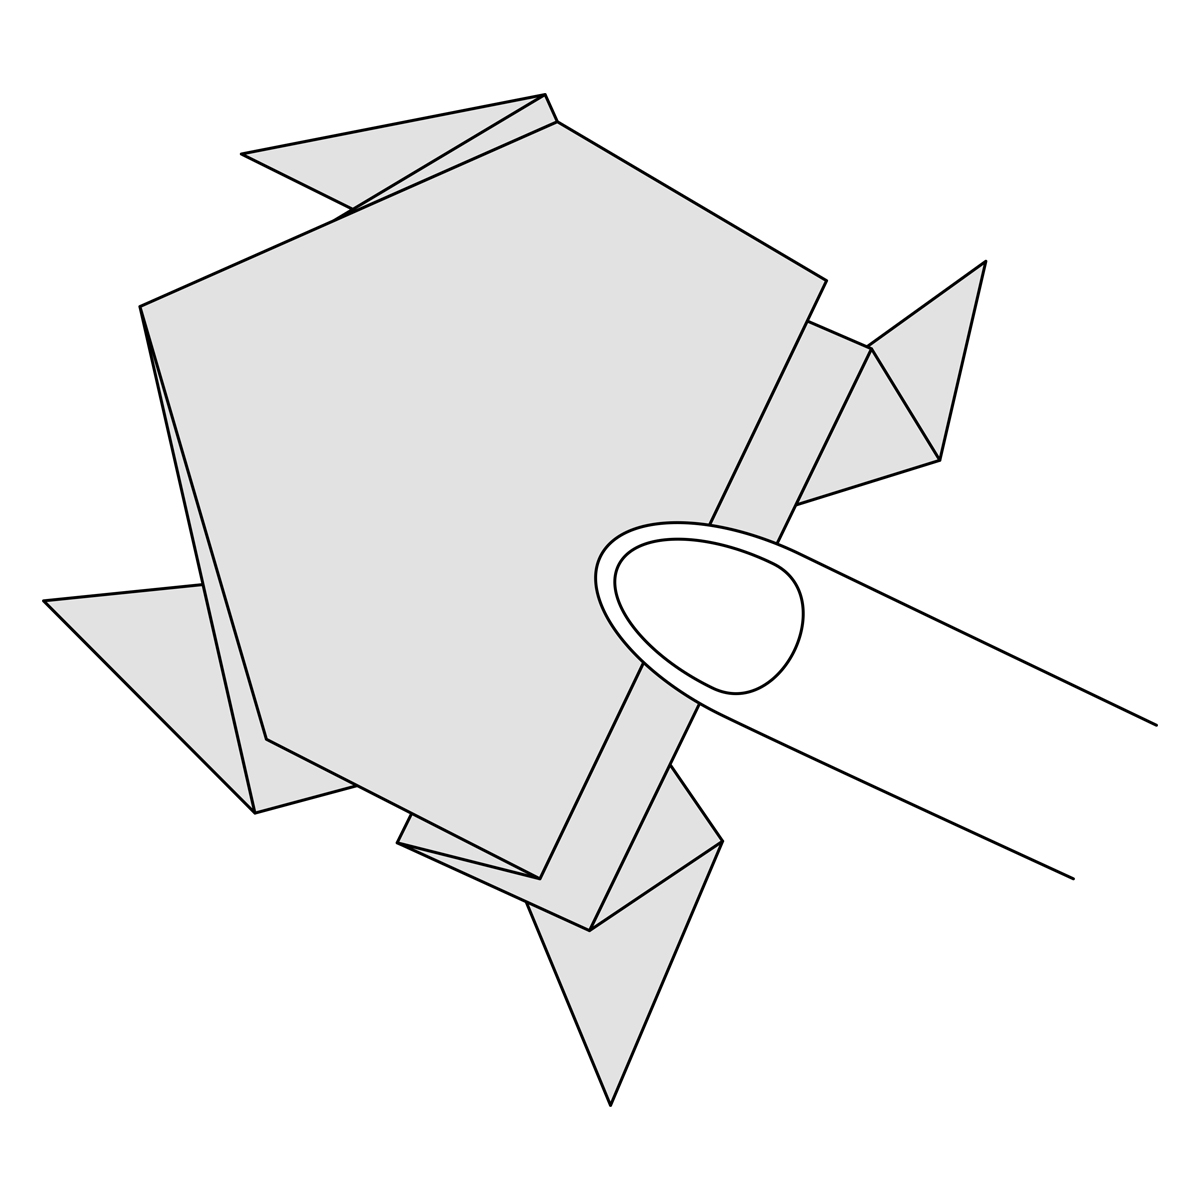
Step-22) Pull the two flaps of paper on the inside of either side out. Just like you’re making a Boat Base.
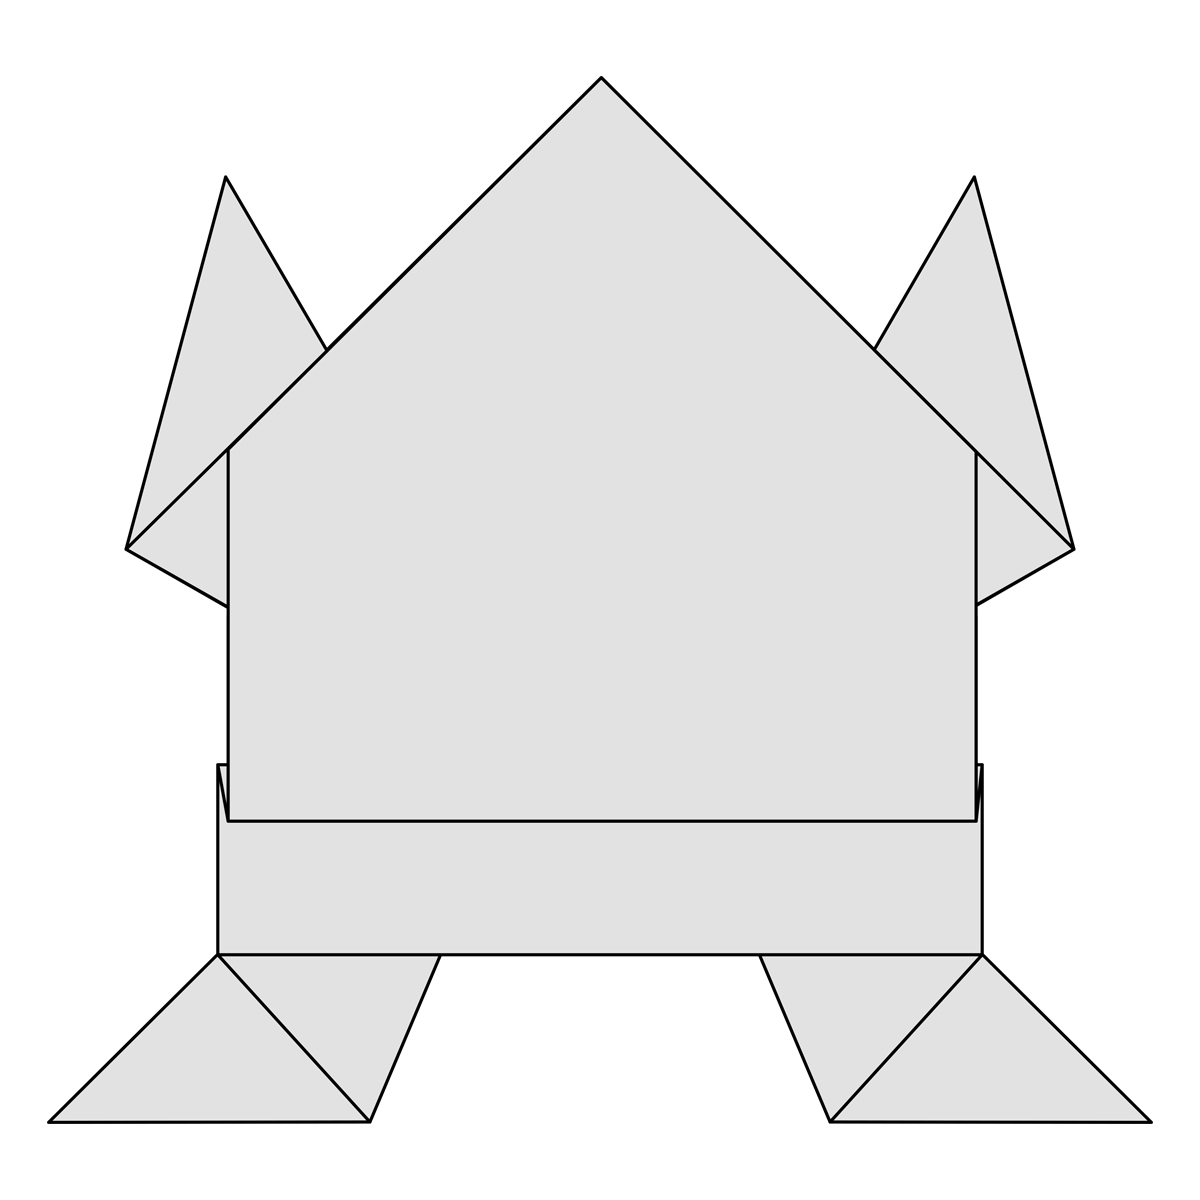
Step-23) Fold the two flaps of paper on each side down along the dotted lines.
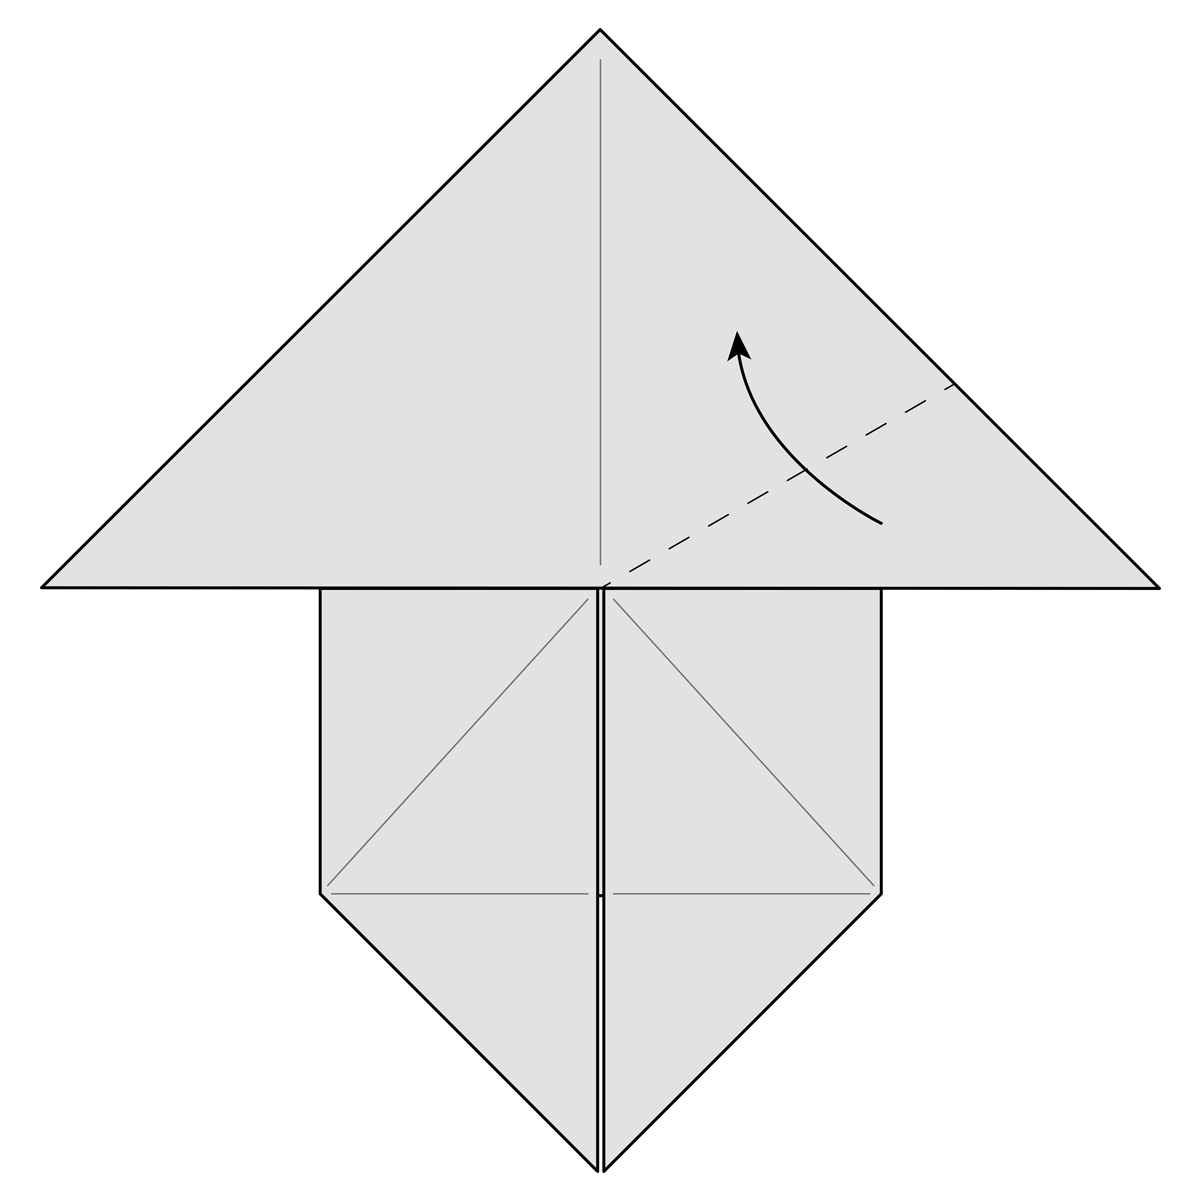
Step-24) Fold the top right part of the paper up along the dotted line. This will make one of the frog’s front legs. Don’t worry about the angle of the crease. As long as you get a shape like what you see in the next step it’s fine.
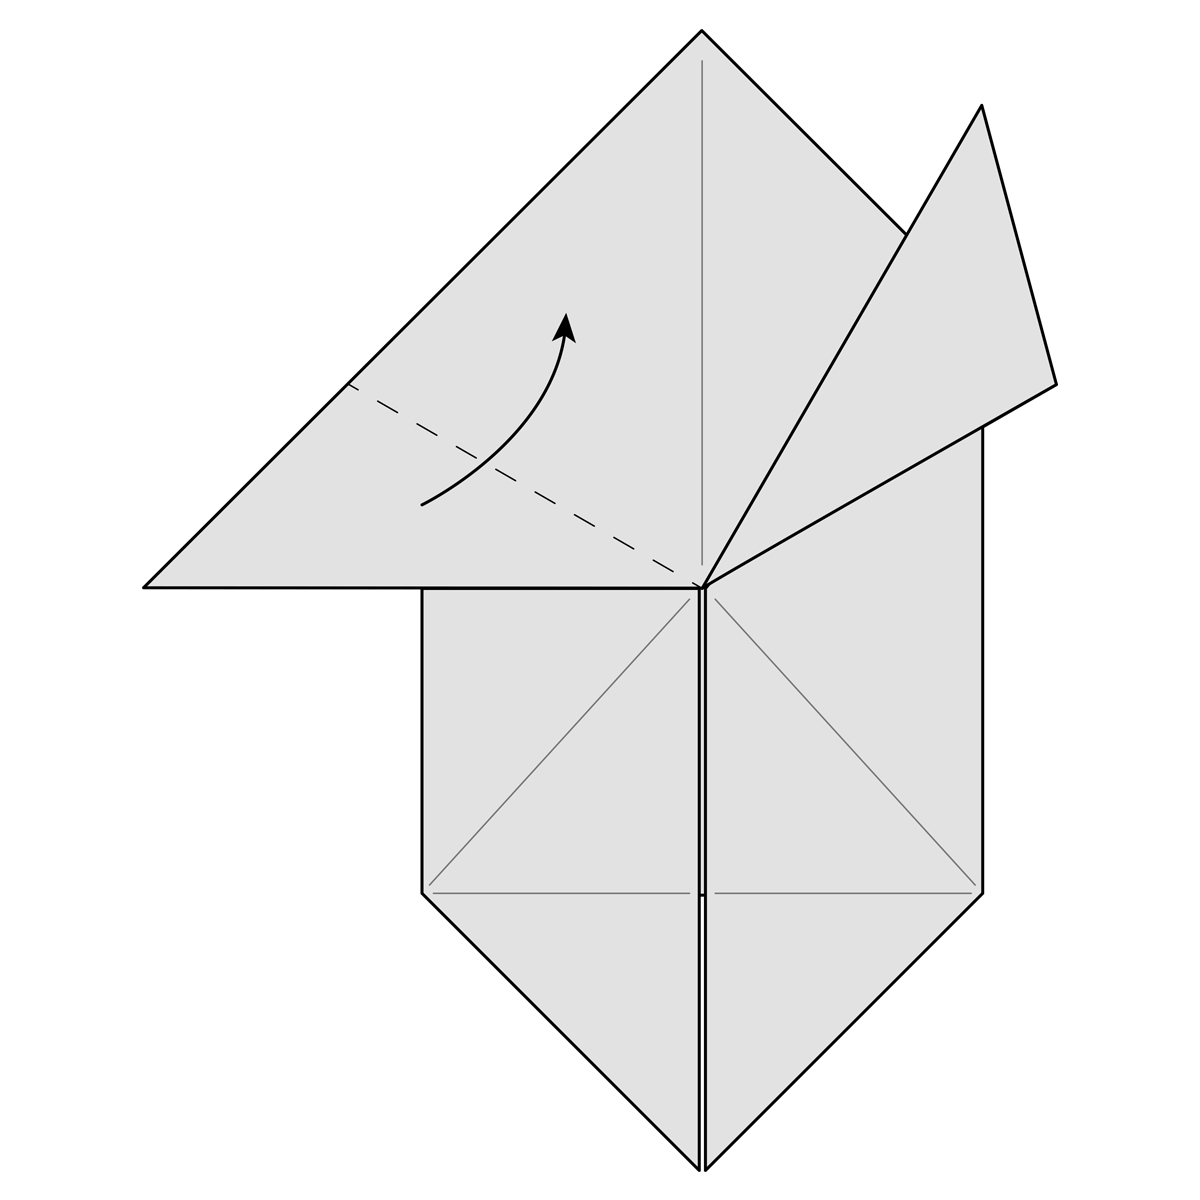
Step-25) Fold the left part of the paper up along the dotted line to make the other front leg. It should match the other leg from the previous step.
Step-26) Fold the bottom right part of the paper up along the dotted line. This will form one of the back legs. This crease also doesn’t have to perfectly match the diagrams as long as you end up close to the shape in the next step.
Step-27) Fold the bottom left part of the paper up along the dotted line to form the other back leg.
Step-28) Fold the entire model up along the dotted line.
Step-29) Fold the top part of the model down along the dotted line.
Step-30) Turn the whole model over.
The Completed Traditional Origami Jumping Frog.
If you push down on the folds on it’s back you can make it jump!

Our Purpose Is To Sustainably Make the Pleasure and Benefits of sports Accessible to the Many.
Copyright-2021 Abdul Haq