Geometric Origami Wall Art With Sonobe Units
Make a piece of geometric origami wall art with Sonobe units.
They are inexpensive and simple to fold, resulting in
an impressive, modern artwork to display in your home.
There are many different ways to use Sonobe units; the most popular
object to make using six units is the origami unit cube.
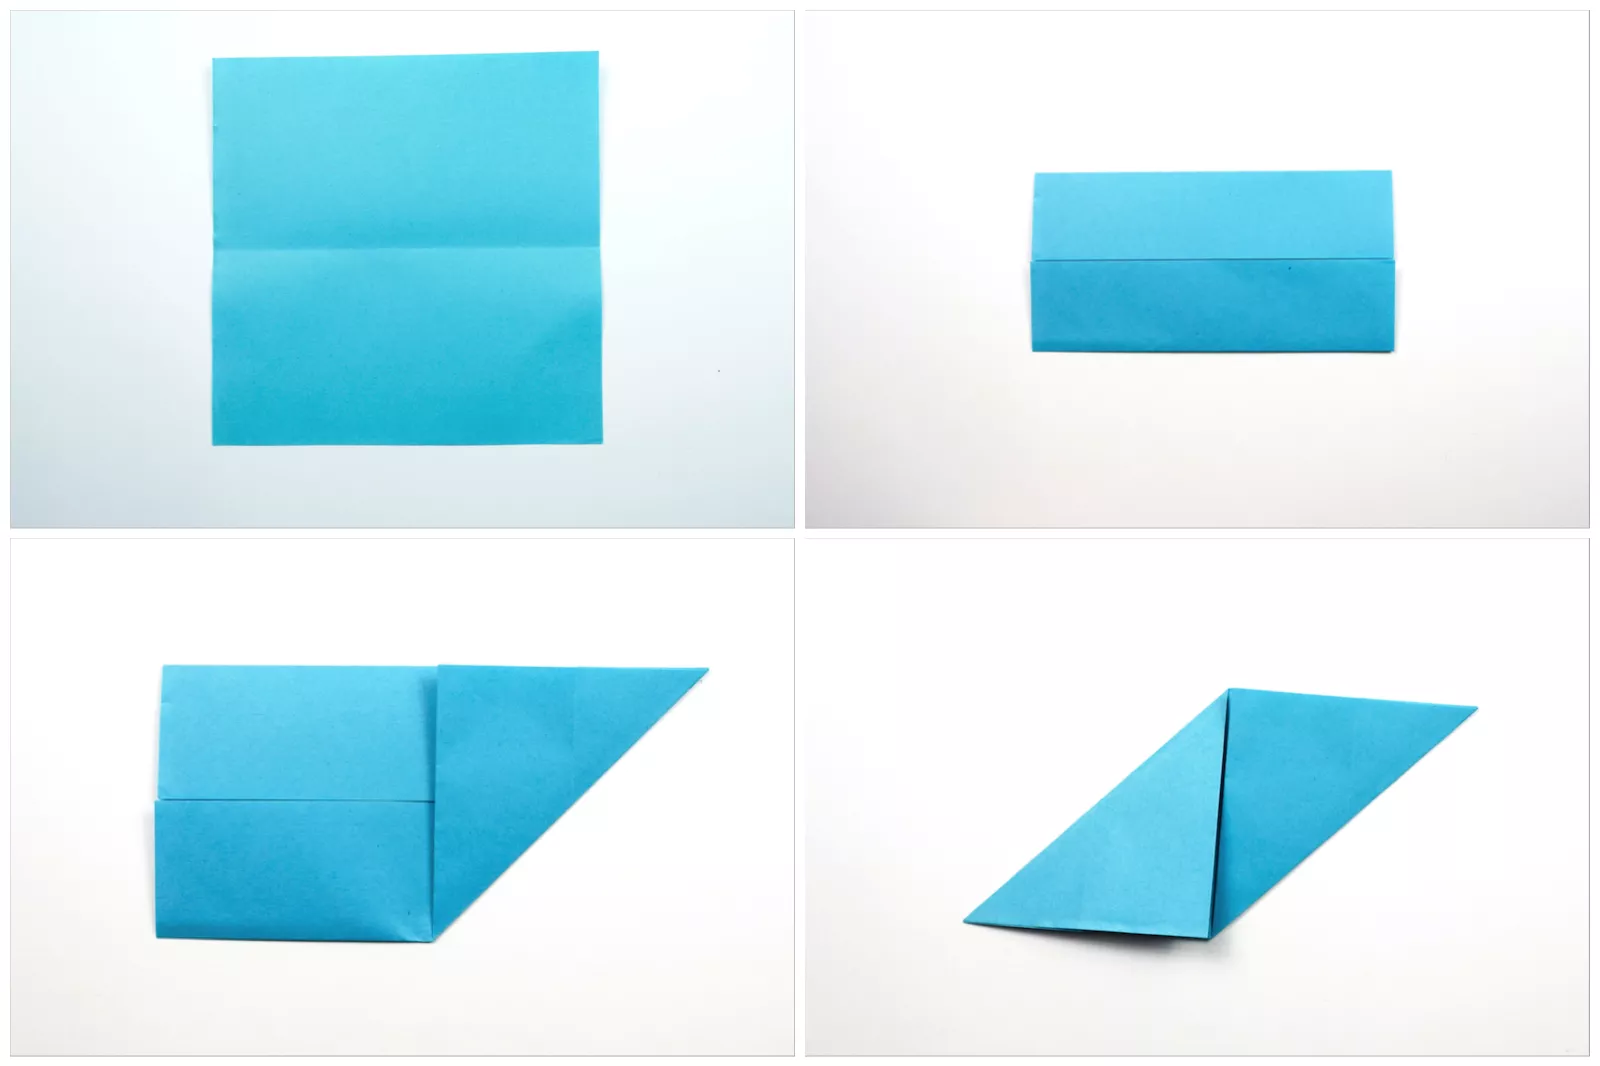
01:Make the First Folds
For this tutorial, we'll be making a triangular shape using
nine Sonobe units. Start with a piece of square paper,
white side up if it has one.
Fold the bottom edge of the paper up to the top and unfold,
creating a horizontal crease.
Next, fold the top and bottom edges to the central crease.
Fold the bottom right corner up diagonally.
Fold the top left corner down diagonally.
02:Unfold Your First Folds
Unfold the two previous diagonal folds. You are left with little
diagonal flaps on the bottom left and top right. Unfold fully,
so you're back to the beginning.
Re-fold the bottom left and top right diagonal flaps, making sure
that they align with the horizontal crease. Next,
re-fold the bottom edge up.
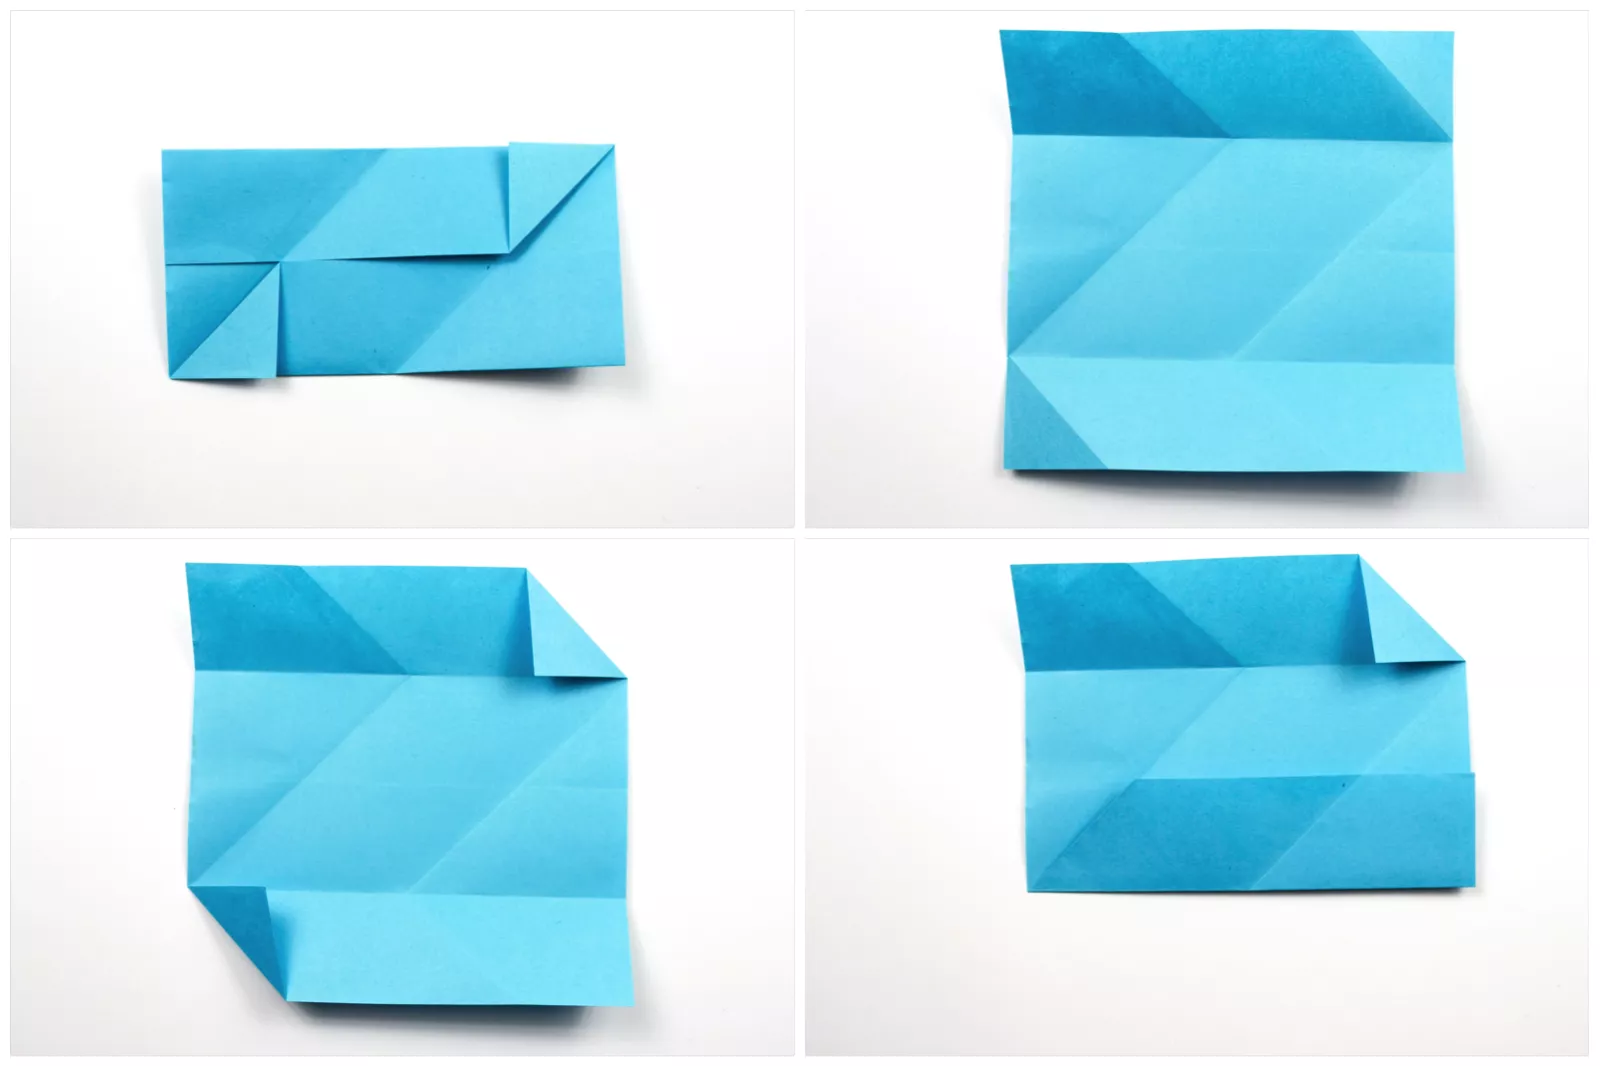
03: Fold the Corners
Re-fold the bottom right corner up diagonally.
Next, re-fold the top edge down.
Now re-fold the top left corner down diagonally
and slot the flap underneath the bottom left section.
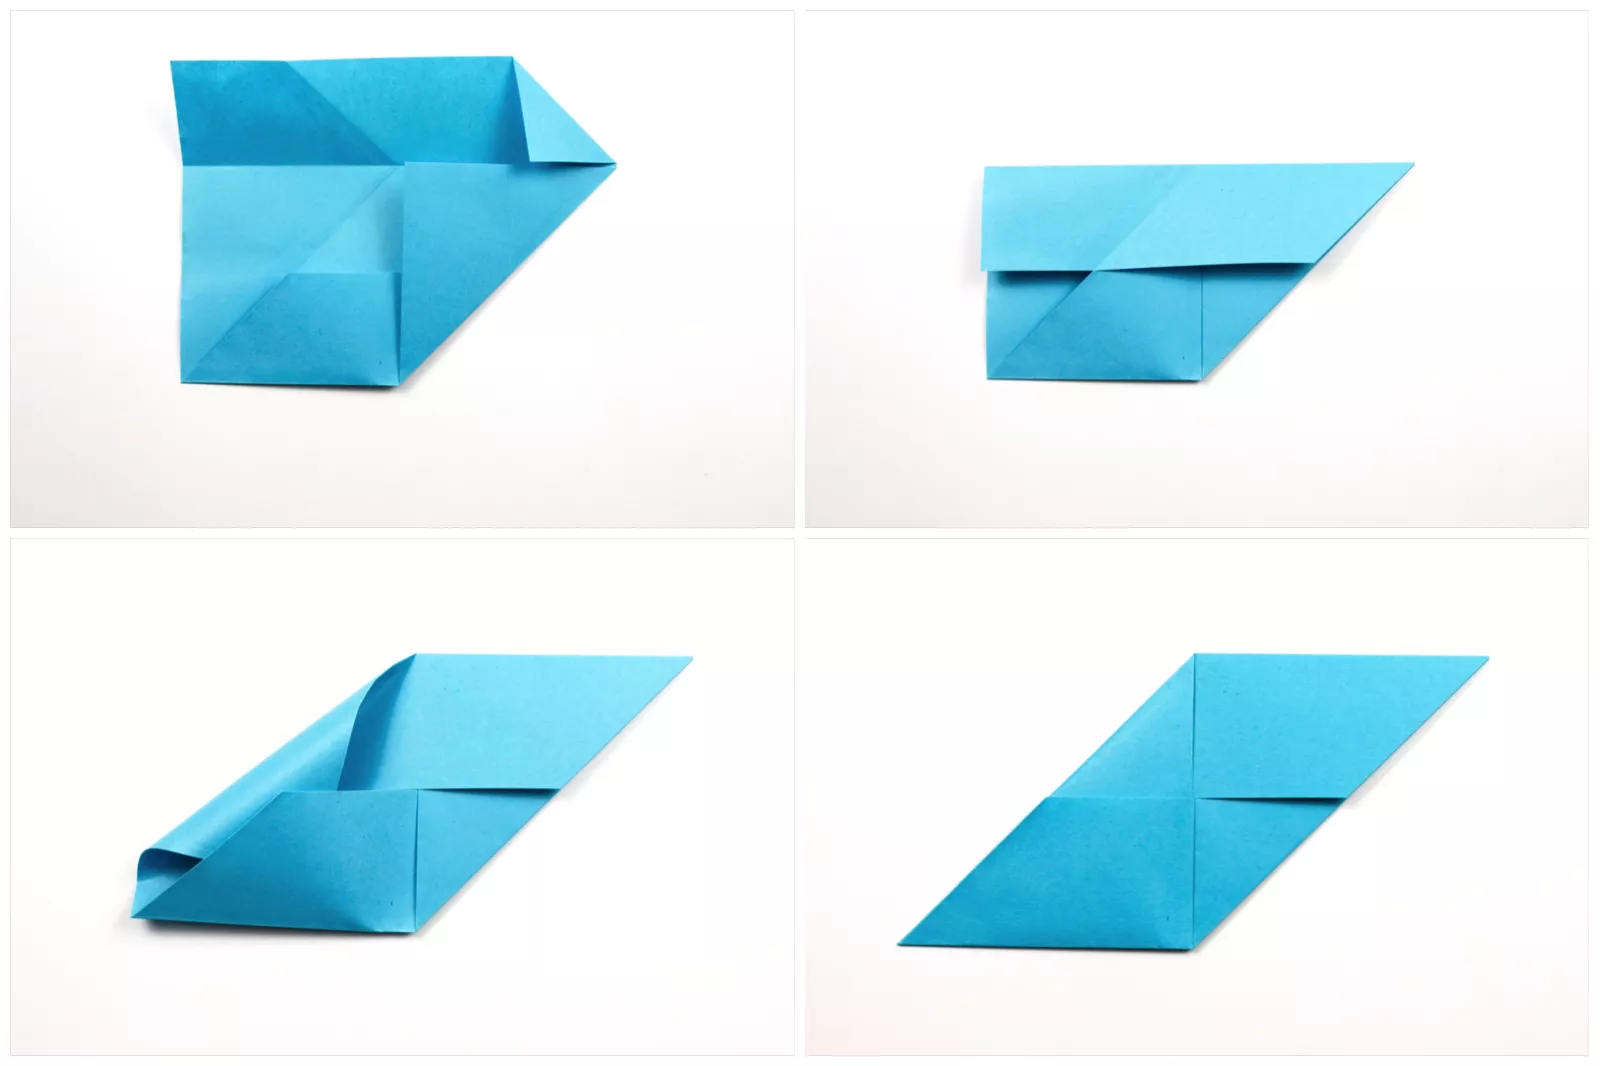
04: Make the Final Folds
Rotate the unit counter-clockwise. Flip the unit
over to the back, from left to right.
Fold the bottom corner up to the top right corner (on a diagonal),
aligning with the right edge. Next, fold the top corner down
to match the bottom one.
Flip the unit over from left to right. Crease the unit in half,
along the line that runs diagonally from top left to bottom right.
Your first unit is complete. You will need nine of them if you are
making a triangular wall display.
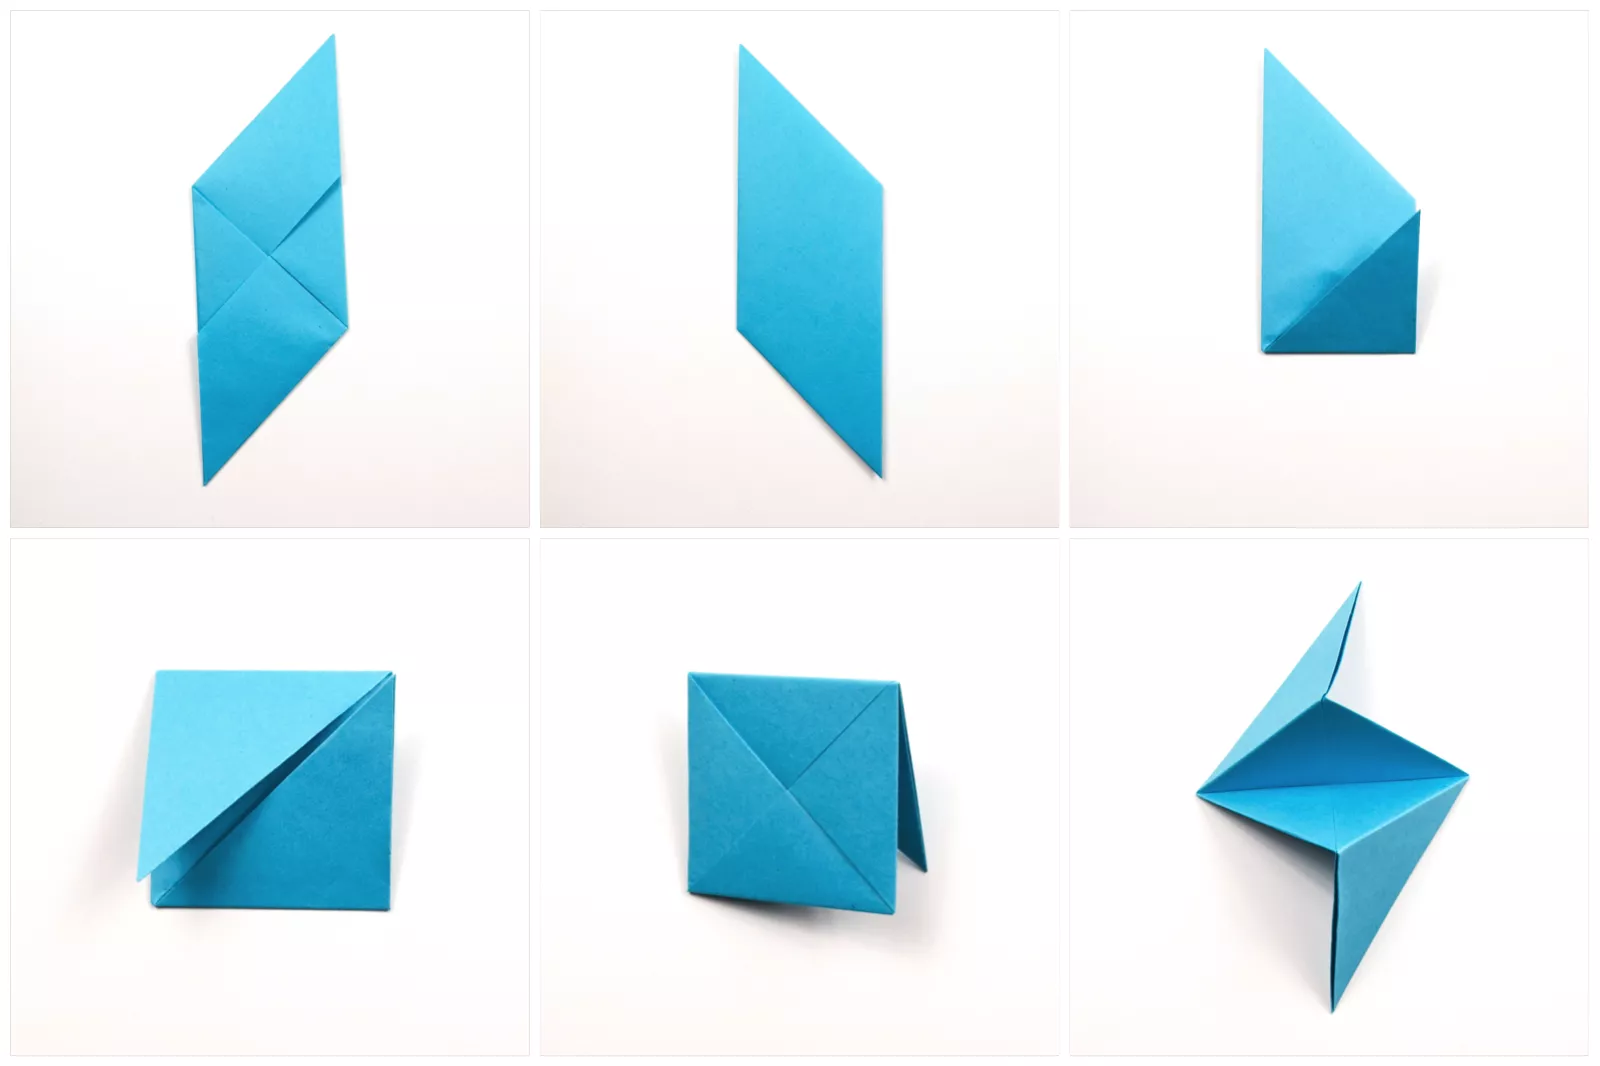
05:Begin Assembling the Sonobe Units
For this tutorial, we used three sets of three matching colors.
Take three of your units, and arrange them as shown,
tucking the end of one unit under the fold of another.
Slot them all together. If you are aiming for a color-coordinated
effect, make sure the order of colors is the same each time.
In this case, it's blue, yellow, green.
Do this for all of your units.
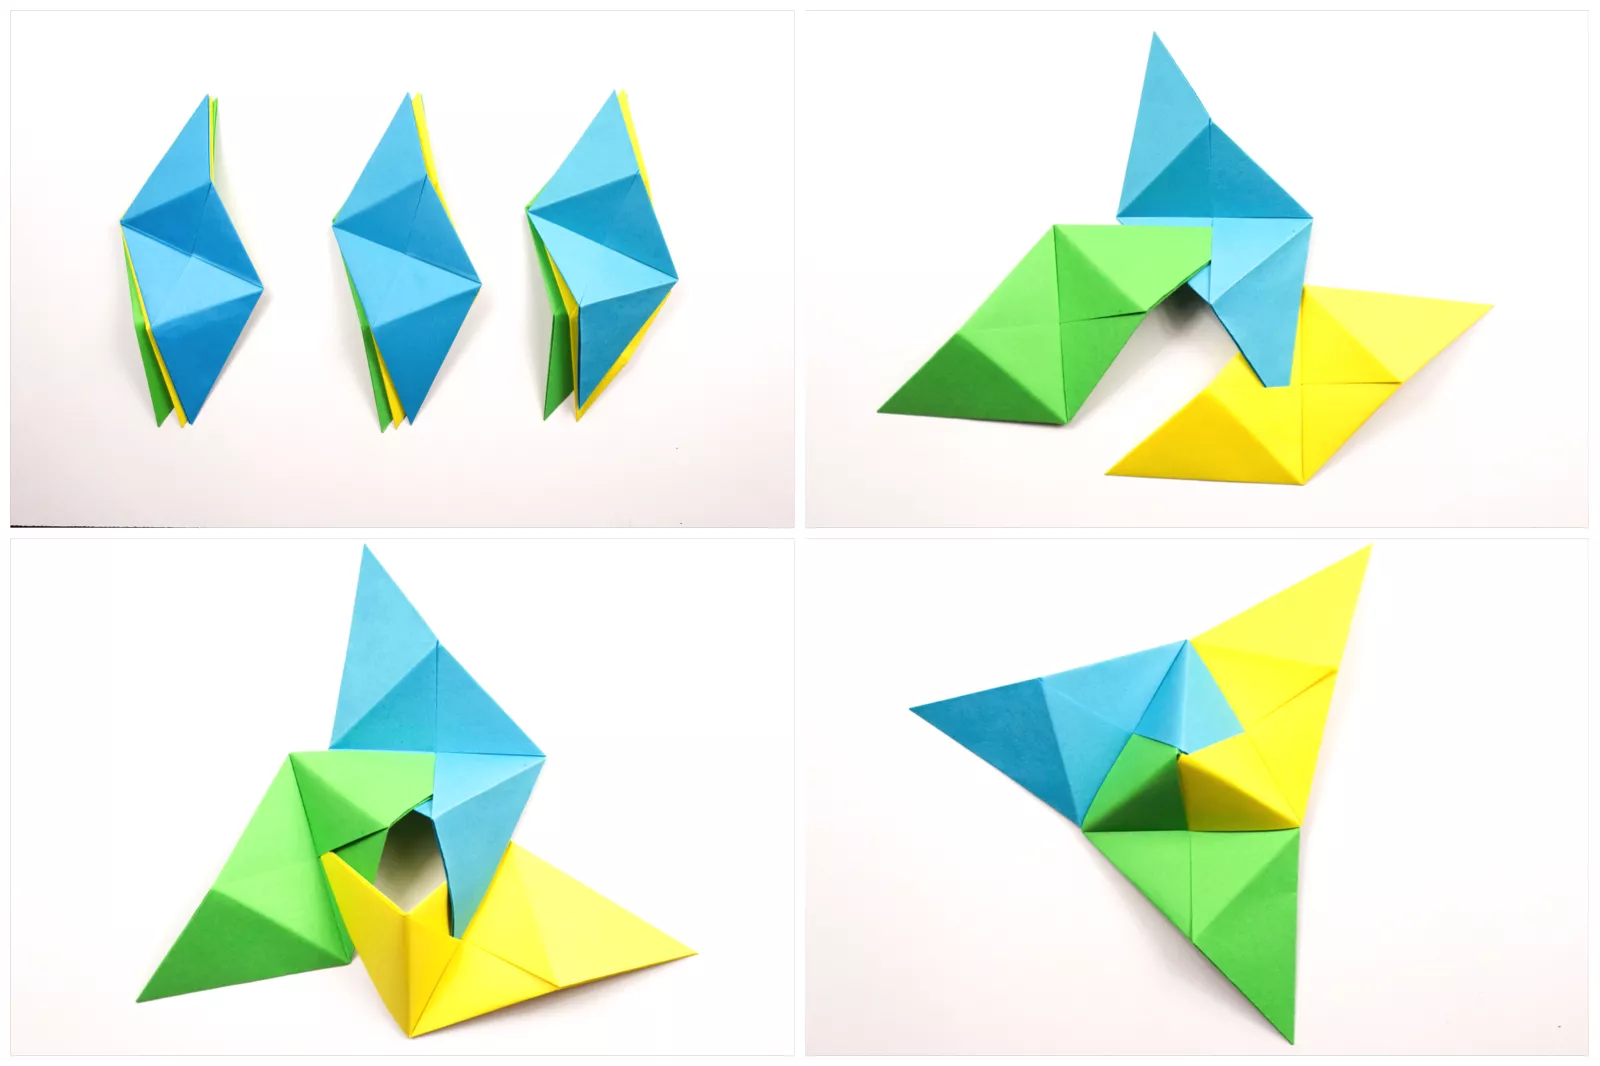
06:Combine the Units
Once you have all three sets of units completed, you can slot them
together. Again, keep the color order: blue, yellow, green.
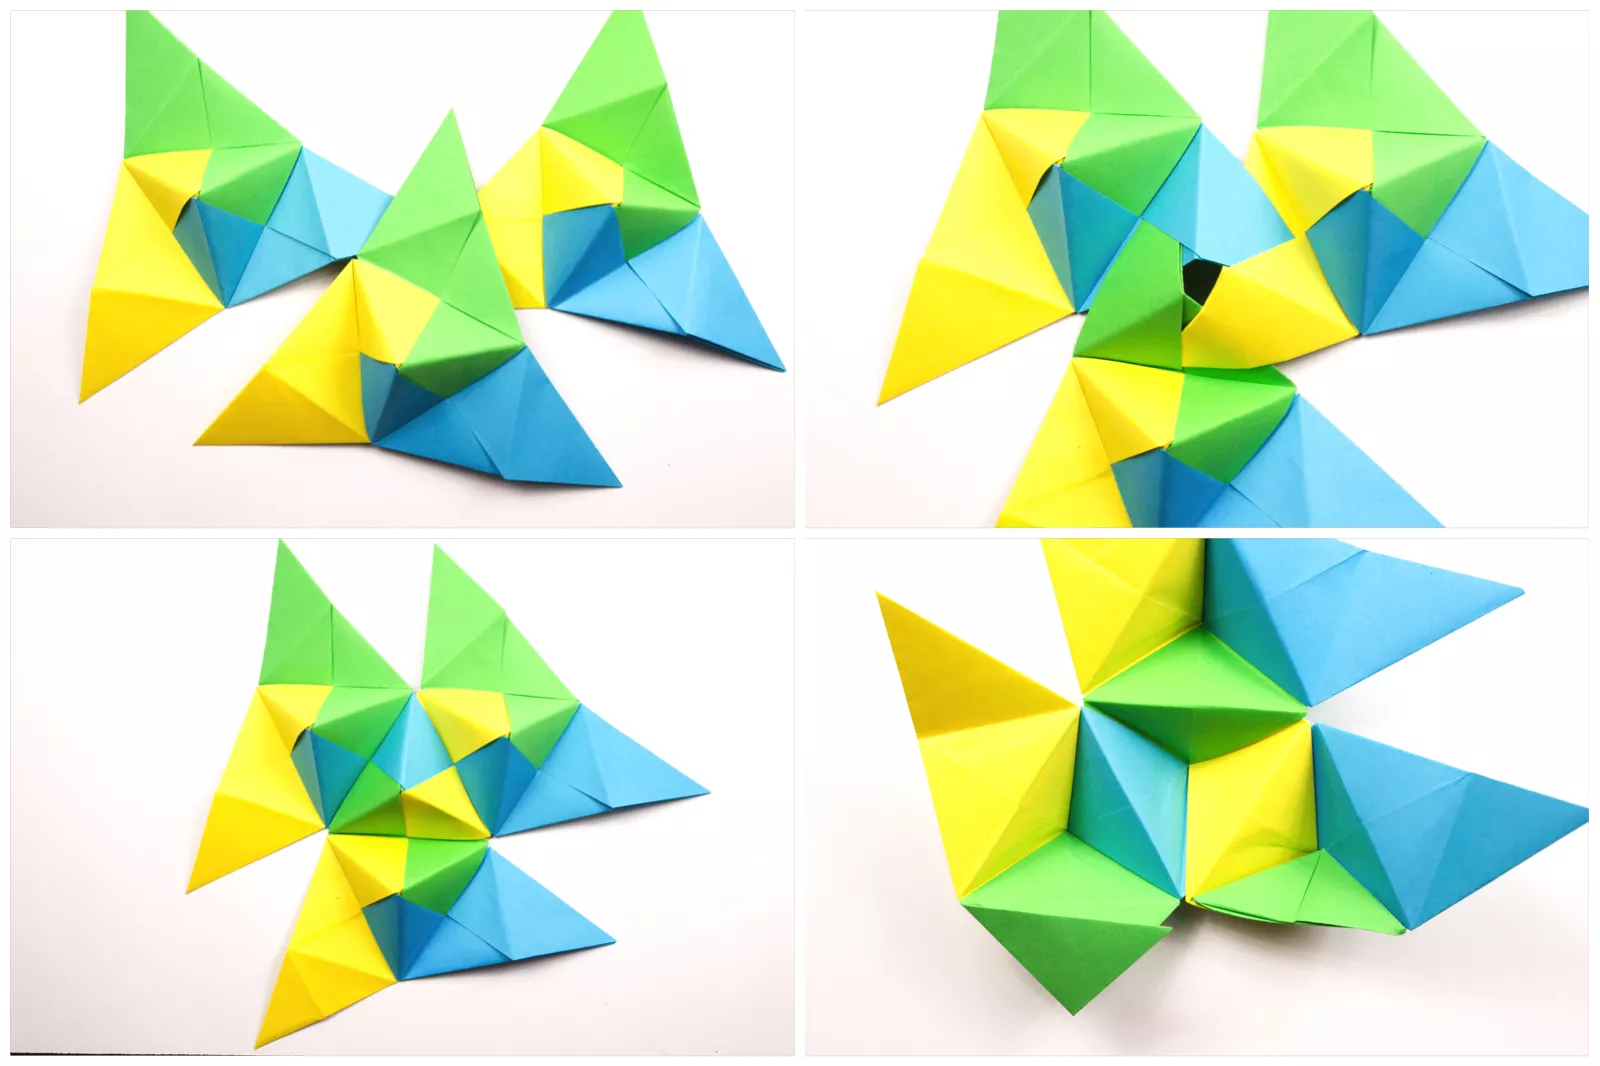
Now that you have your nine units assembled, you can keep adding
more units, creating larger geometric shapes such as a hexagon,
slanted rectangle, or an uneven shape.
Once you have your desired shape completed, carefully flip your units
over to the other side. You can either fold the ends over and glue
them inside or trim them off.
To mount them on a wall, use a piece of stiff cardboard or foam board;
cut it to the same size as your wall art by tracing around your assembled
Sonobe units on the board and then cutting it out. Use PVA glue or a hot
glue gun to attach your art to the board.
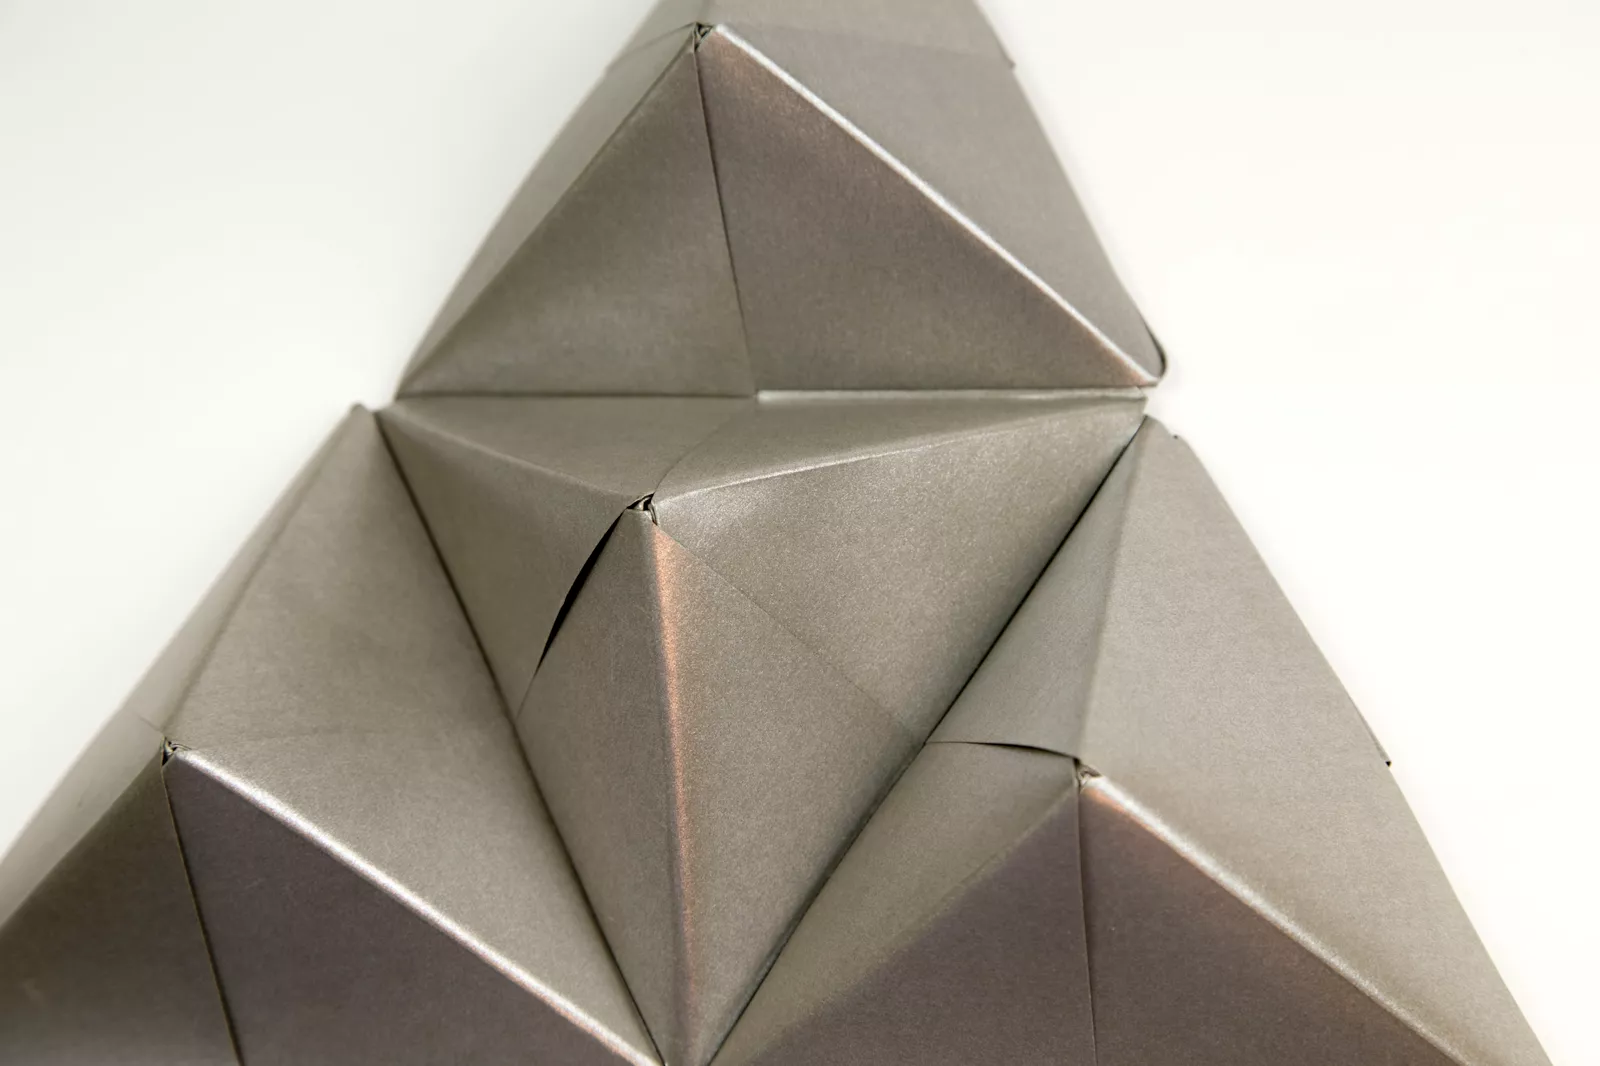
07:Display Your Origami Sonobe Wall Art
You can achieve a standout piece of origami wall art by using
large paper to make the units—in this example, 30-centimeter
square metallic paper was used.
Alternatively, use small sheets of crisp white paper to create
your wall art. It may be more time consuming, but the result
is a very detailed piece of origami wall art—a perfect
statement for a dining room.

Our Purpose Is To Sustainably Make the Pleasure and Benefits of sports Accessible to the Many.
Copyright-2021 Abdul Haq